After completing the registration form and gaining access to the Droplo dashboard, you will be asked to complete 7 steps to finalize account verification:
Basic information
Business terms and conditions
Return policy
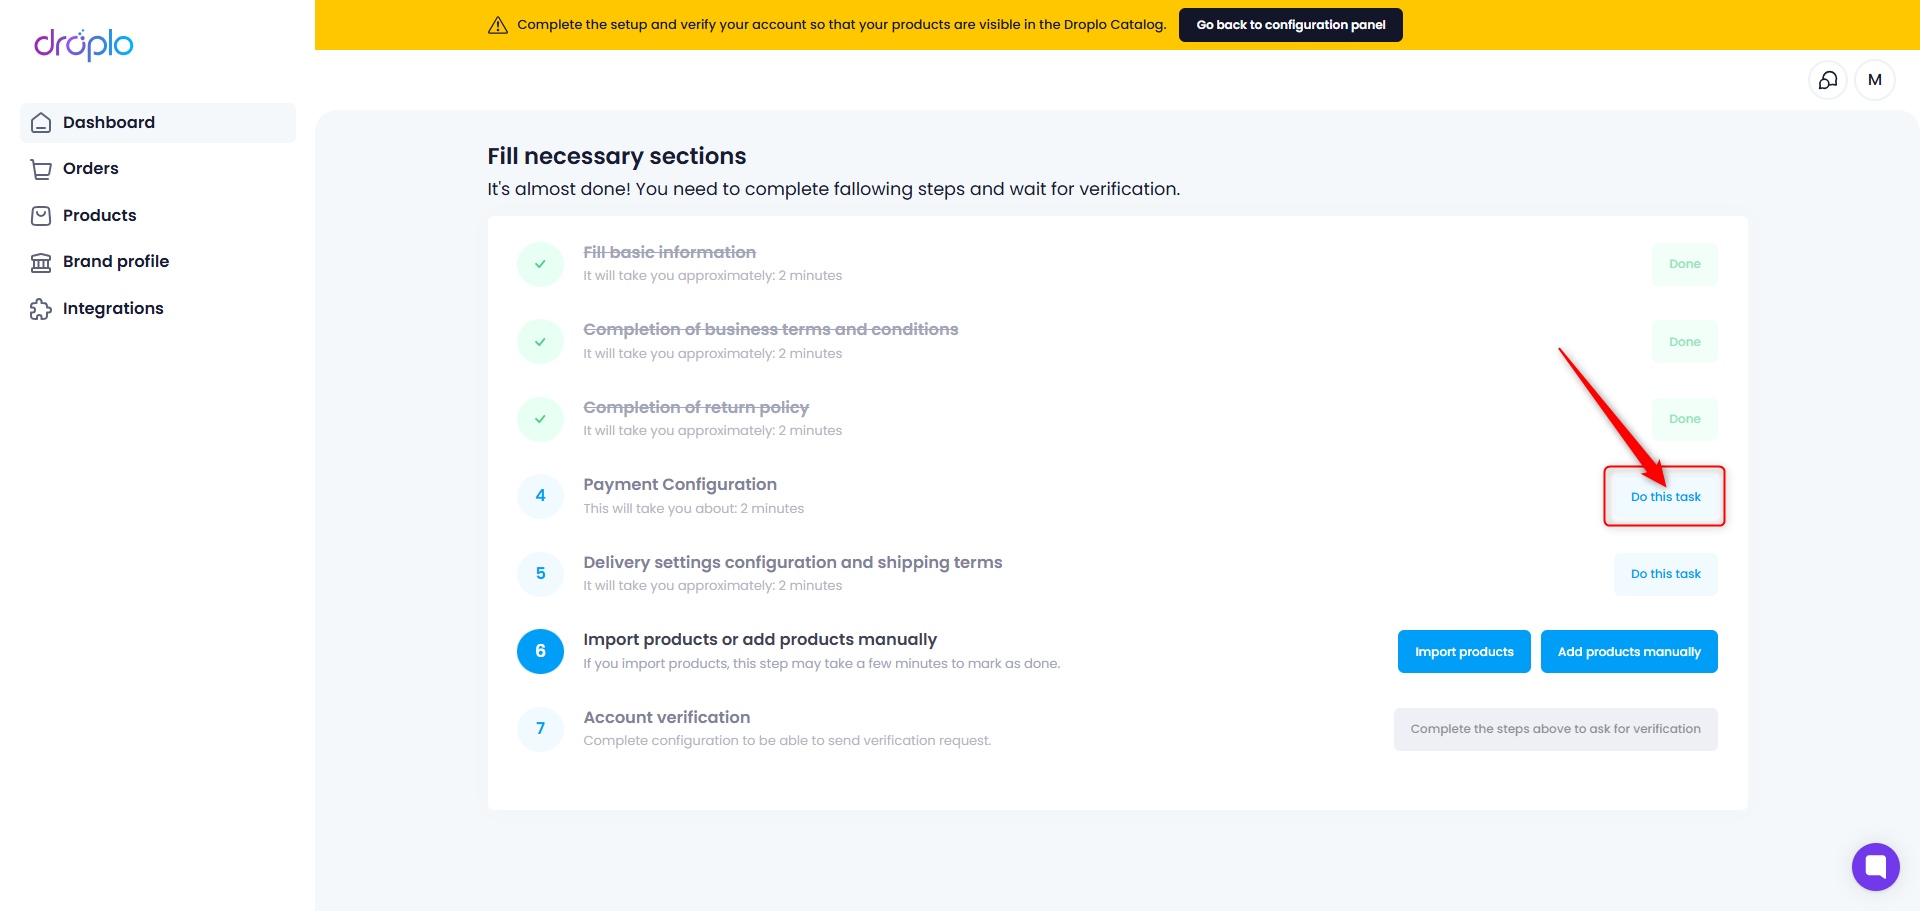
Payment configuration
Delivery and shipping terms
Add/Import products
Account verification
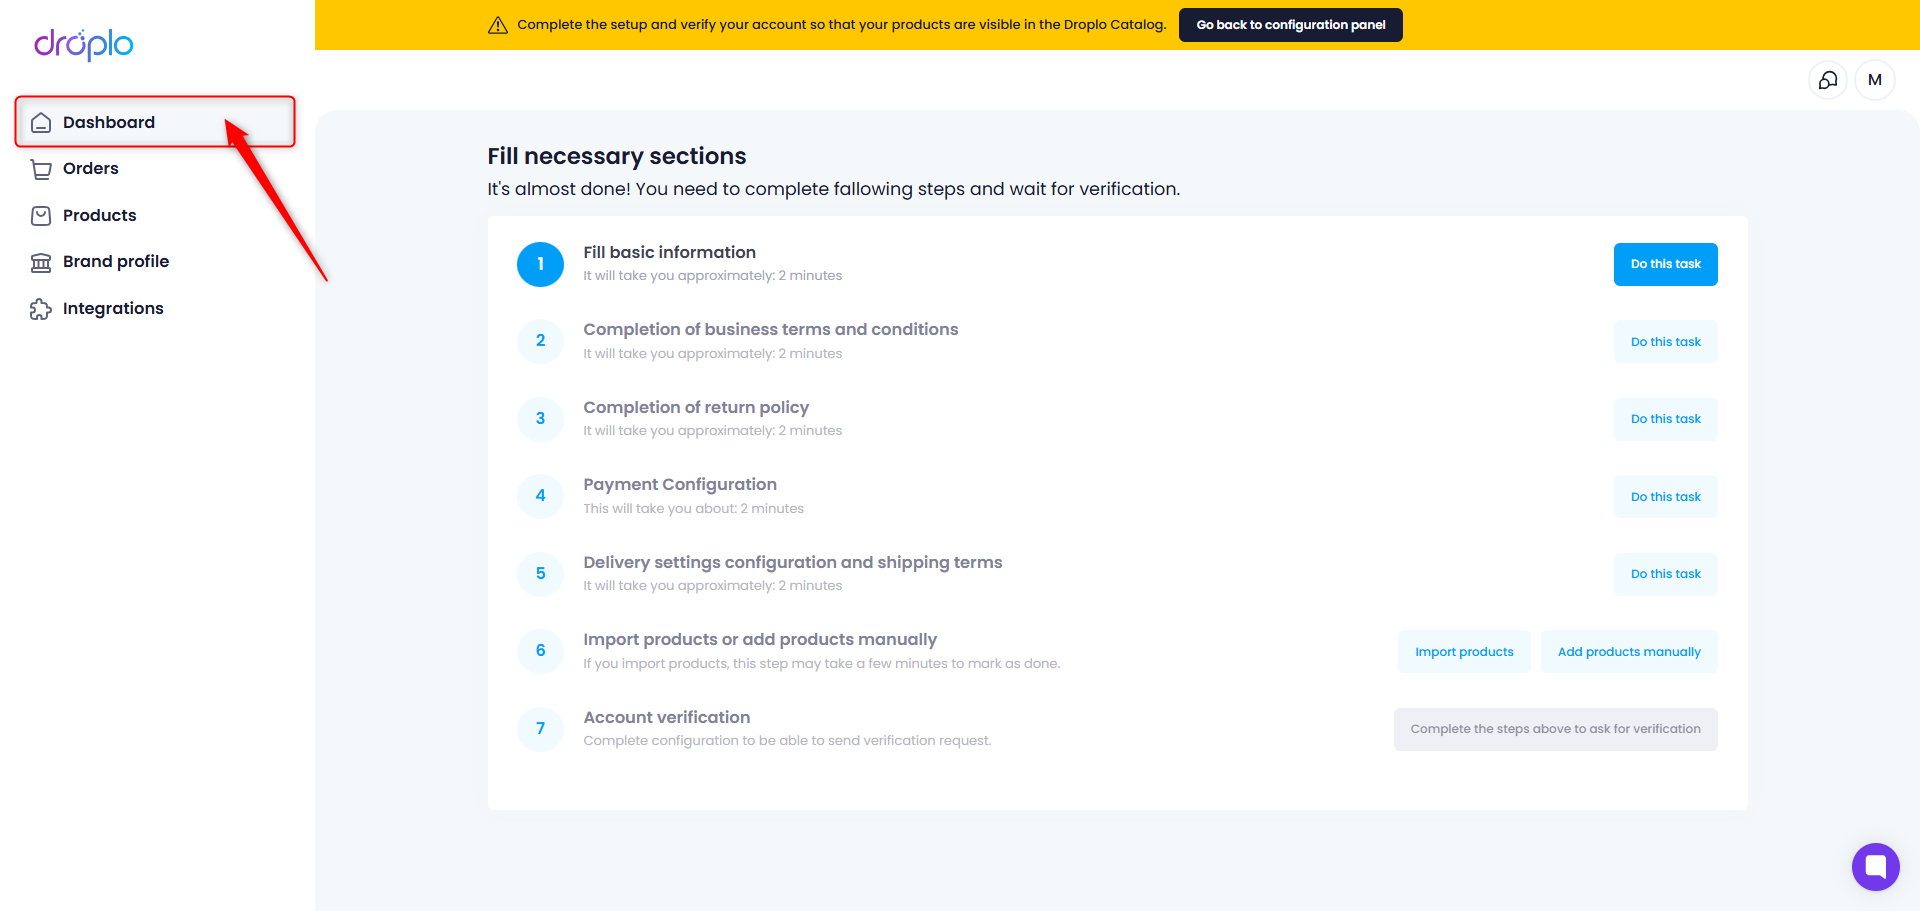
Indicate whether you are a manufacturer or a wholesaler.

Enter your logo in .JPG / .JPEG / .PNG format and complete the Tax ID and name of your brand to be displayed in the Droplo catalog.
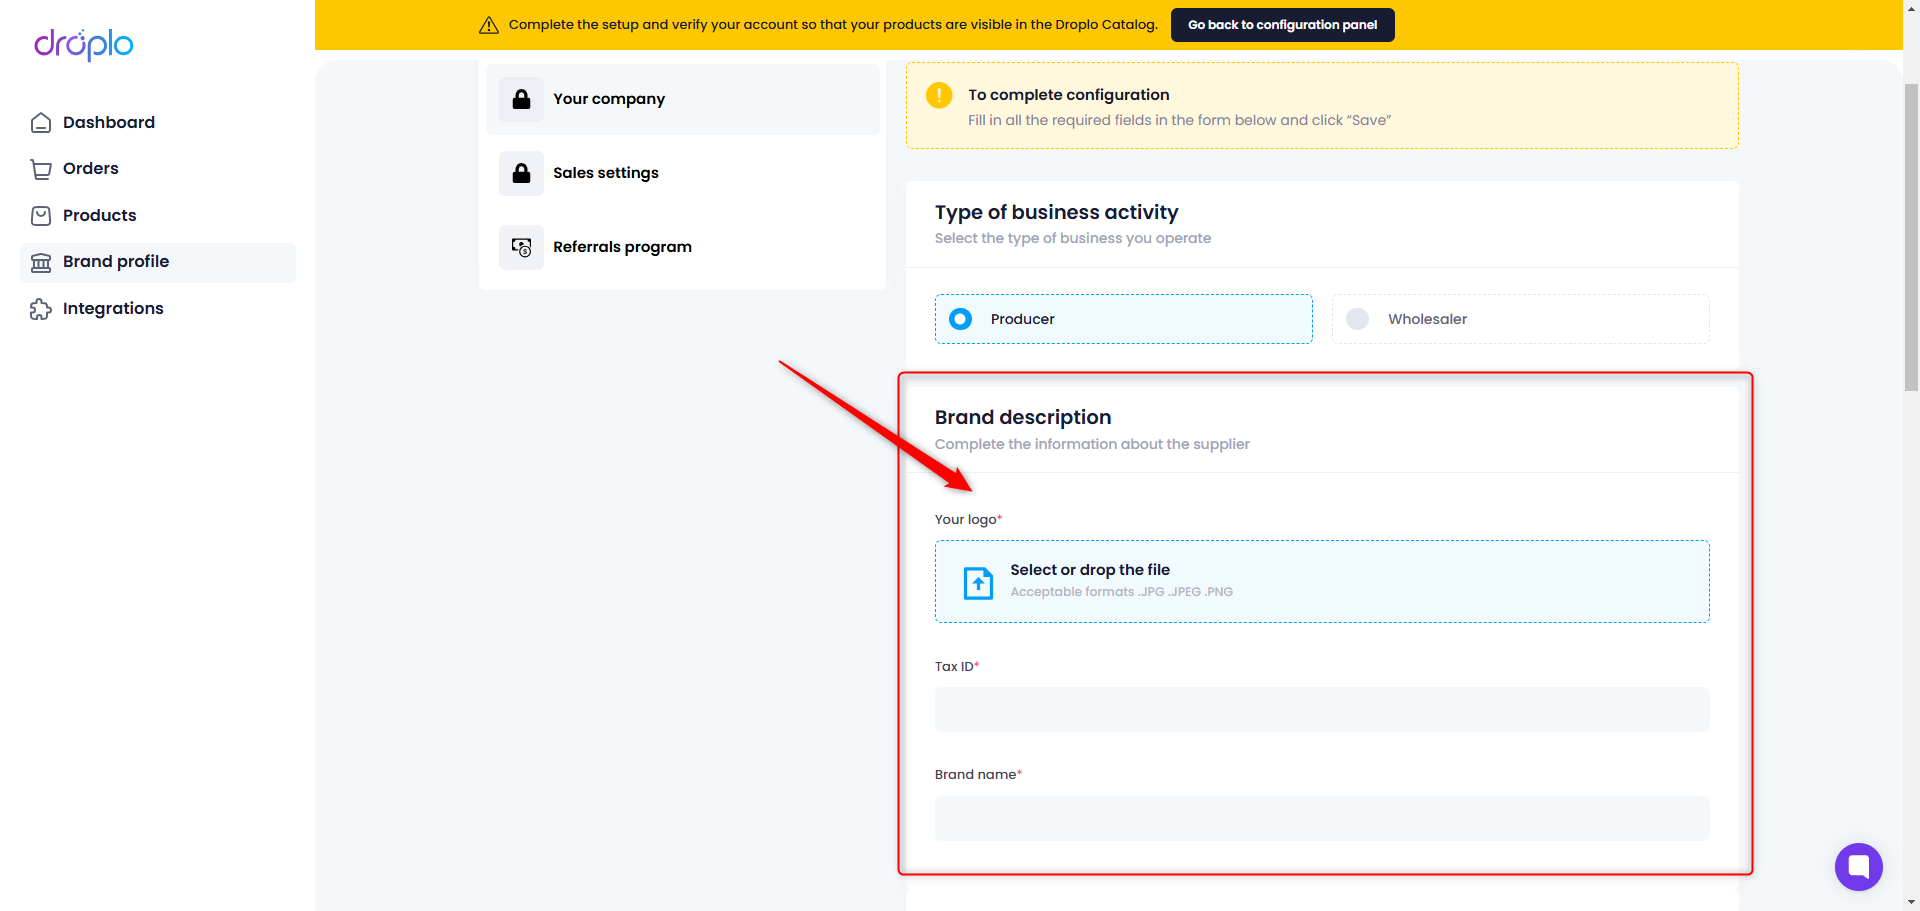
Complete the contact information for the Droplo authorized person.
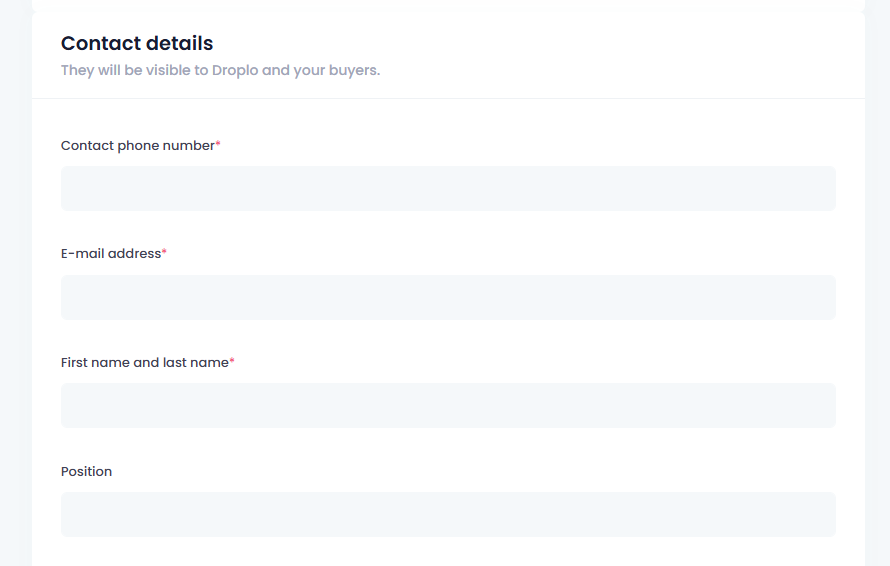
Characterize your business: select the category your products belong to and enter descriptions. Remember that the descriptions will be displayed in Droplo on the Merchant (online seller) side of the panel.
Note: In the field In which countries do you have warehouses? Enter all possible countries. Completing this section will later affect the conversion of your products' prices into other currencies.
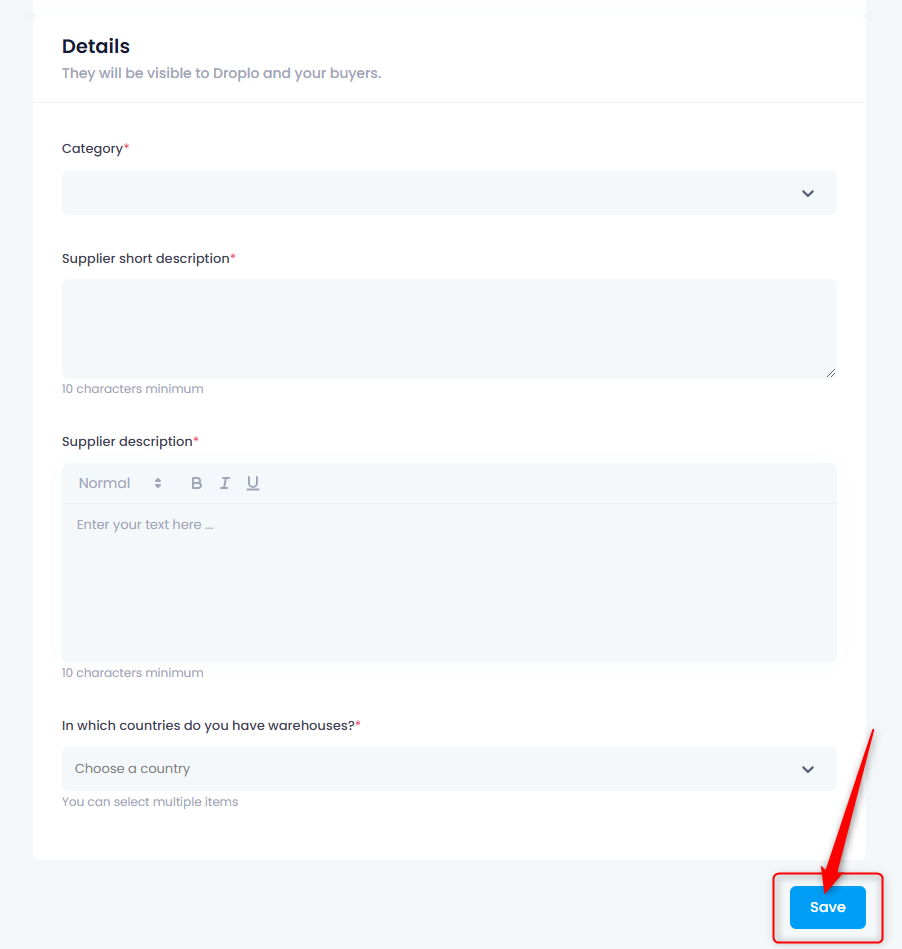
When you fill in all the necessary information and click Save.
You should see a confirmation of data saving in the upper right corner.

Return to the configuration panel using the button in the top bar.
You can see here that the first step has received the status Done. To proceed to the next step - completing the business terms and conditions, use the Execute Task button.
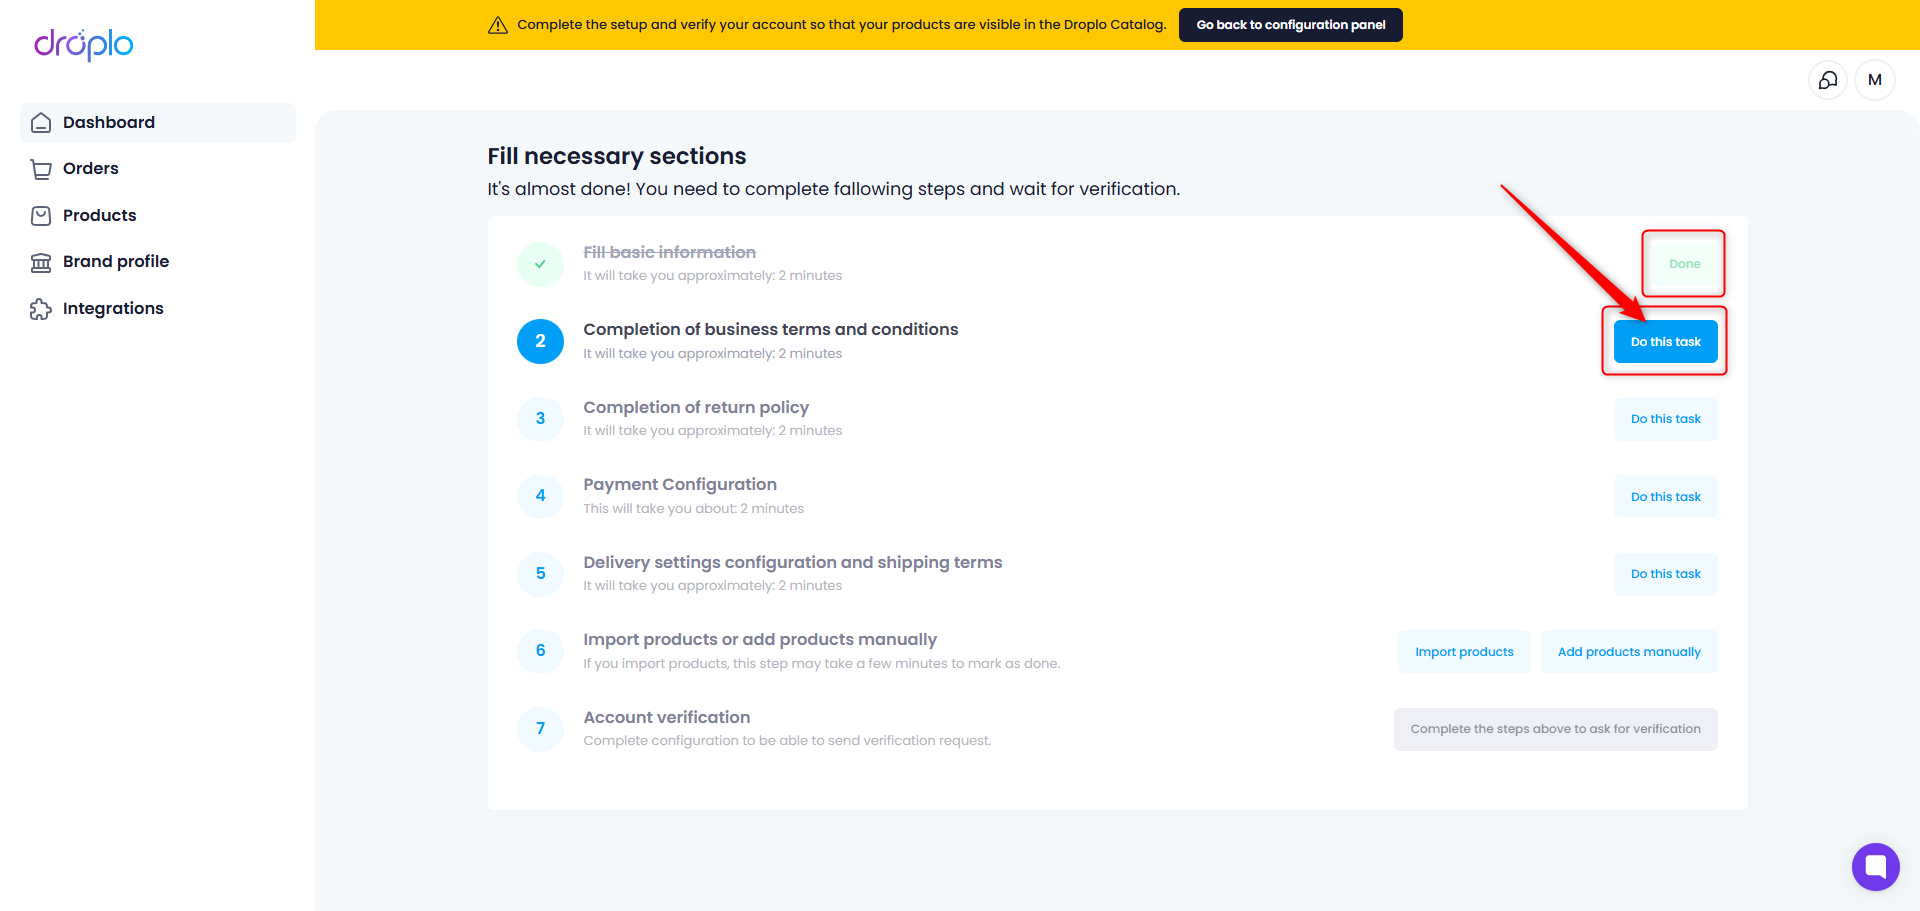
In this window you can use the ready-made conditions offered by Droplo or add your own conditions. If you require other consents from your contractors use the Add field button in the Additional Consents section.
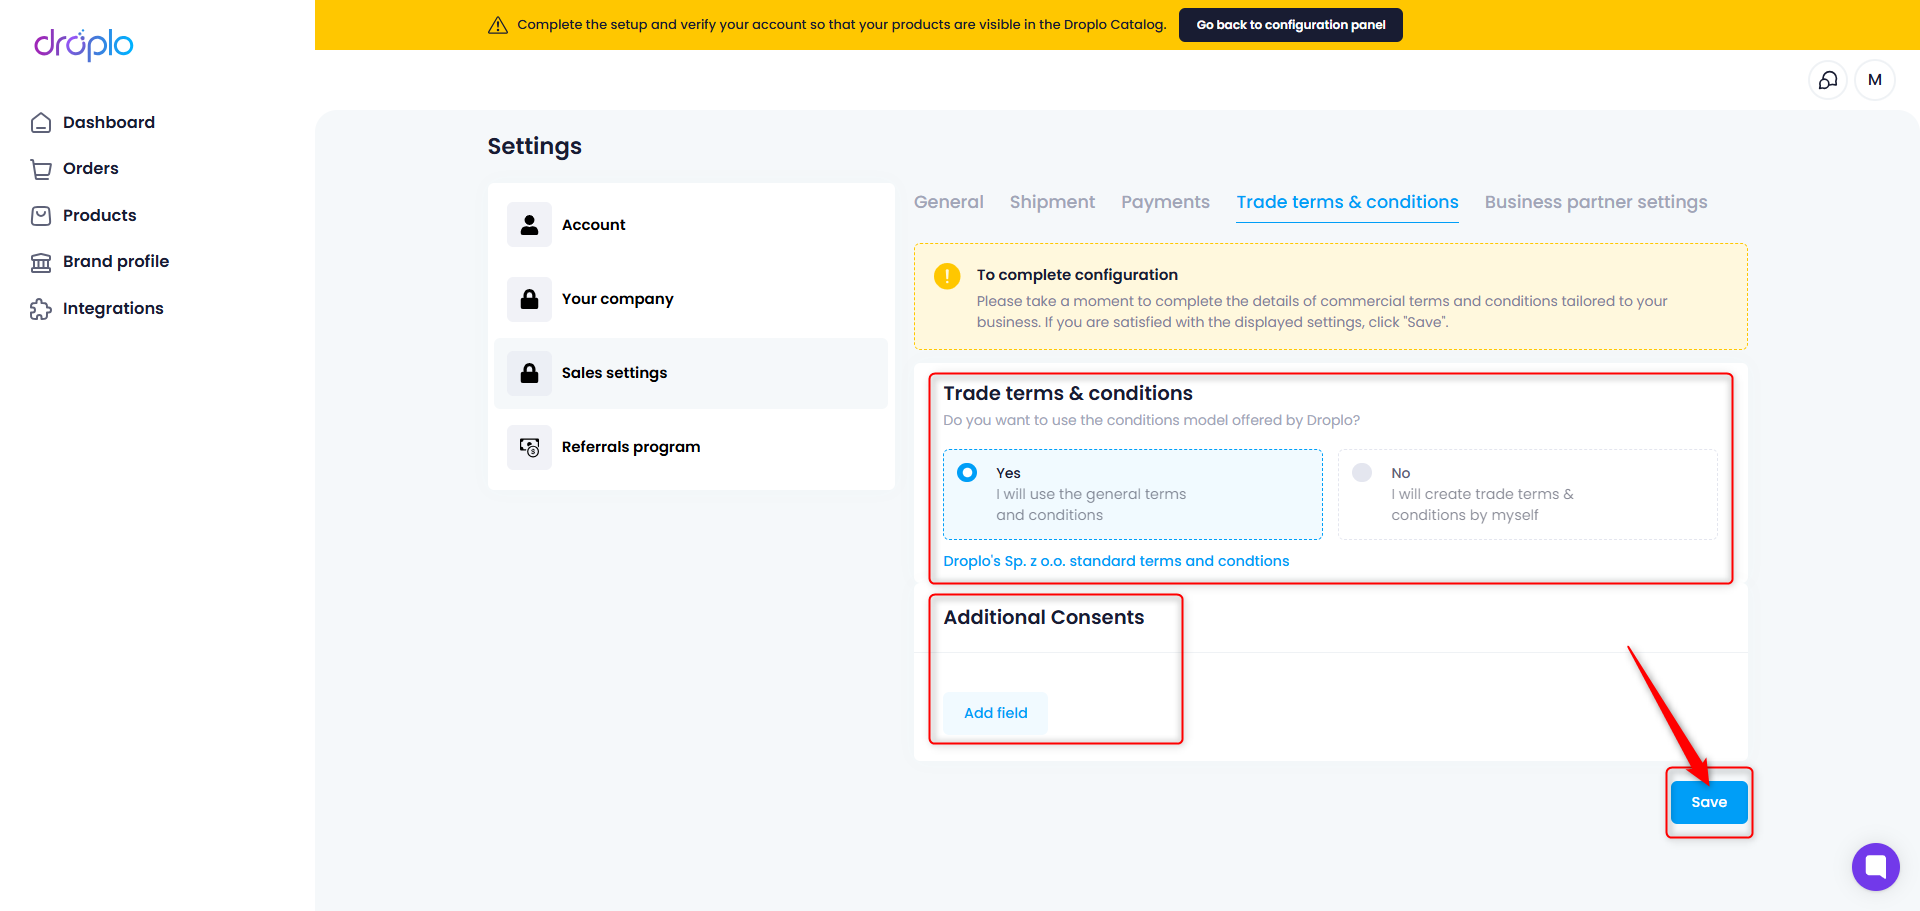
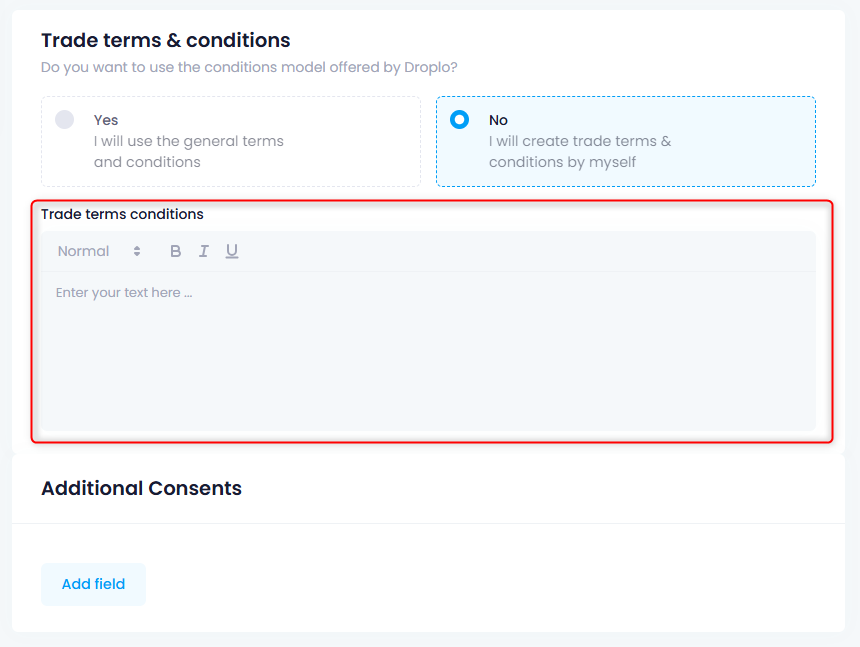
When you select No. I will create trade terms & conditions by myself a new field will appear where you can put your own content:
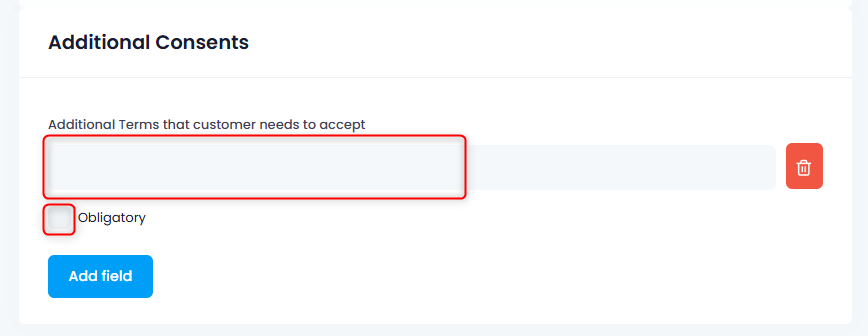
Additional consents may be mandatory or optional, depending on your preferences.
When you have finished entering your business terms, click the Save button at the bottom of the page.
Now return to the configuration panel again.
Click Do this task at the third step, where you will complete the terms of the returns.
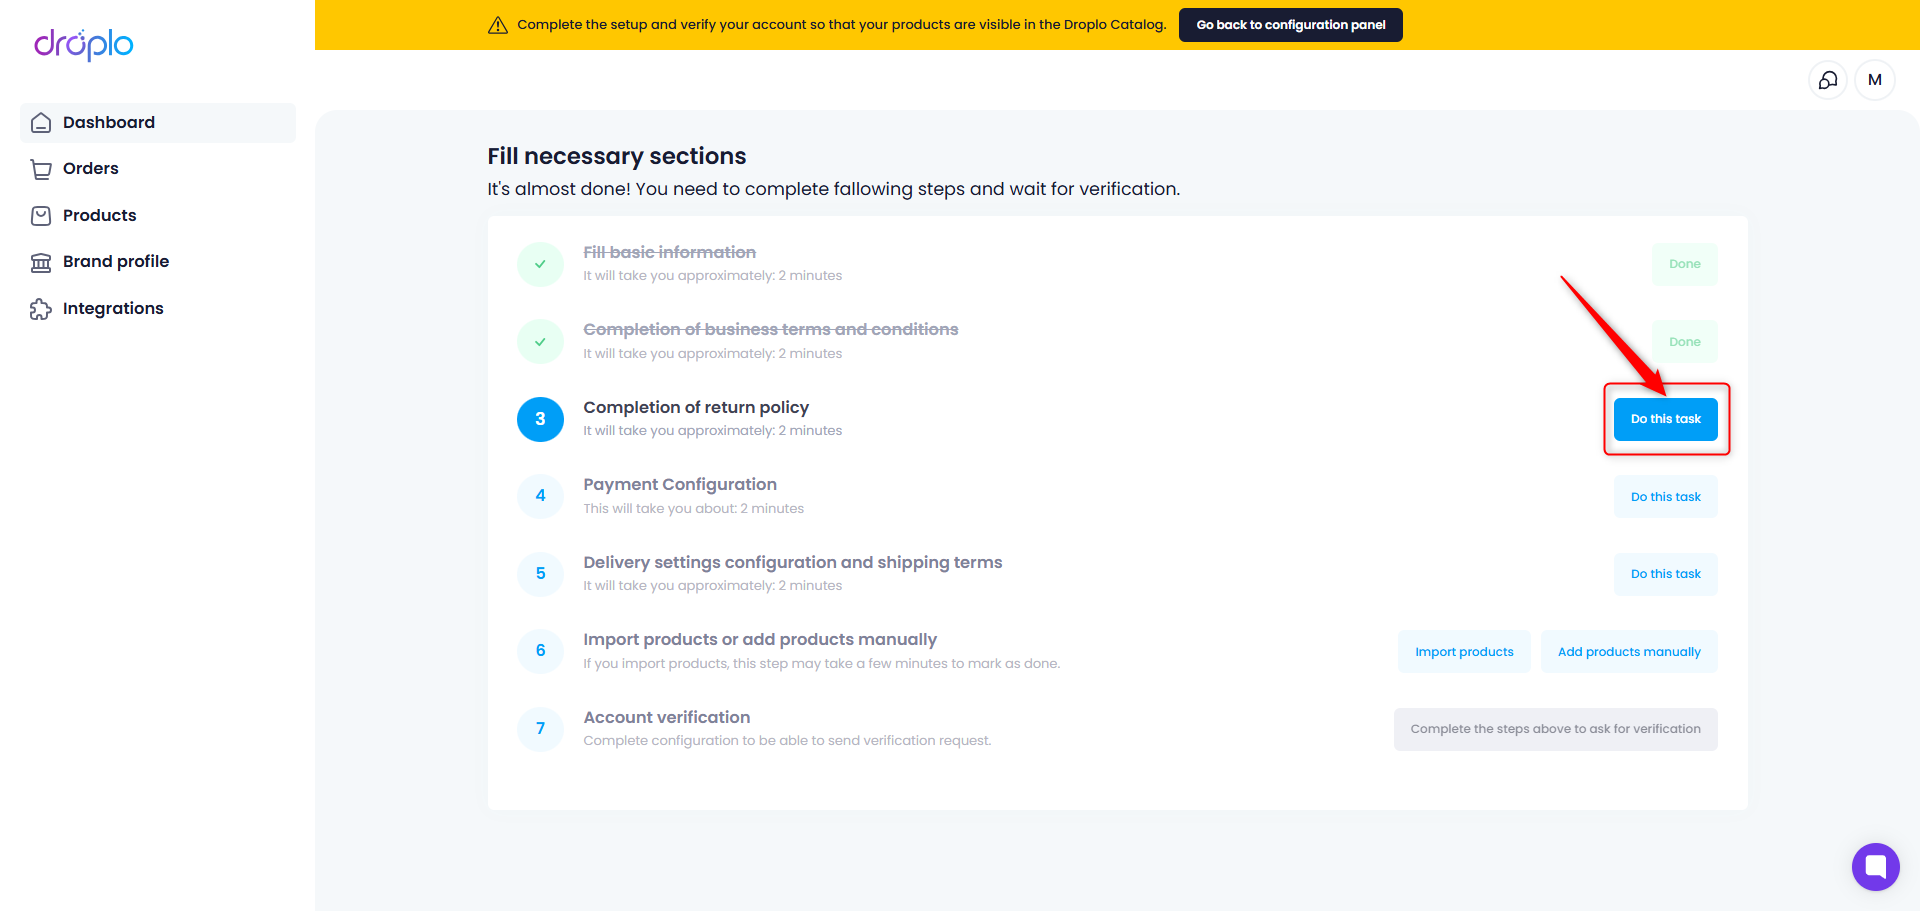
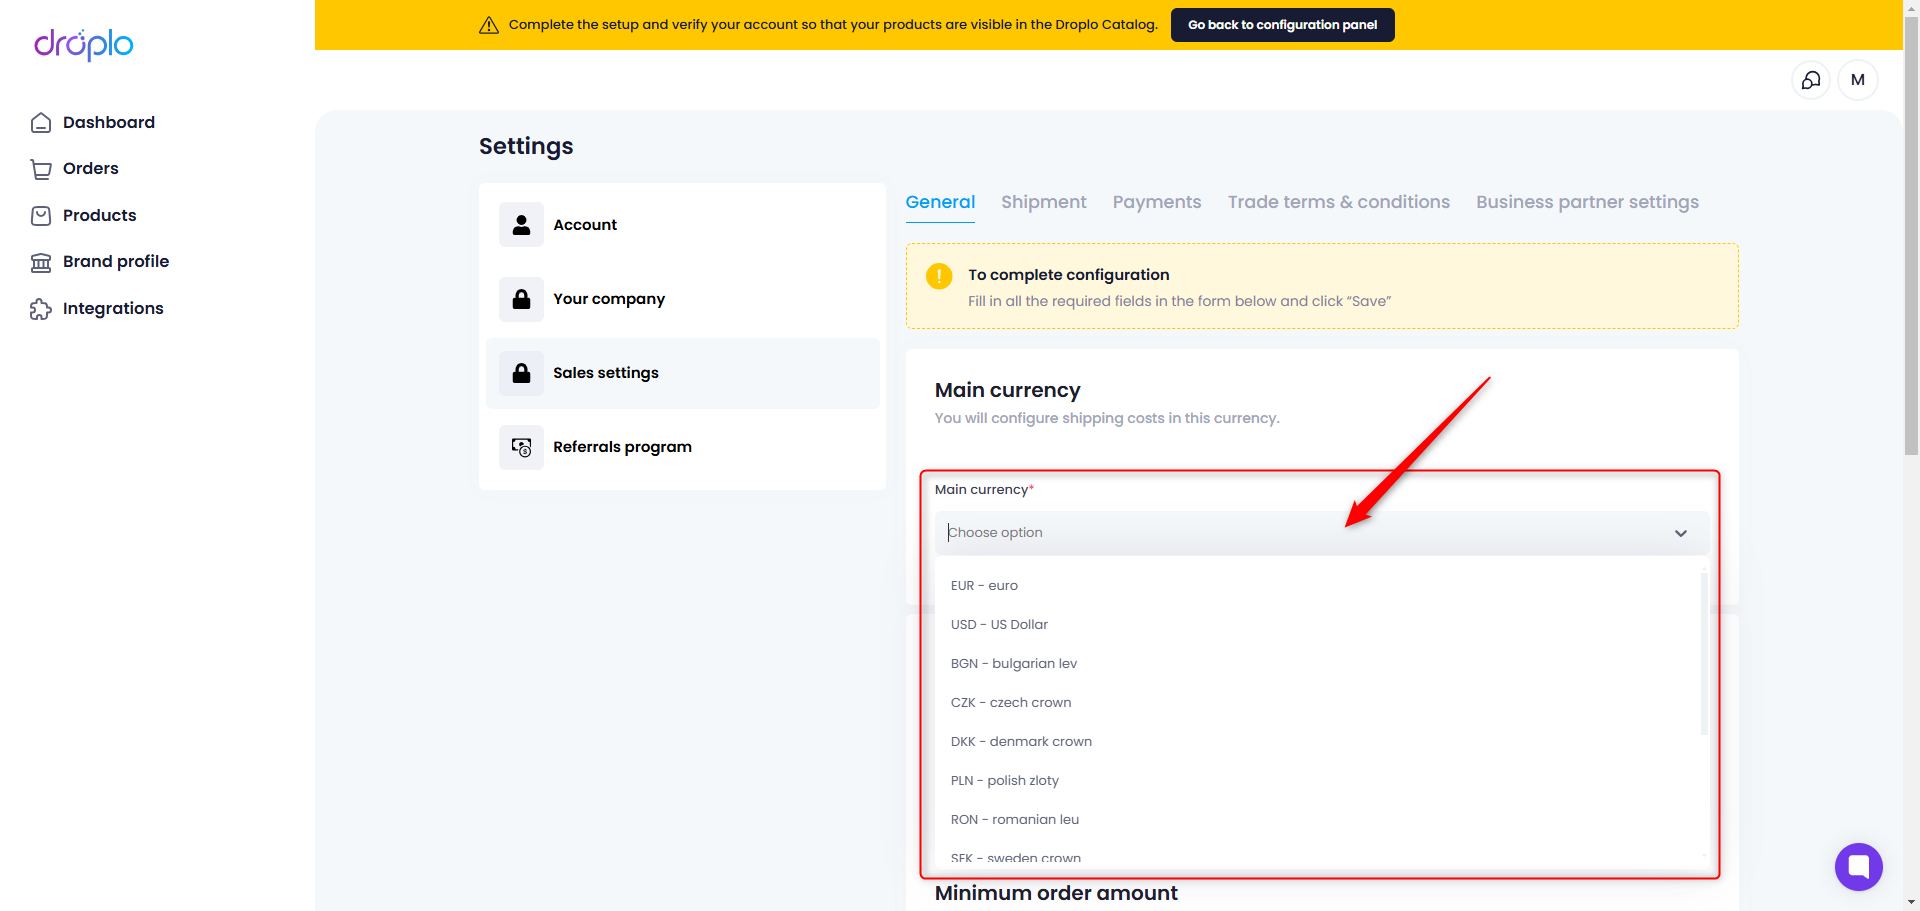
Choose what is the Main currency you use for your business, such as shipping costs.
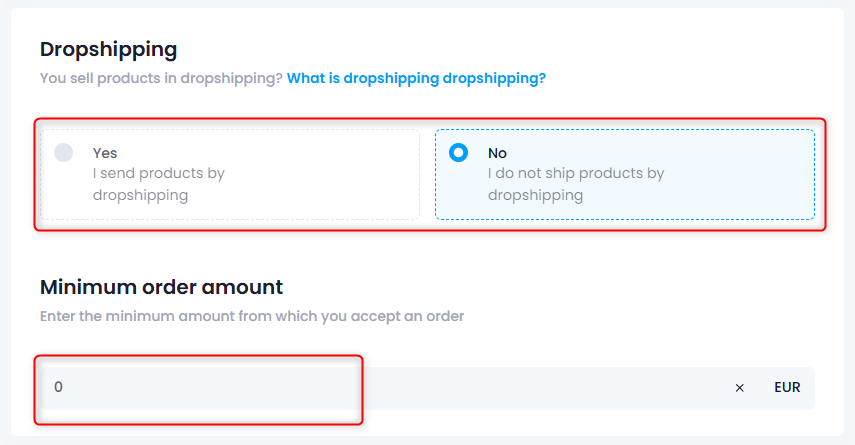
Indicate whether you cooperate in dropshipping (you ship products directly to your contractor's customers) and specify the realisation time of the orders you accept.
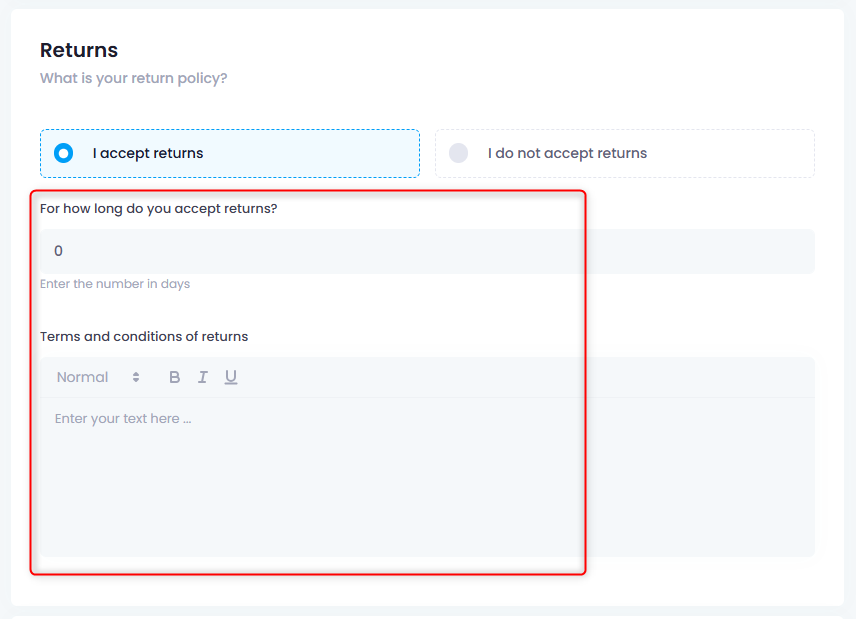
If you are accepting returns, you will be asked to enter the time it is possible. Also, describe your terms in detail in the box below.
You can skip the last section at first. This is the place where you can specify the time frame during which you will not provide services, e.g. production / holiday / inventory break.
When you check Notify my buyers about this fact and click the Save button, the system will send an automatic message to all your Droplo contractors informing them of the pause.
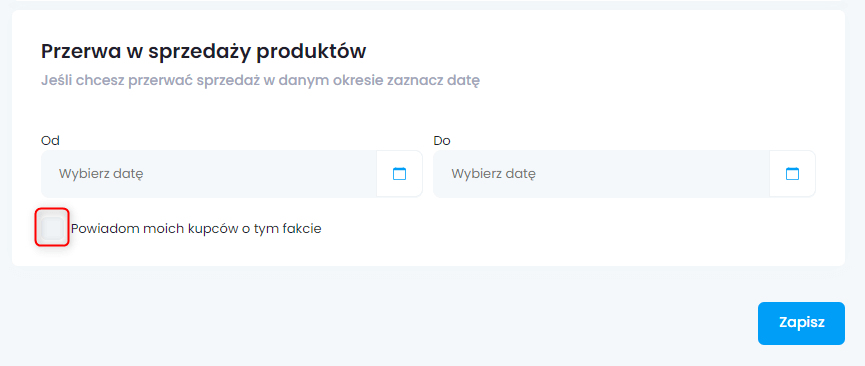
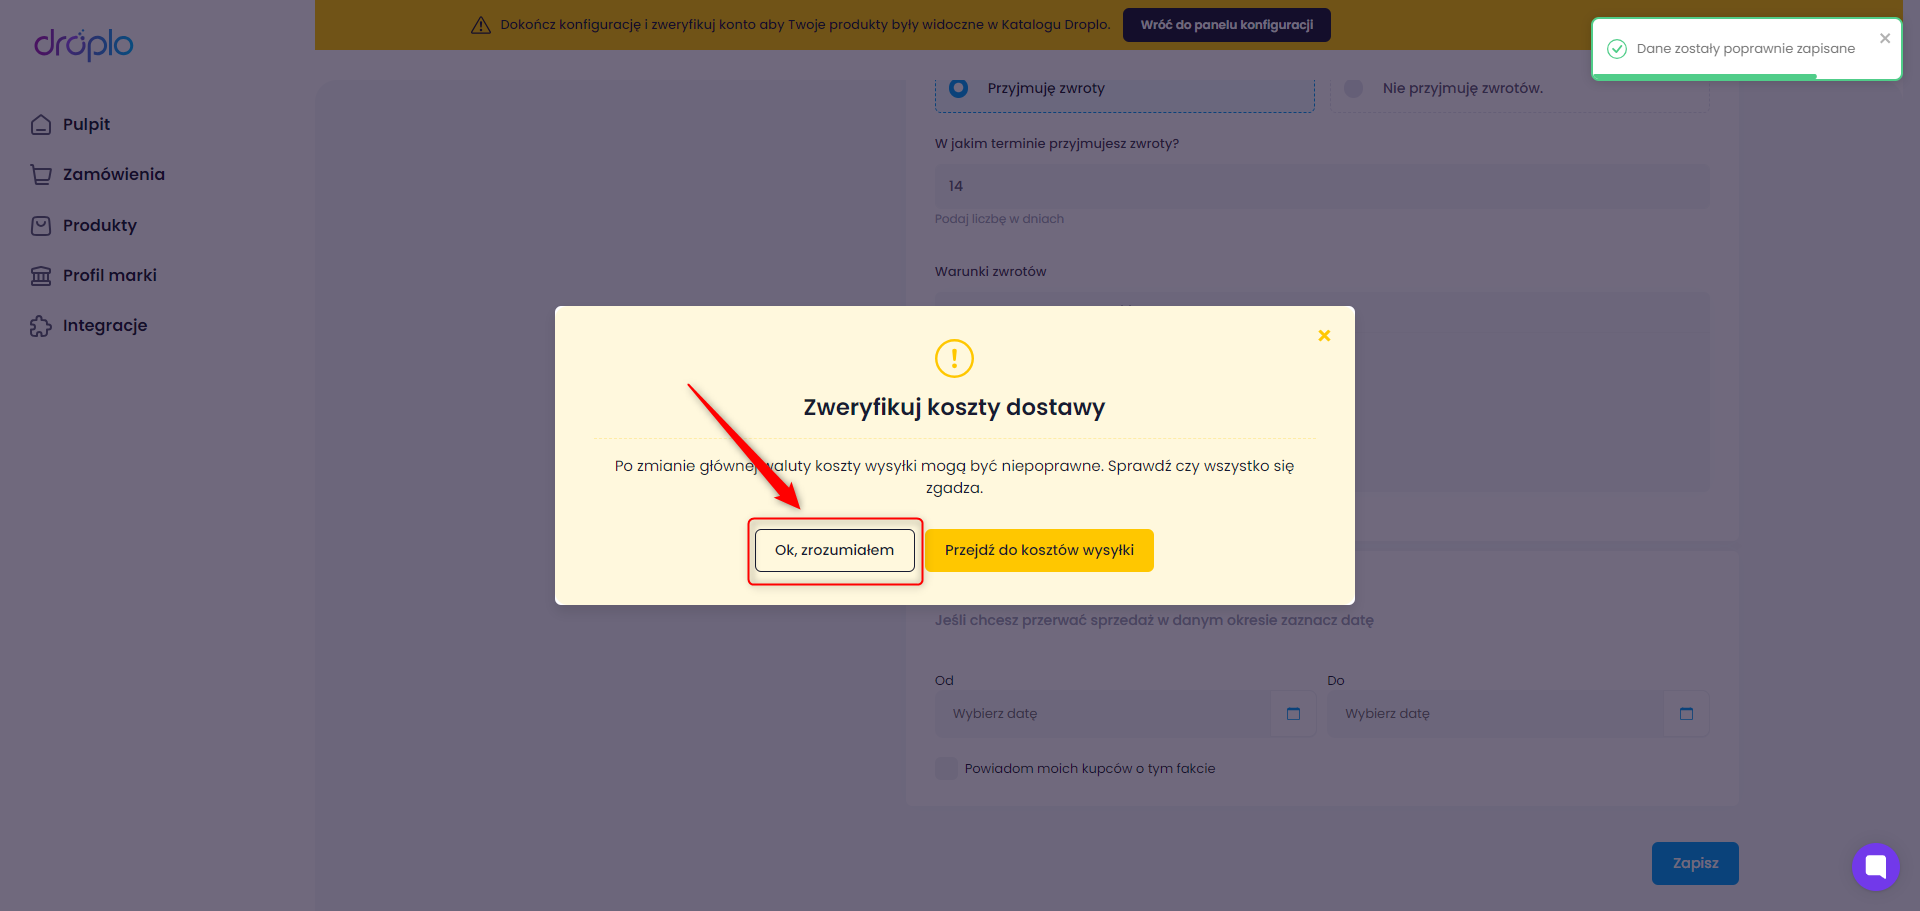
Po uzupełnieniu wszystkich wymaganych pól i zapisaniu zamian dostaniesz powiadomienie, które możesz pominąć. Kliknij Ok, zrozumiałem i wróć do panelu konfiguracji.
Now go to the payment configuration.
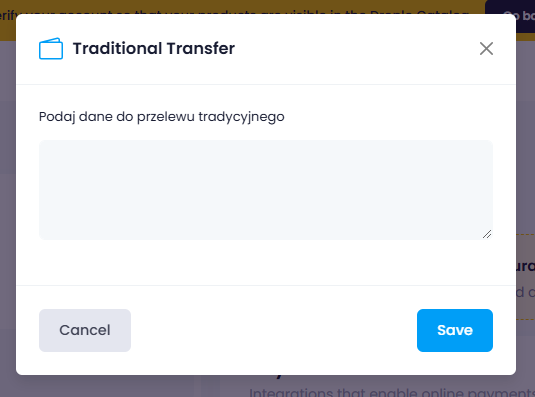
Here you can allow contractors to pay by the method of your choice: by traditional bank transfer and/or PayU.
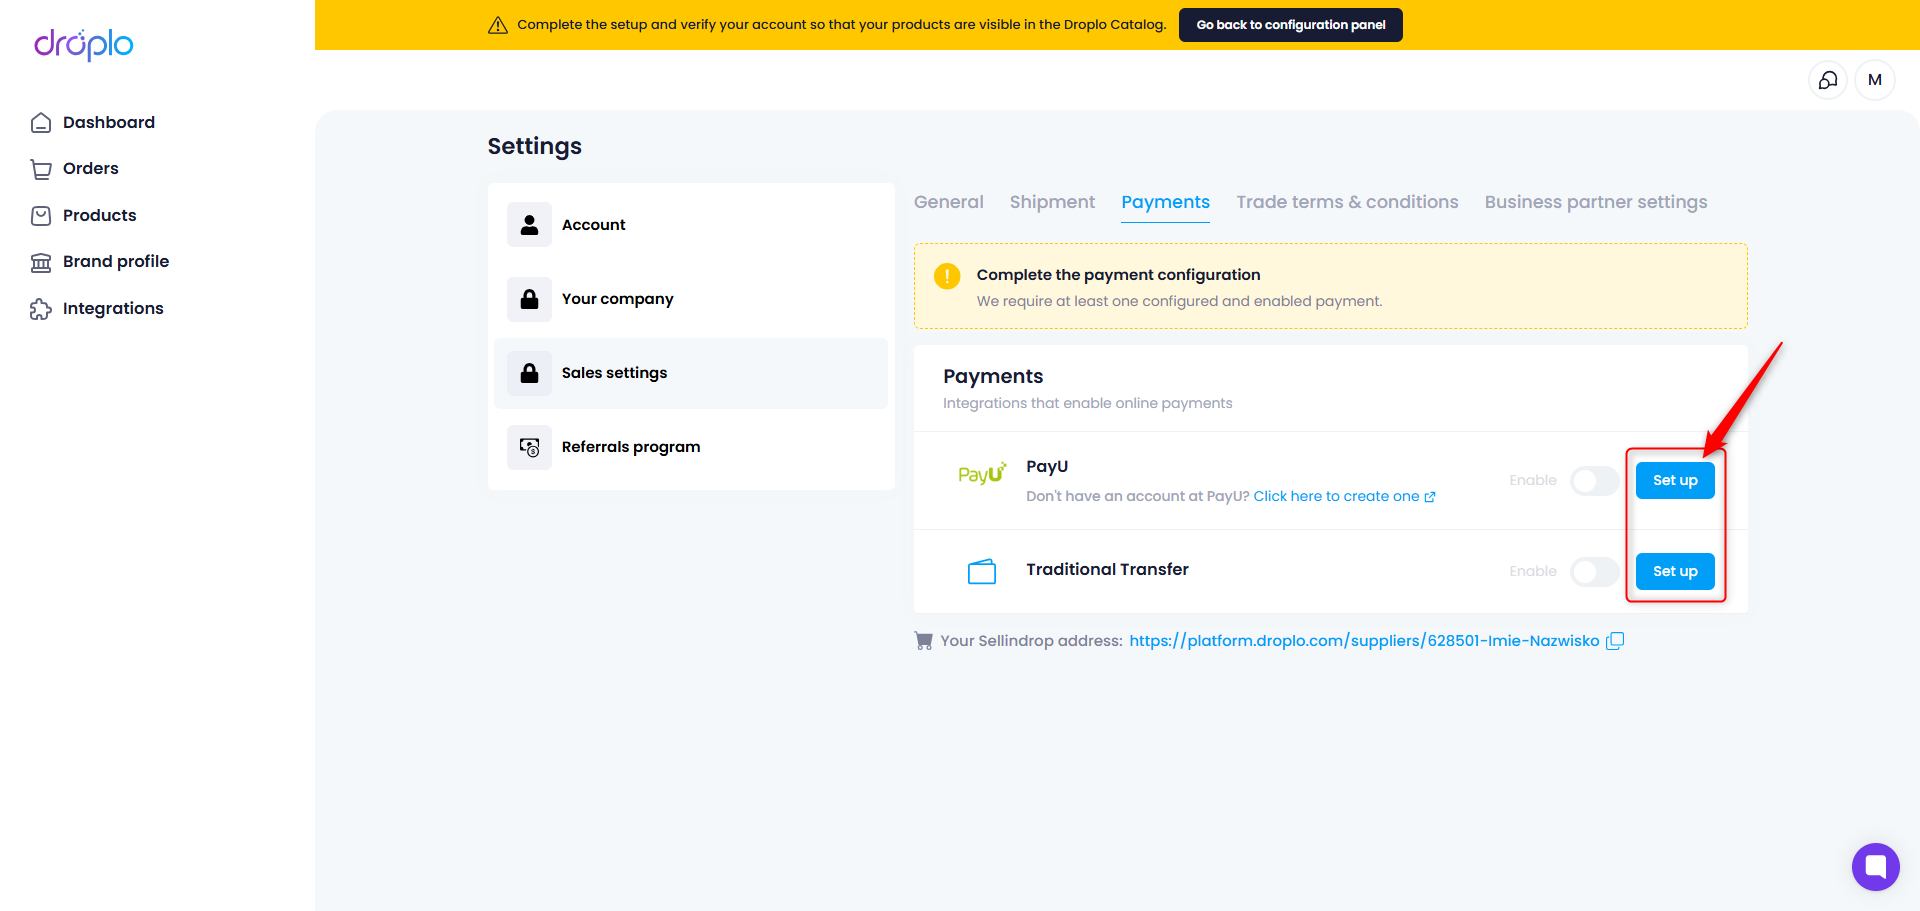
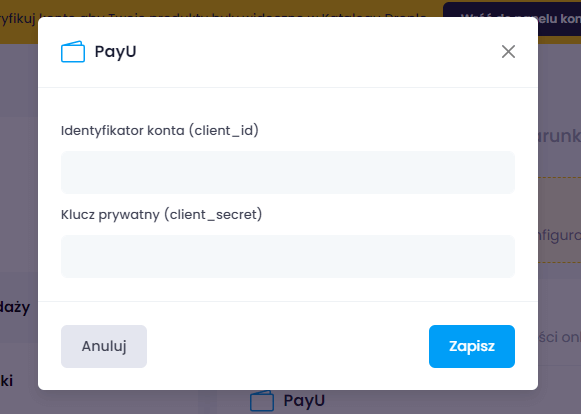
In both cases, you will be asked for the data required to activate the payment method.
In the case of PayU, you first need to set up a new account on the side of this service.
To do this, go to the separate instructions: CLICK
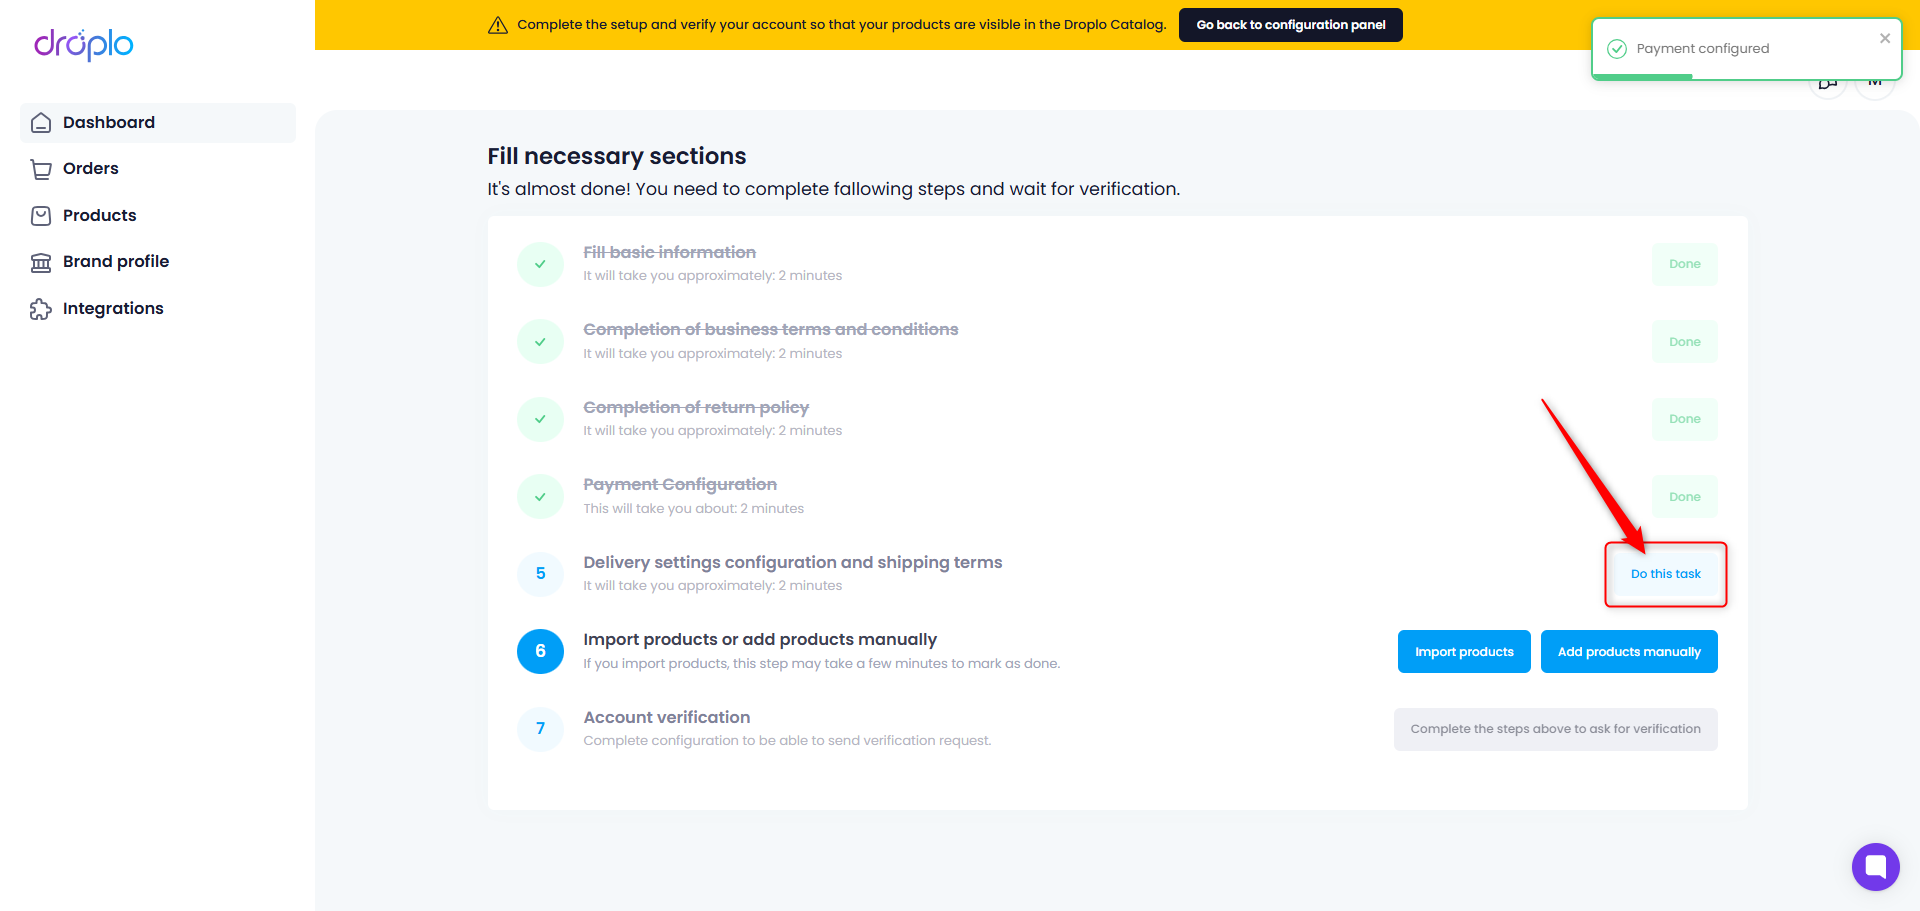
After successfully configuring the payment, the contractor will be able to select it when creating a new order in Droplo. Again, use the Go back to configuration panel button.
Proceed to the fifth step - configuration of types of deliveries and their conditions.
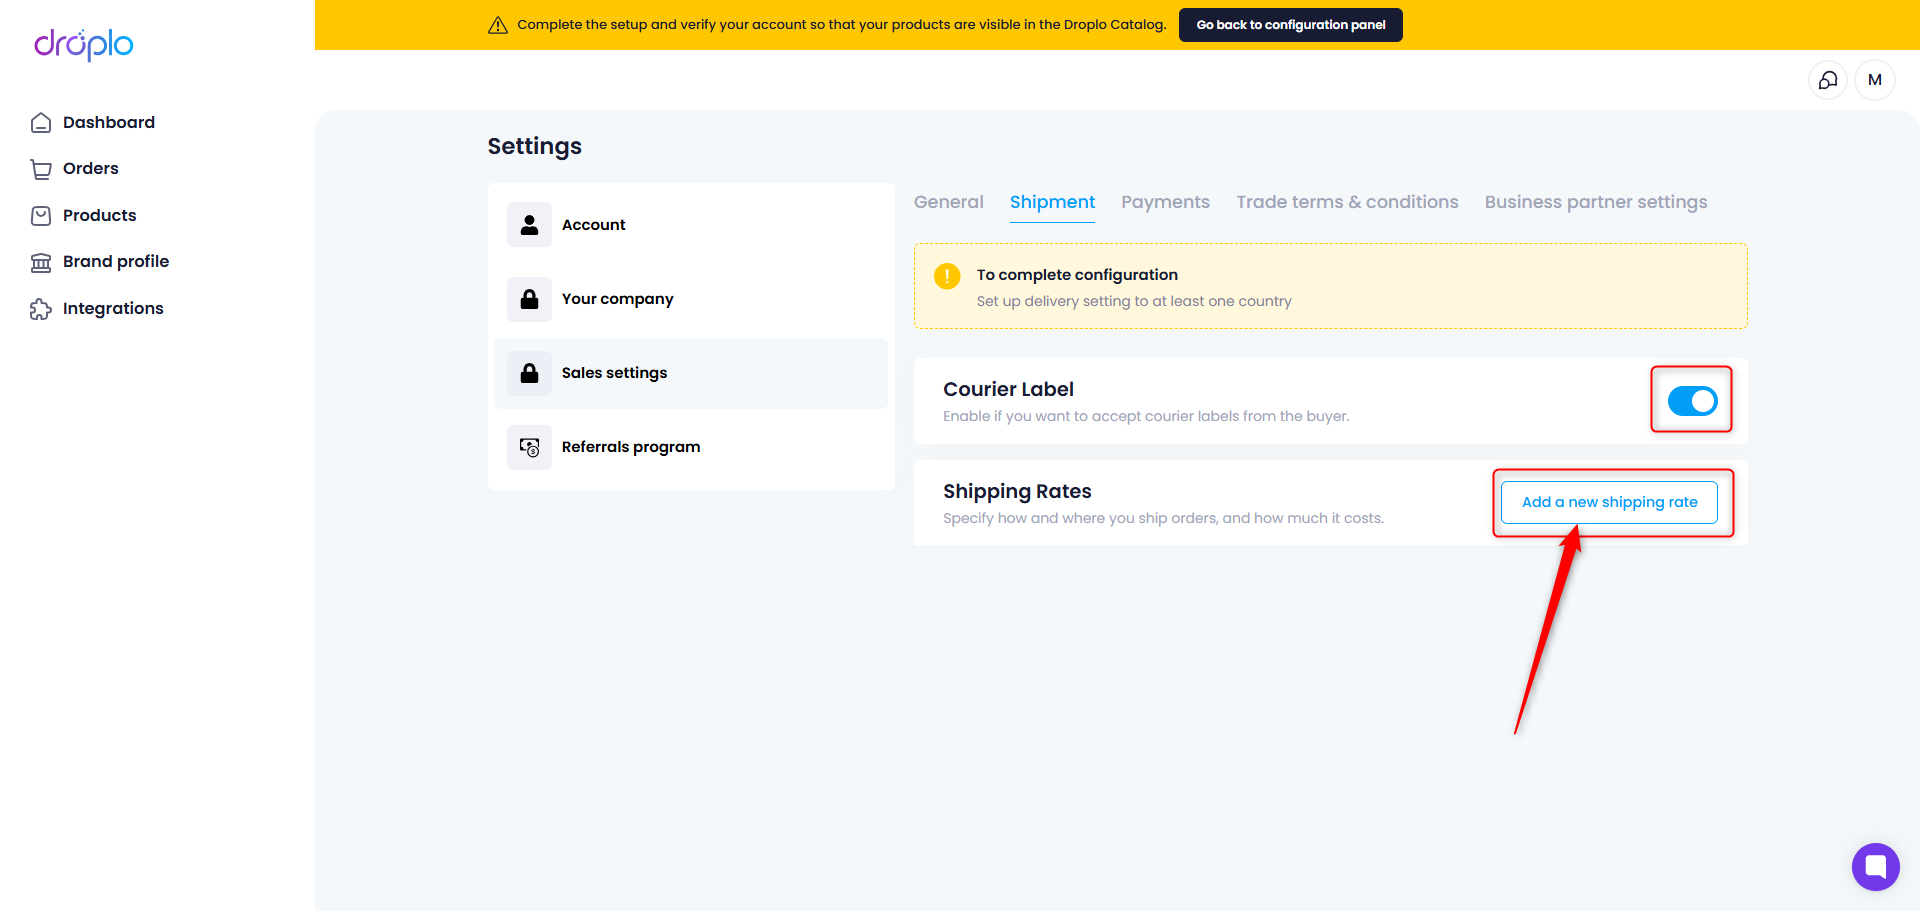
If you want to allow contractors to send shipments on their own, mark the Courier Label option. You will then make it possible to attach seller-generated labels to your orders. They will be able to enter labels on the side of their panel.
Below you will notice the Shipping Rates section. Here you can add separate shipping costs depending on the country, or enter a general policy for all countries you will be shipping to.
When you check the box This shipping type is to the point, you will see other available options in the Delivery Type drop-down list.
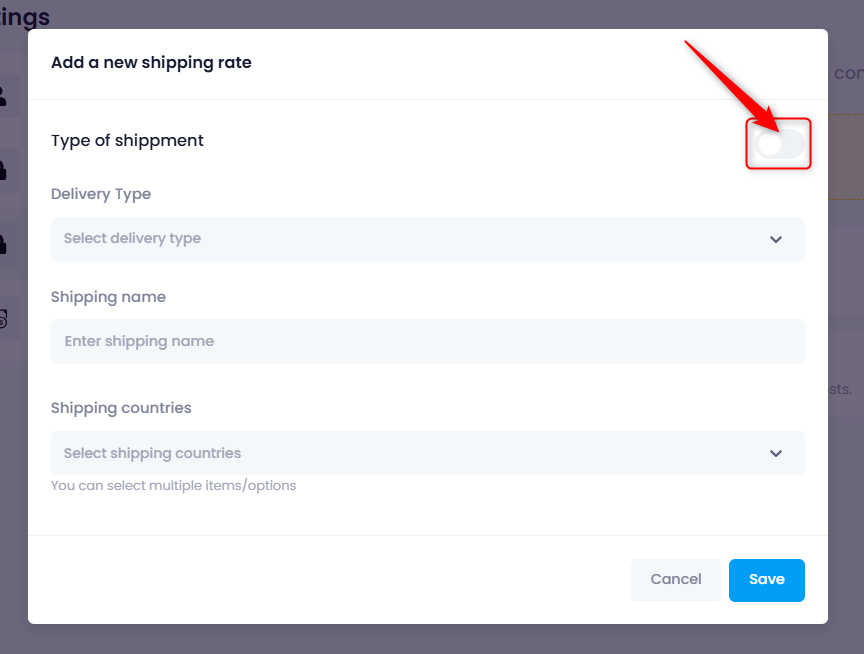
All available delivery methods:
Courier delivery
Postal delivery
Global Express
Pallet shipment
Parcel machines: Inpost, DPD, Orlen Paczka, DHL POP BOX
Pick-up points: POP parcel machines, DPD Pickup, Orlen Station, DHL POP, Żabka, Ruch.
When you select at least one country, the window will expand, allowing you to fill in the details: the delivery cost for the first and each subsequent item of the product, the logistics maximum for the package, and the delivery time.
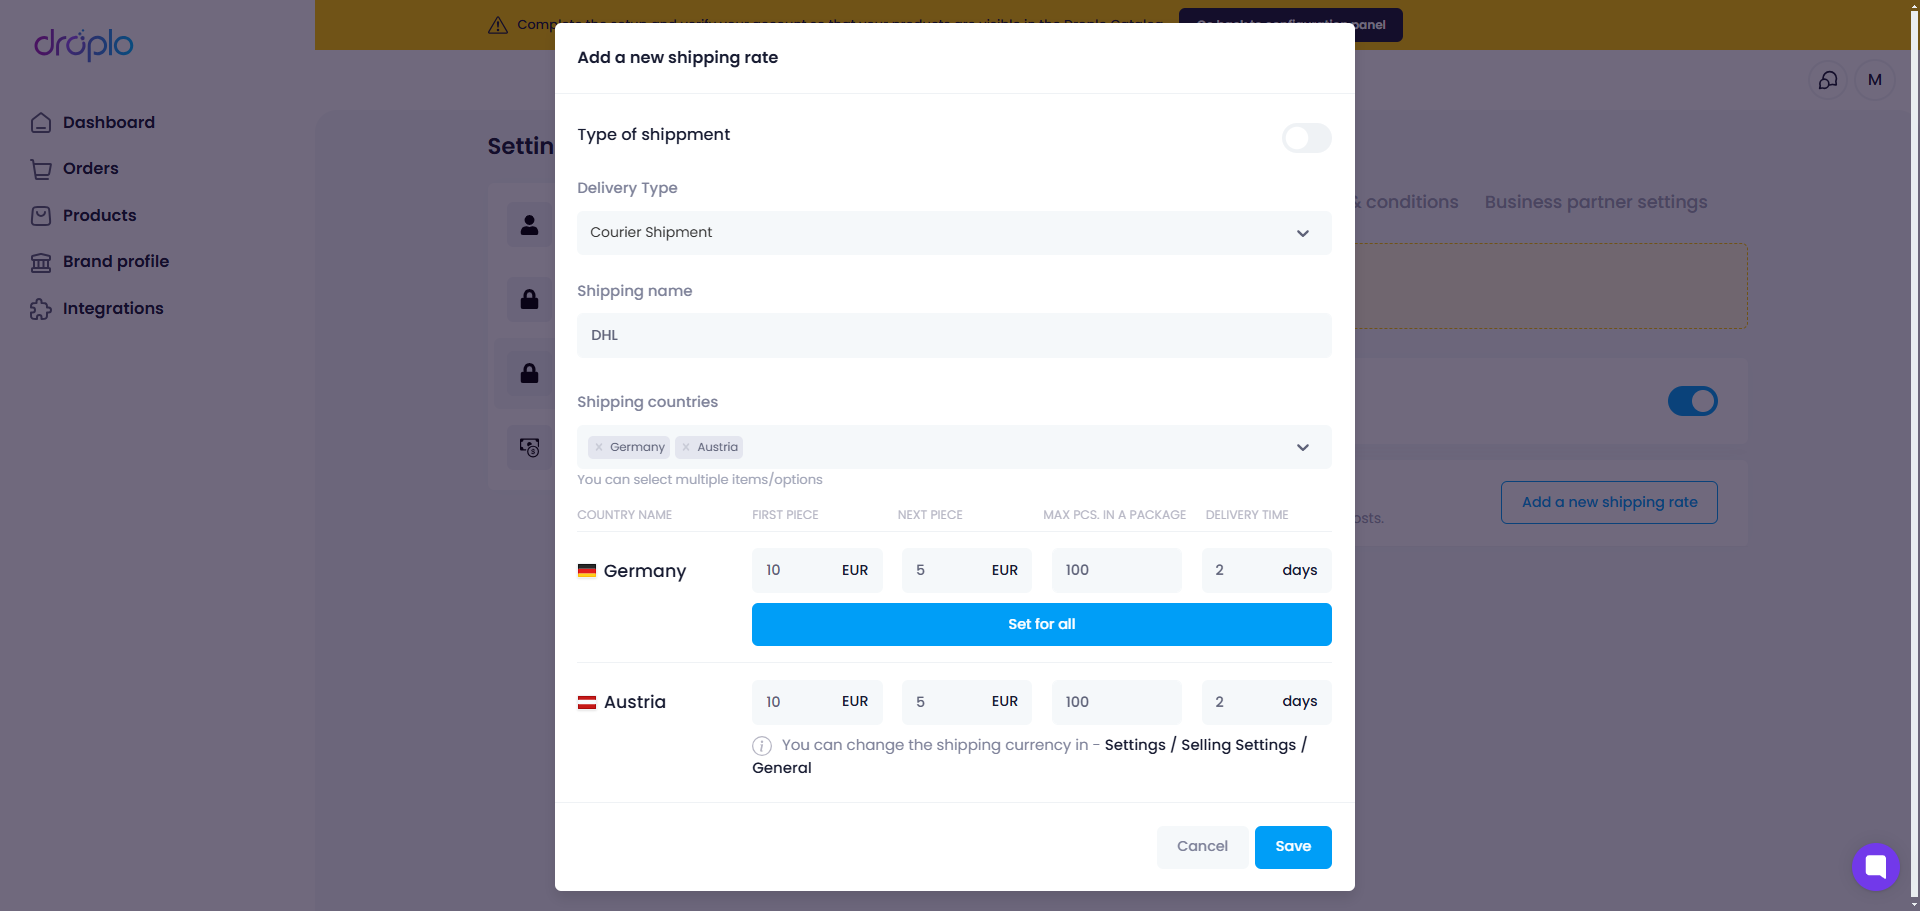
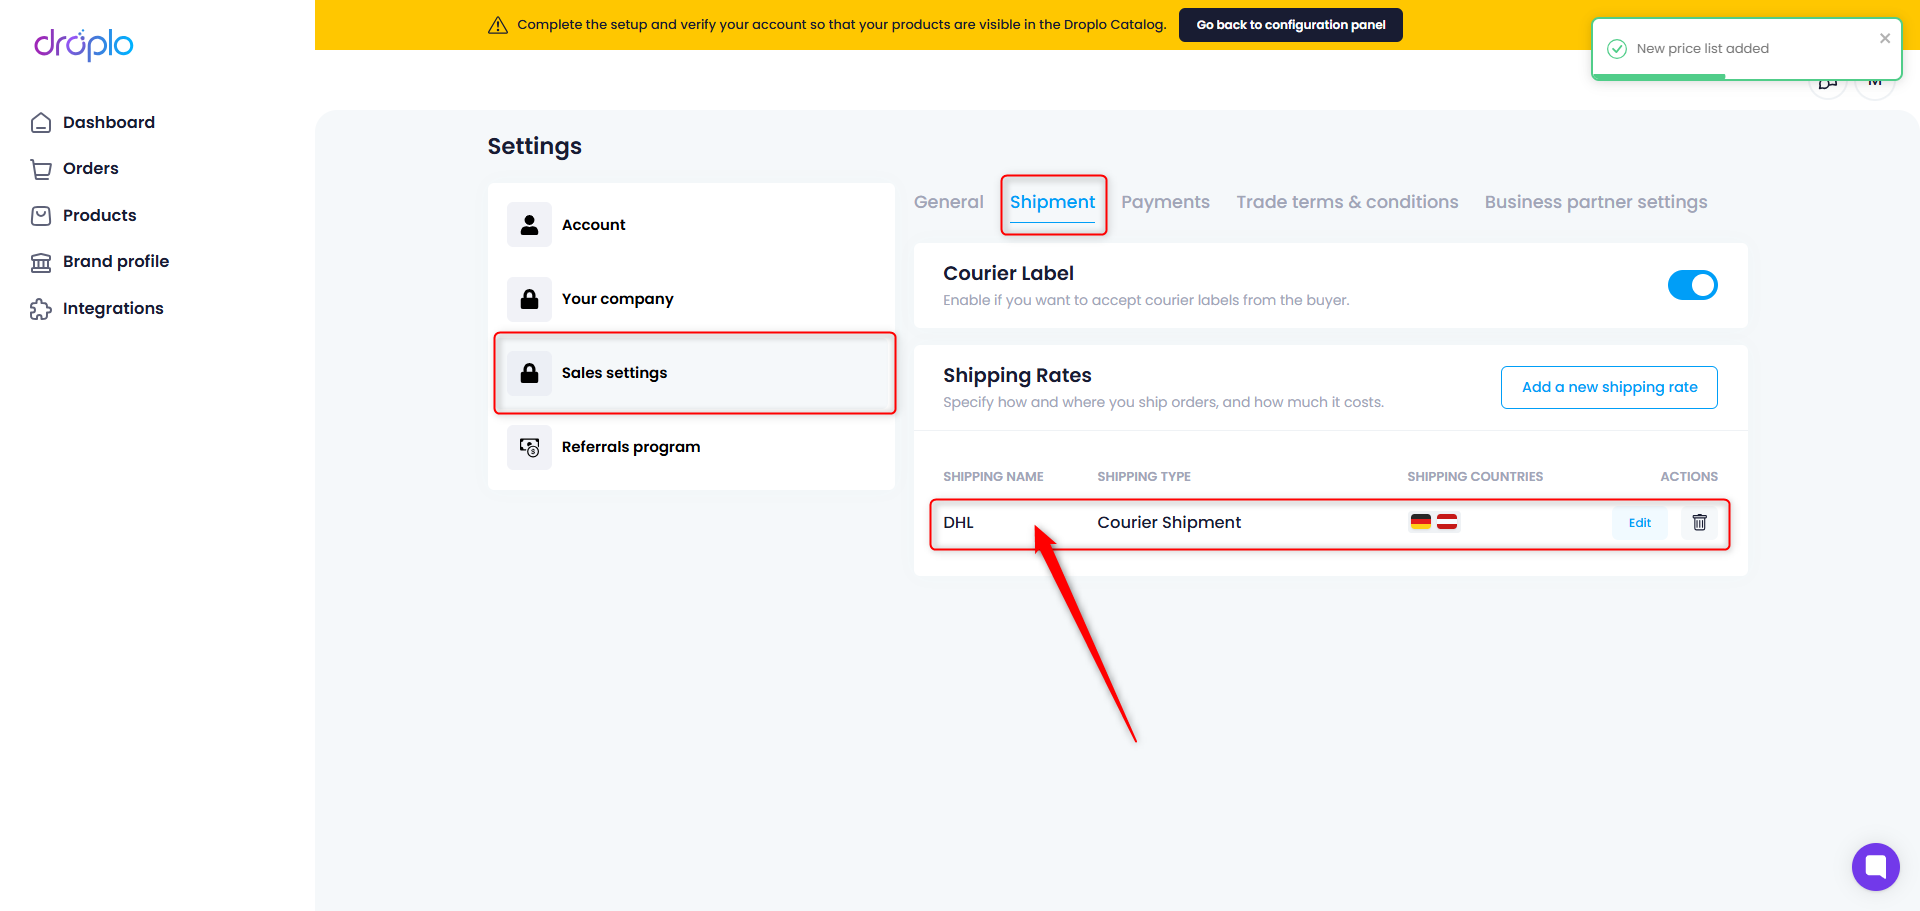
The data you entered should already be displayed in the Sales Settings -> Shipment tab. You can edit these settings at any time using the Edit button.
Return to the configuration panel.
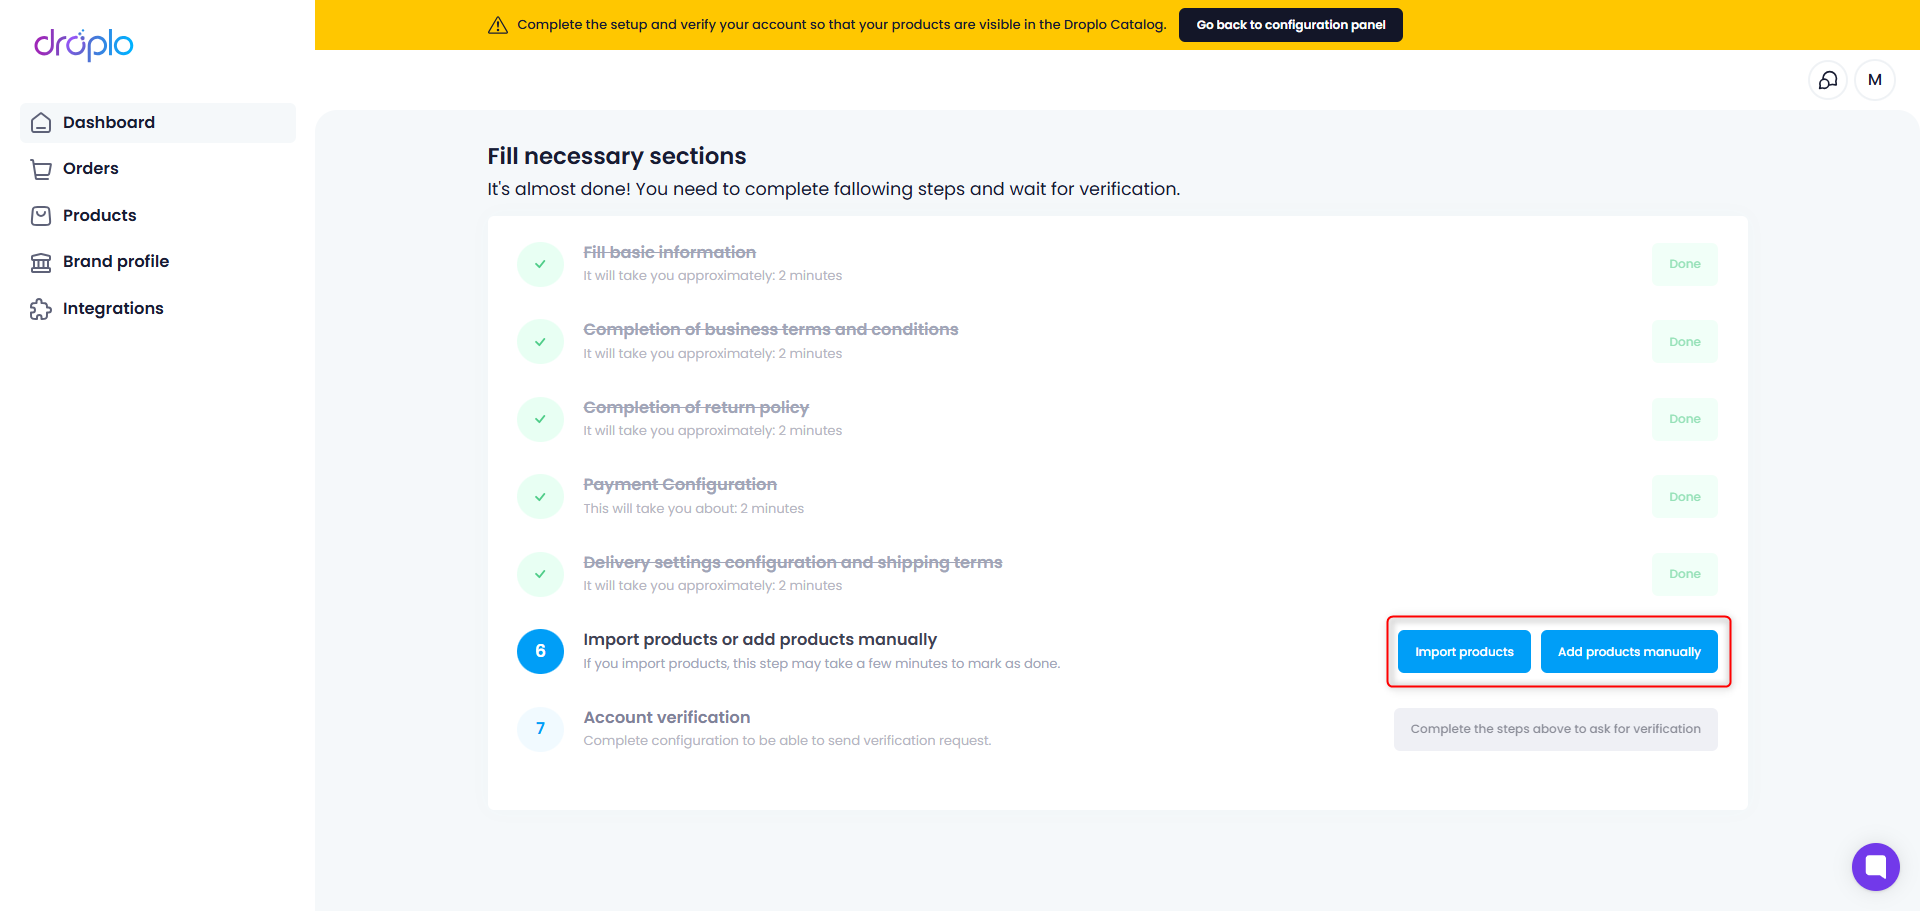
The last step is to add your products to Droplo.
You can do this in two ways: Add products manually (one at a time) or through the Import Products function (bulk import of an XML or CSV file).
Other import methods described in separate instructions:
by integrating with Baselinker:
Import products from Baselinker
Find out how to add products from your account on the Baselinker platform to Droplo.
by integrating with Shoper:
Import products from Shoper
Check out how to add products from your Shoper platform account to Droplo.
On the verification page, use the appropriate button to proceed. You must enter at least 1 product for step 6 to be recognized by the system.
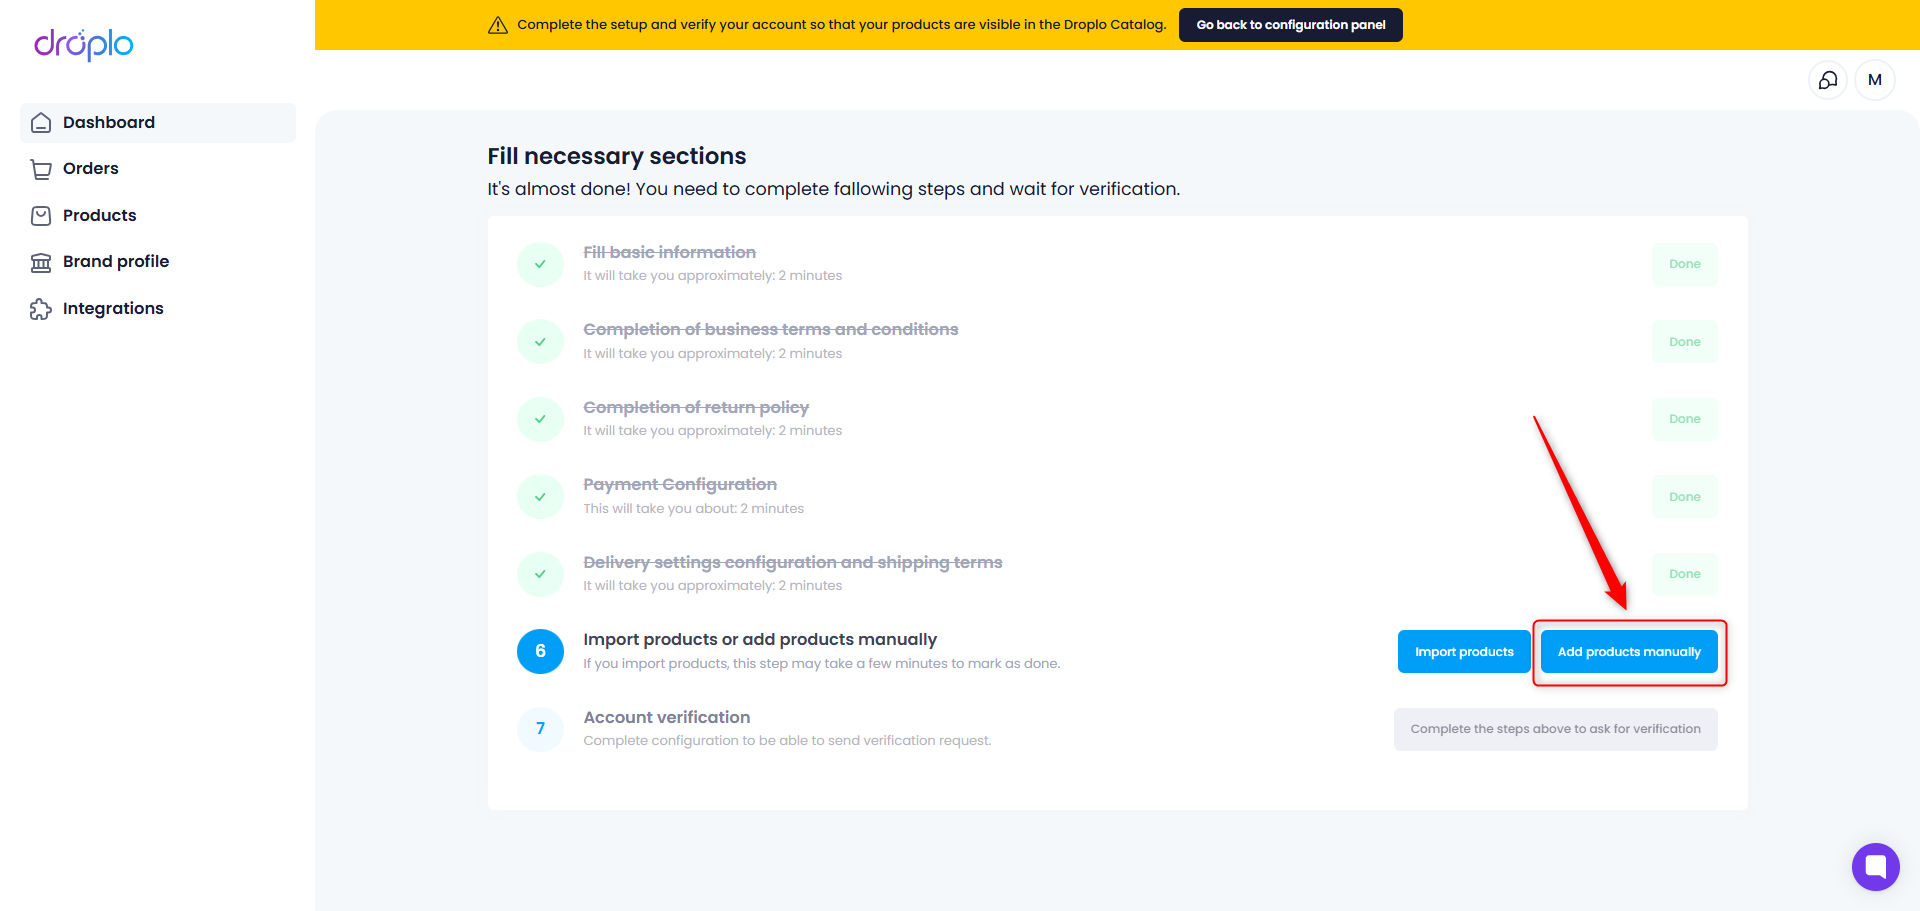
A tab for a new product will open. Here you can put a full description of the product. This page is divided into 7 smaller sections (boxes) for easy navigation:
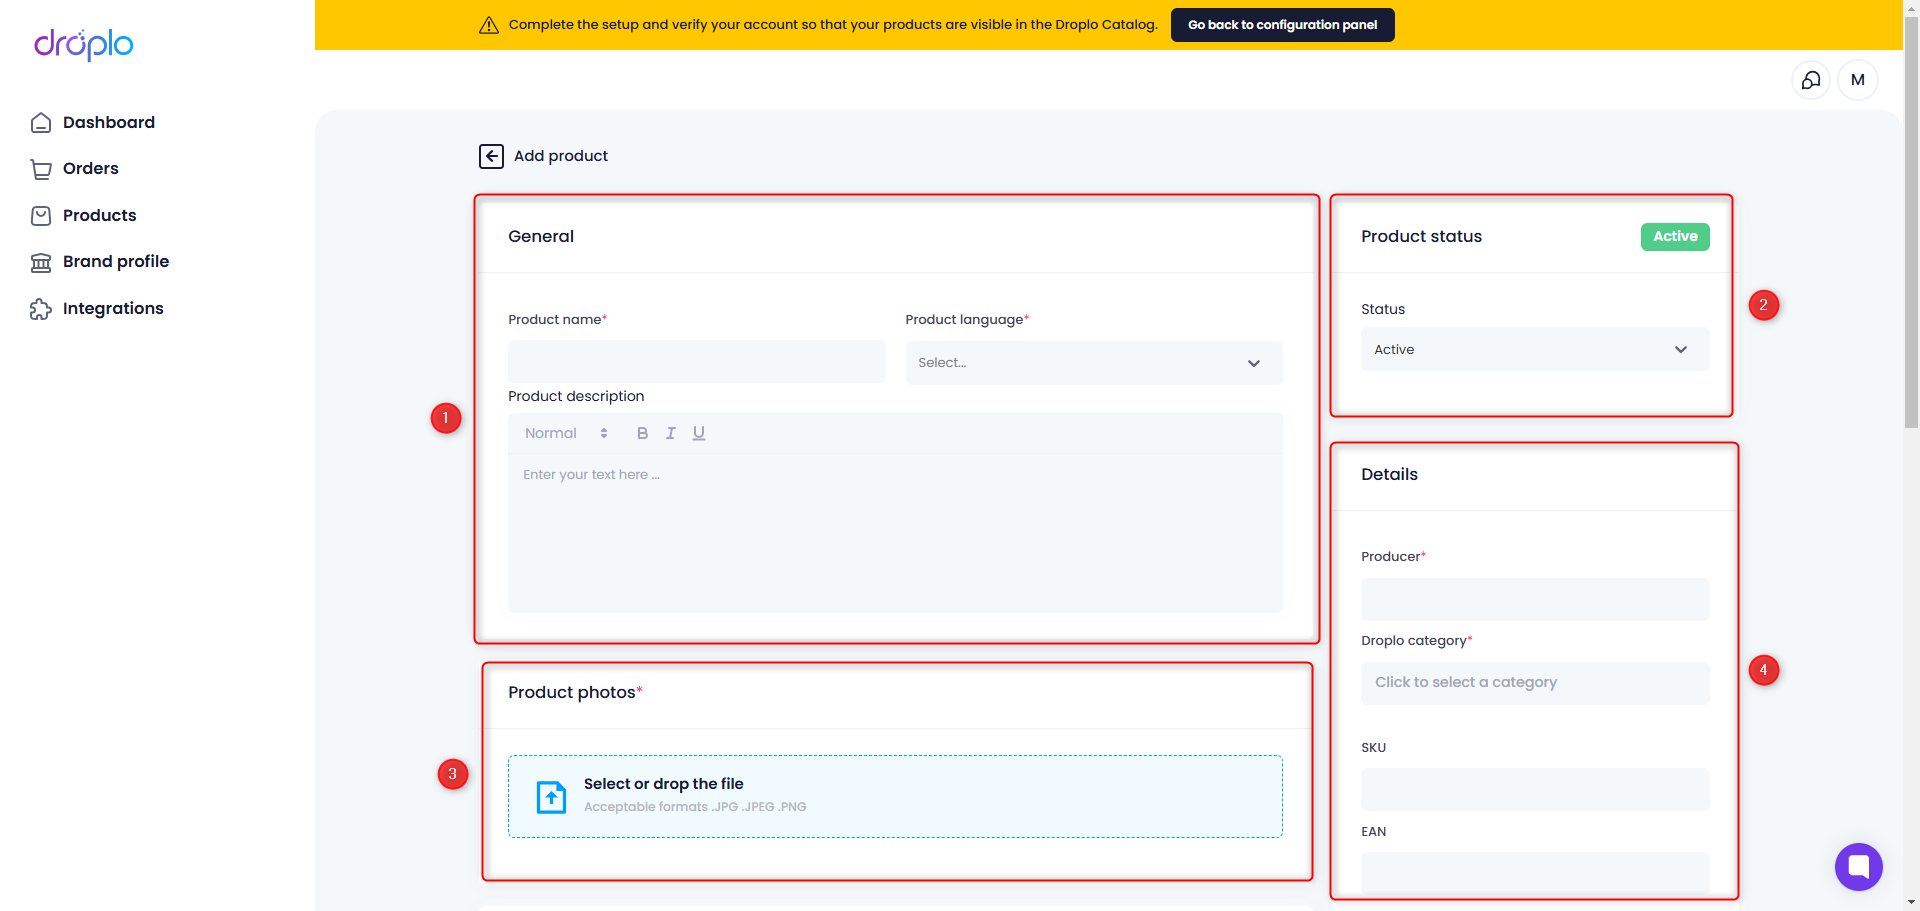
General (1) - name, product description and product language
Product status (2) - active/inactive
Product photos (3) - tool for uploading photos (accepted formats: JPG, JPEG, PNG)
Details (4) - manufacturer, Droplo category, SKU, EAN
Price (5) - currency, net and gross price per unit, tax
Shipping (6) - type of sale (by the piece or bulk packaging), stock, logistics minimum, weight, lead time
Dimensions (7) - height, width, length
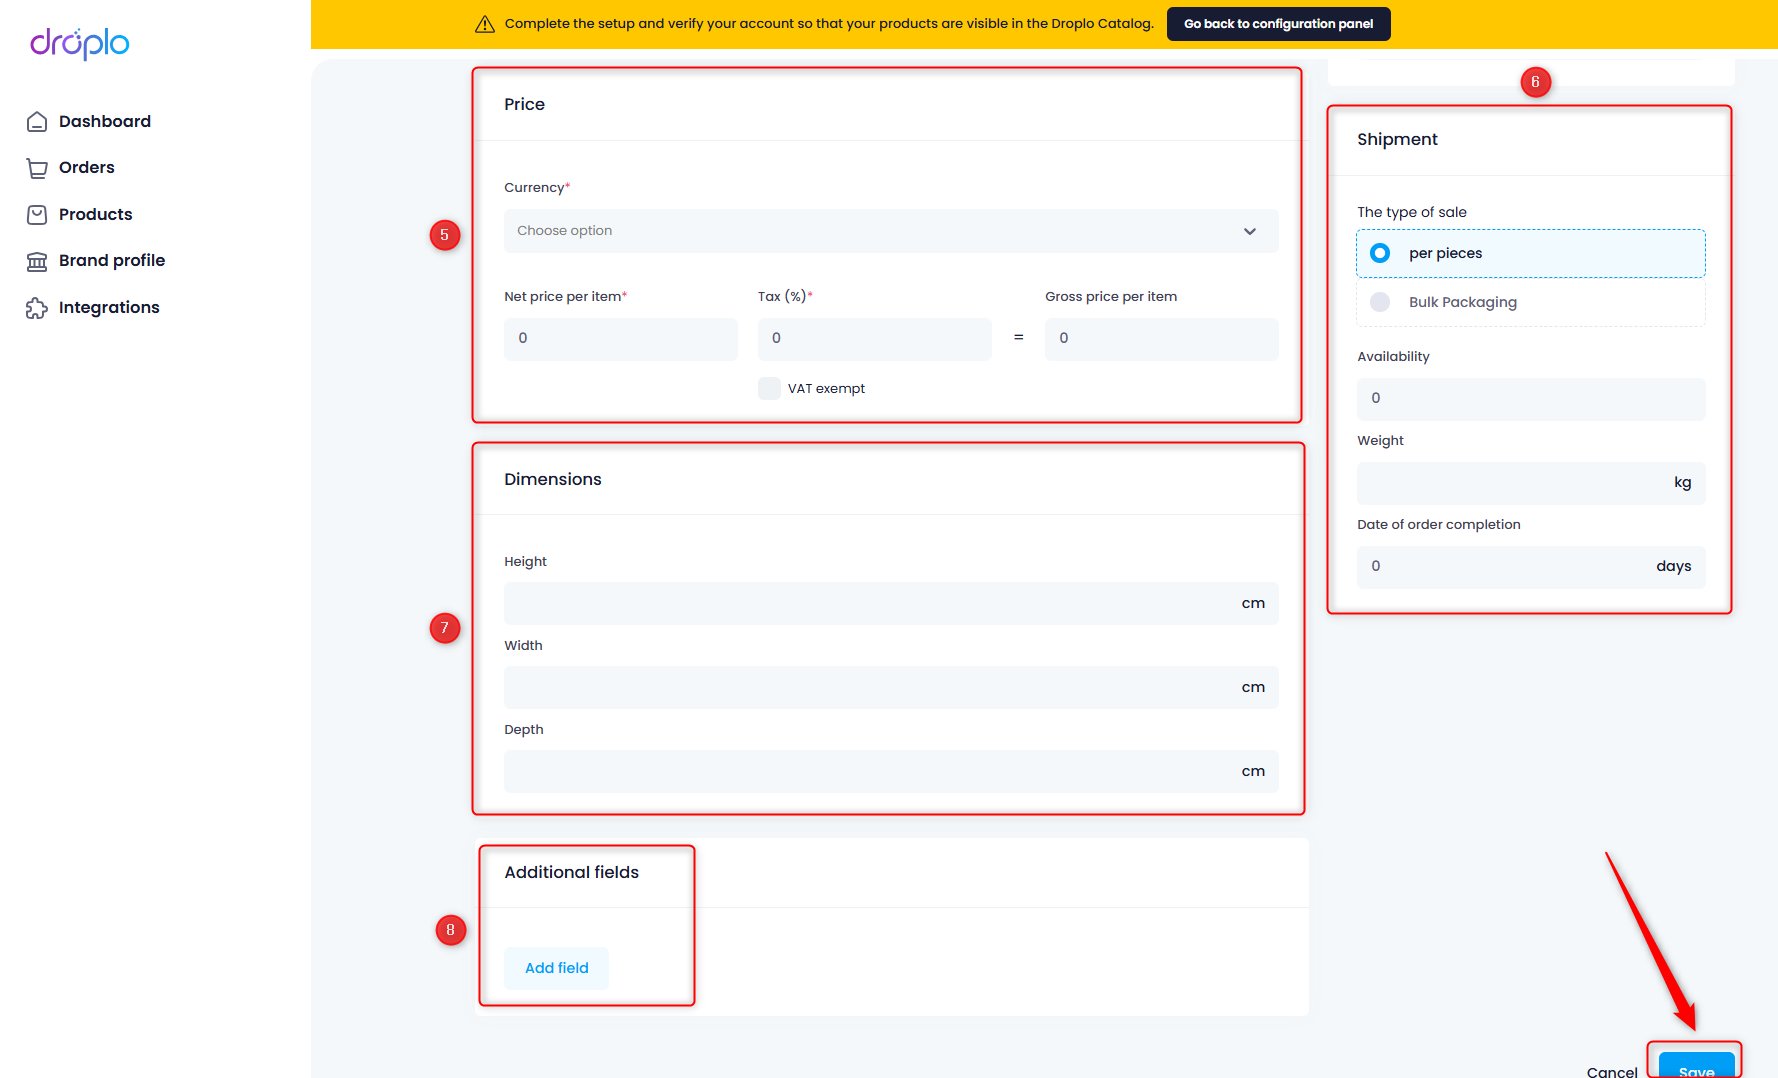
You can add more sections describing the product by using the Add Field (8) button at the bottom of the product configuration page.
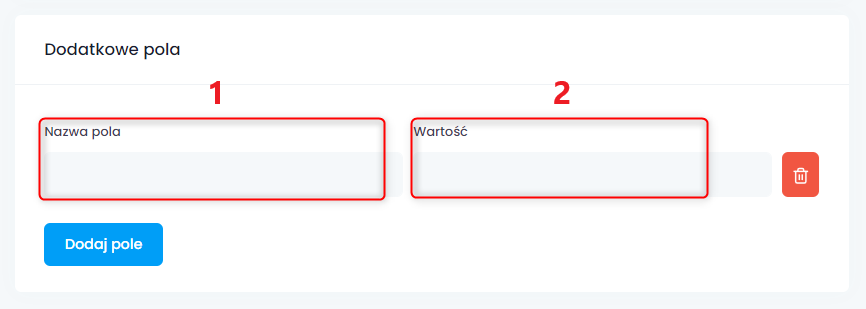
When you choose to use additional data fields, you will be asked to specify a name (1) and a value (2) for each characteristic you enter.
Finally, save the changes. The product will appear in the Products tab.
Use the appropriate button to import the offer.
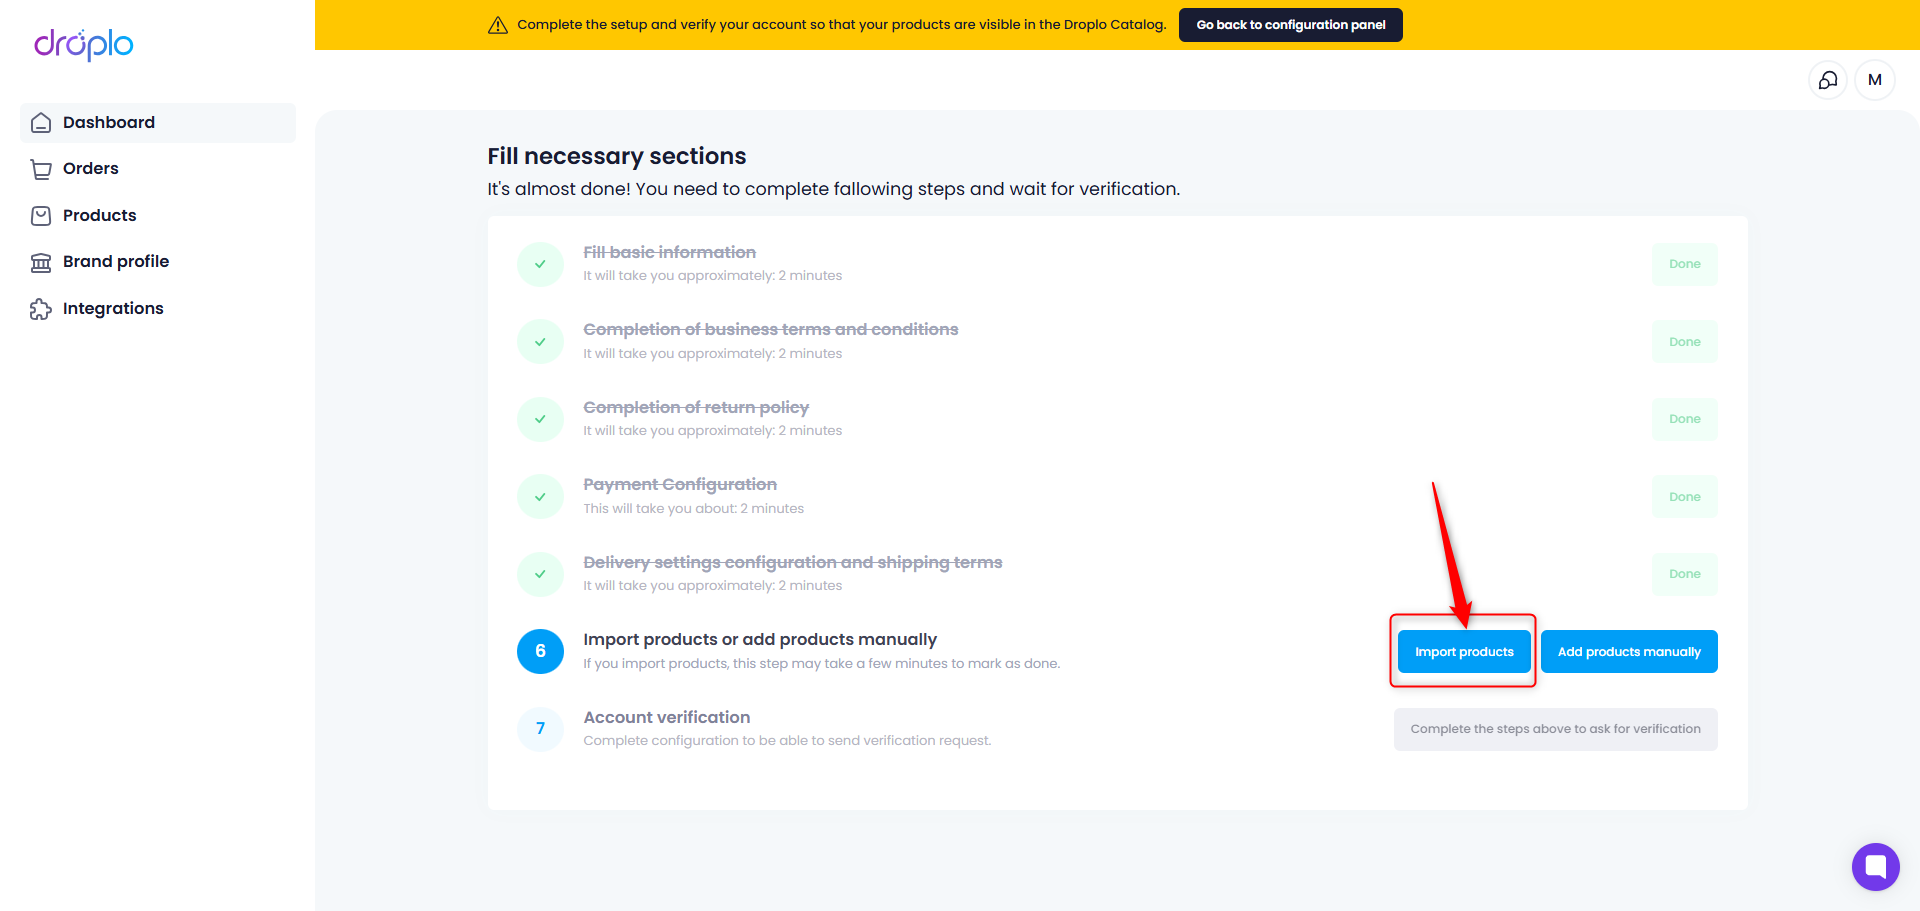
It is possible to import files in XML or CSV format, the volume of which must not exceed 500 MB.
Log in to your account go to the Import Products tab. Then use the Import products button.
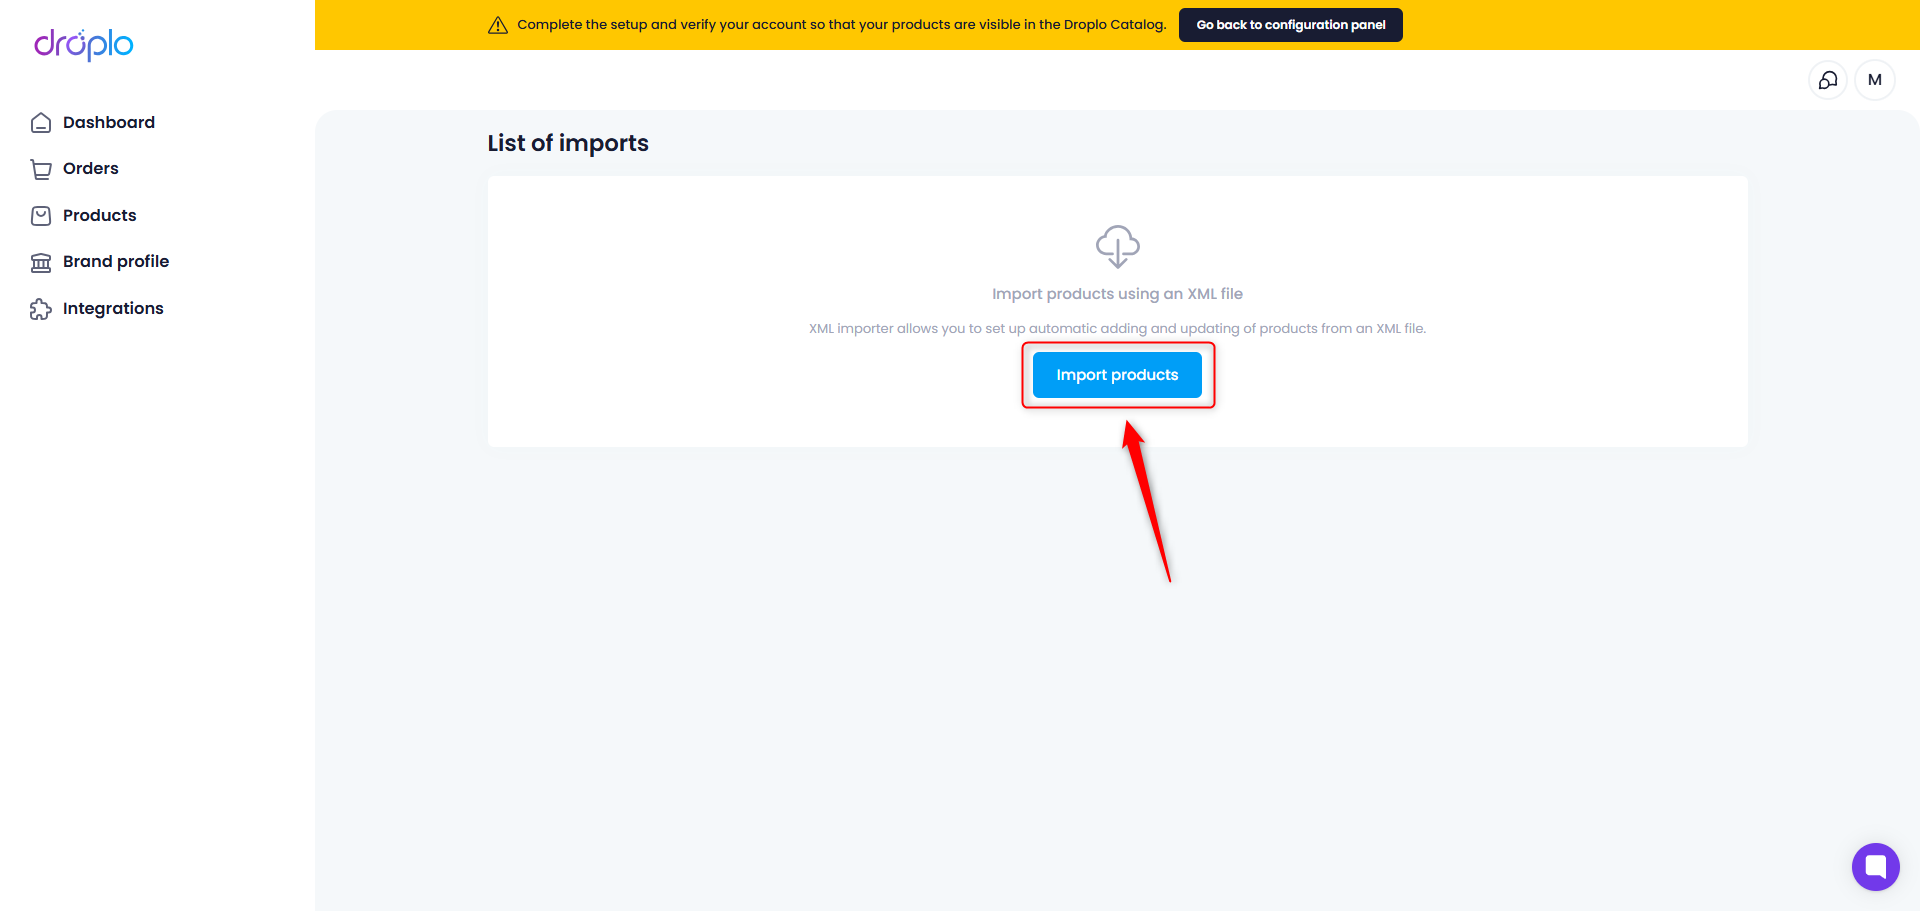
The first step of the import will be displayed: File Configuration.
First, enter the import name and choose how you will add the offer file to Droplo: via URL ( https:// ) or by uploading the file from your device ( .xml / .csv ). Choosing the second solution will open a window in which you will have the opportunity to select the file. After selecting it, you will proceed to the next import step.
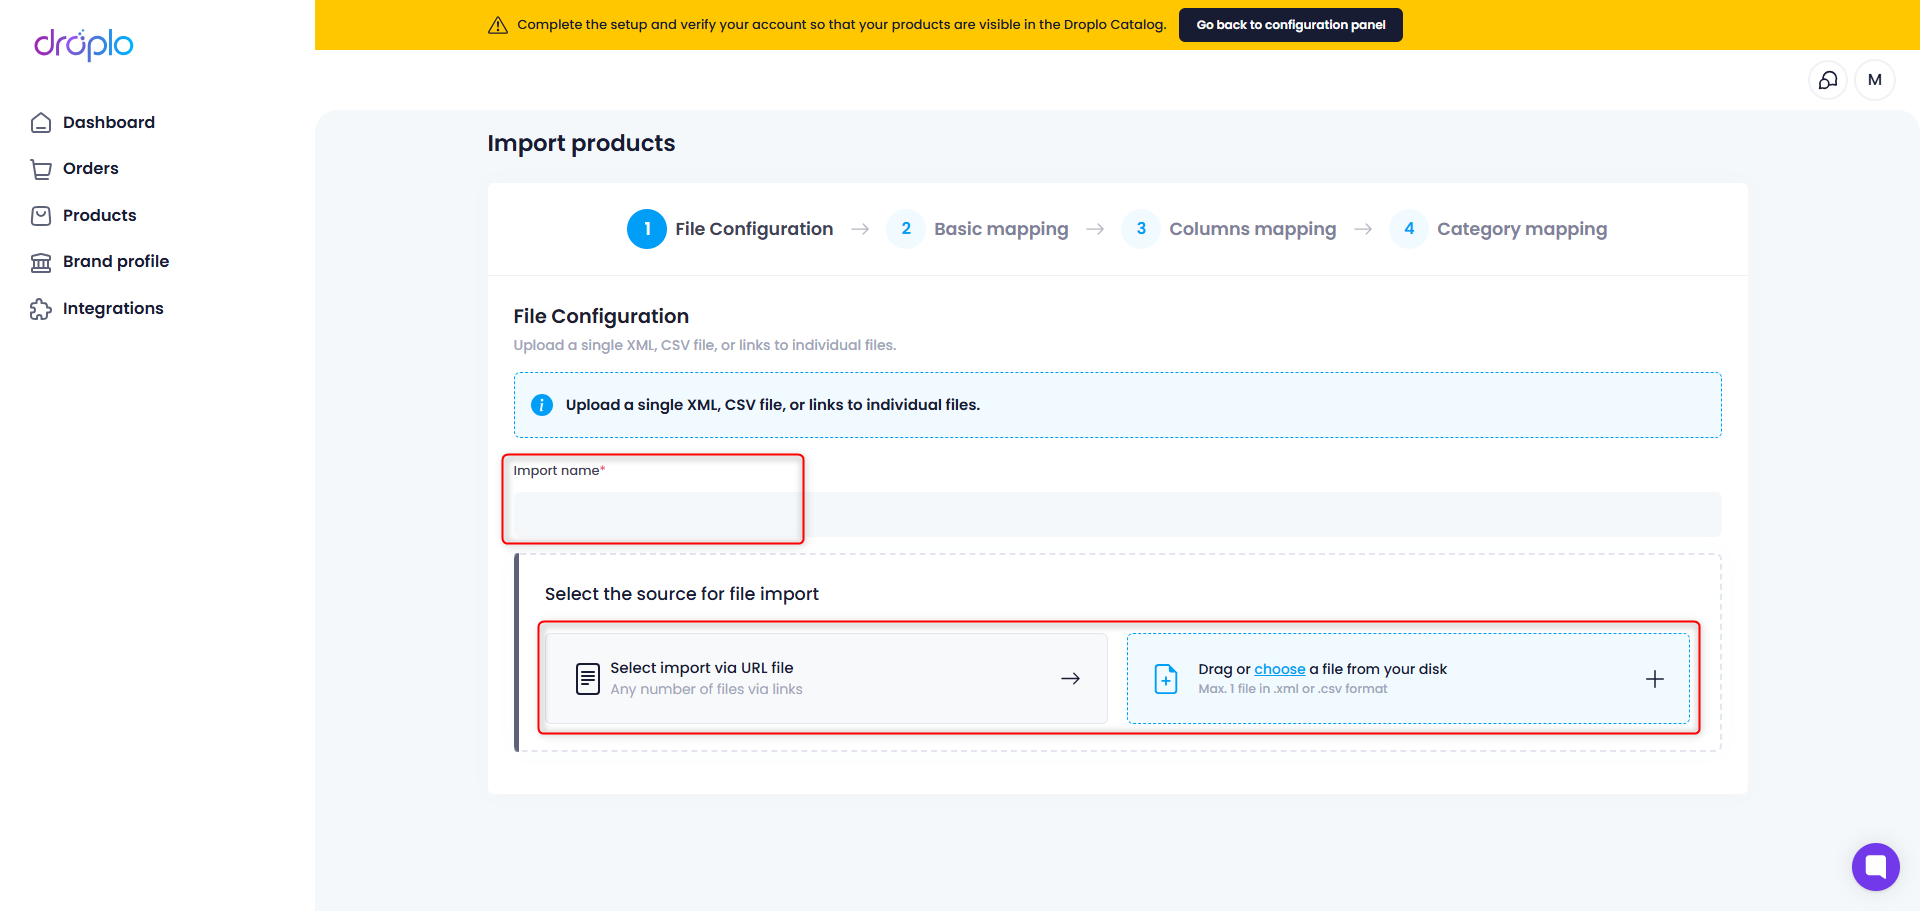
When you select import via URL, a new section will appear. In the first field, enter the URL link.
If the file is password protected, mark it below and two additional fields will appear: Username and Password to download the file from the vendor's server.
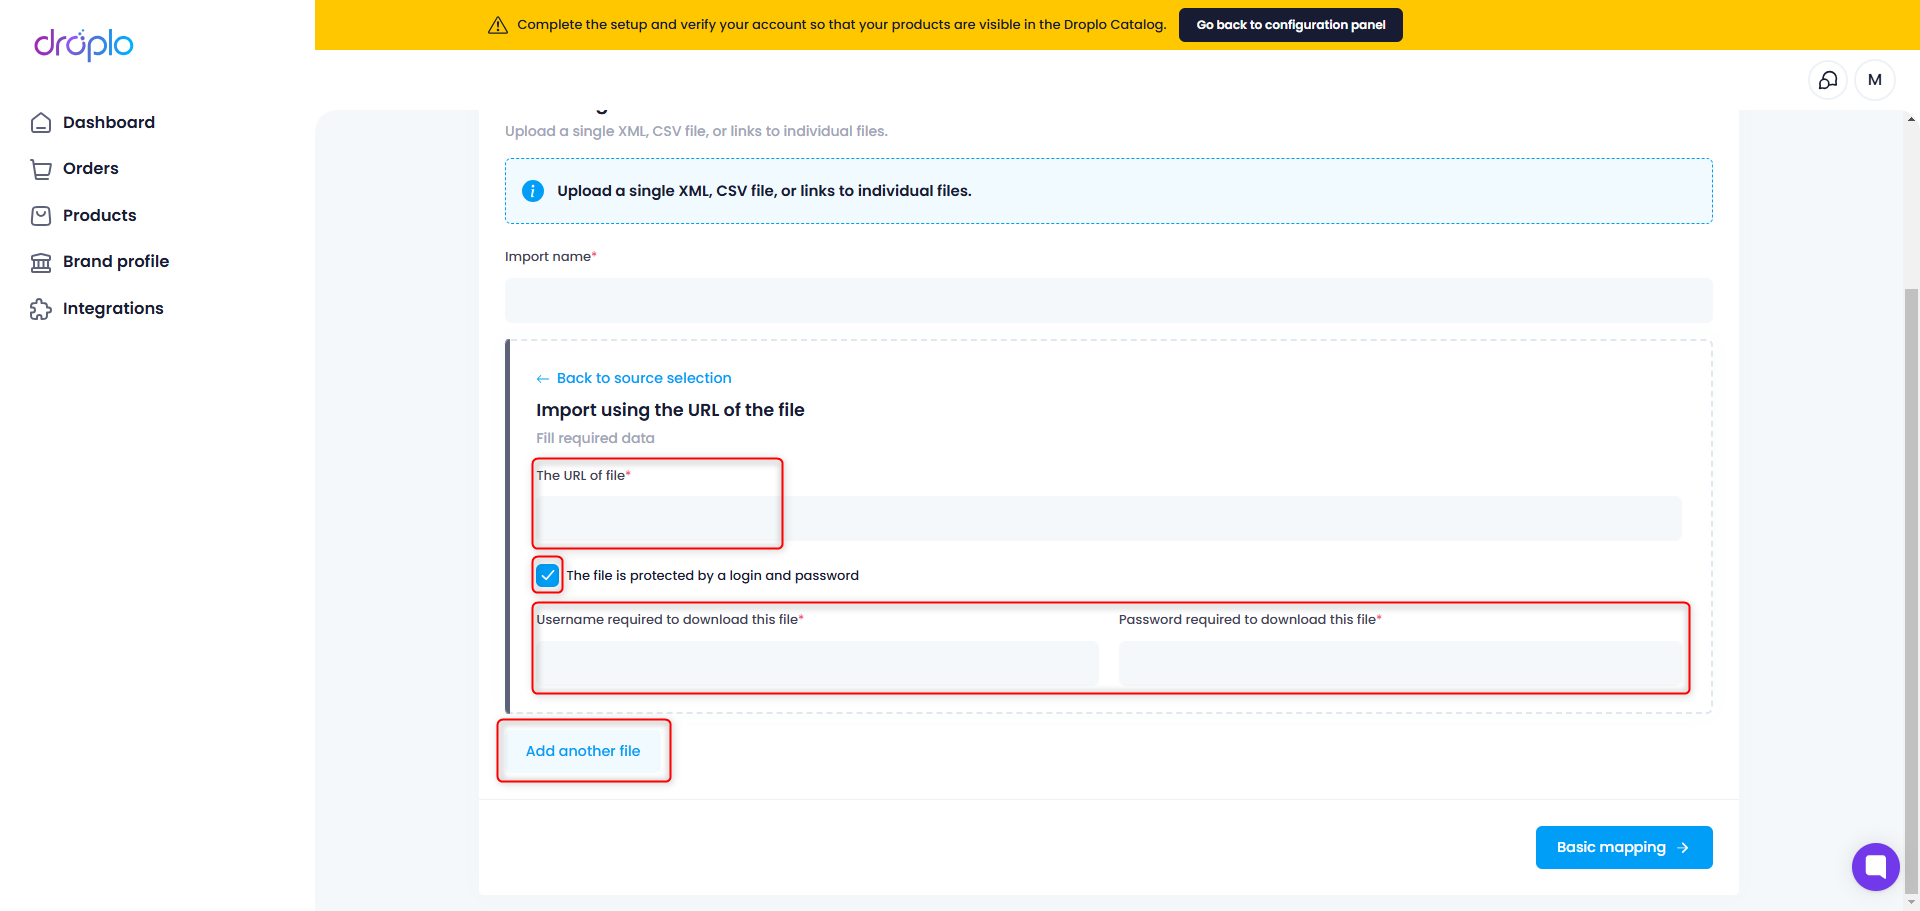
Sometimes a file may consist of several links (e.g., one link is product information and the other is prices and inventory). In this case, use the Add another file option and complete the new card in the same way as the previous one. The importer will then recognize the two files as complementary.
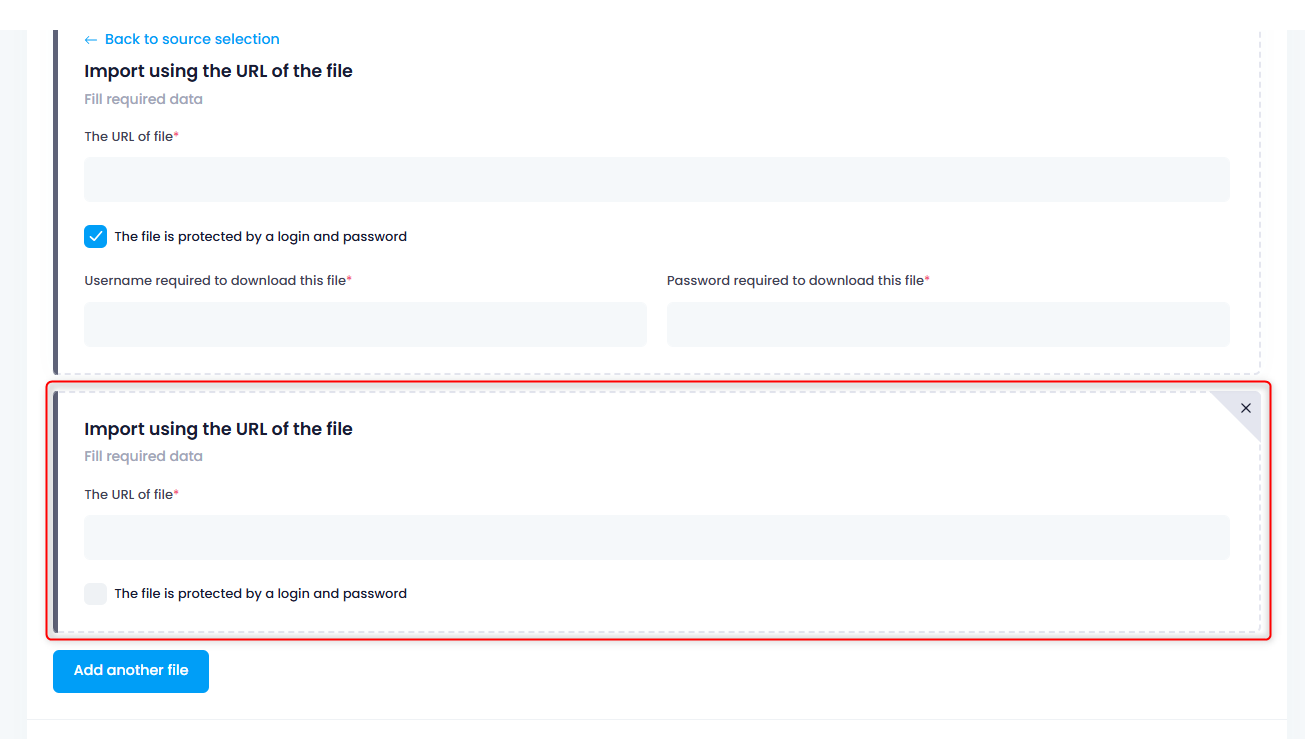
When you have finished configuring the file, you can proceed to the basic mapping. At this stage, the basic parameters of the file that build its structure are completed.
Both fields should complete automatically. However, it happens that for some reason the ID parameter cannot be read by Droplo. In this case, you should enter the missing parameter into the file or select it manually from the drop-down list.
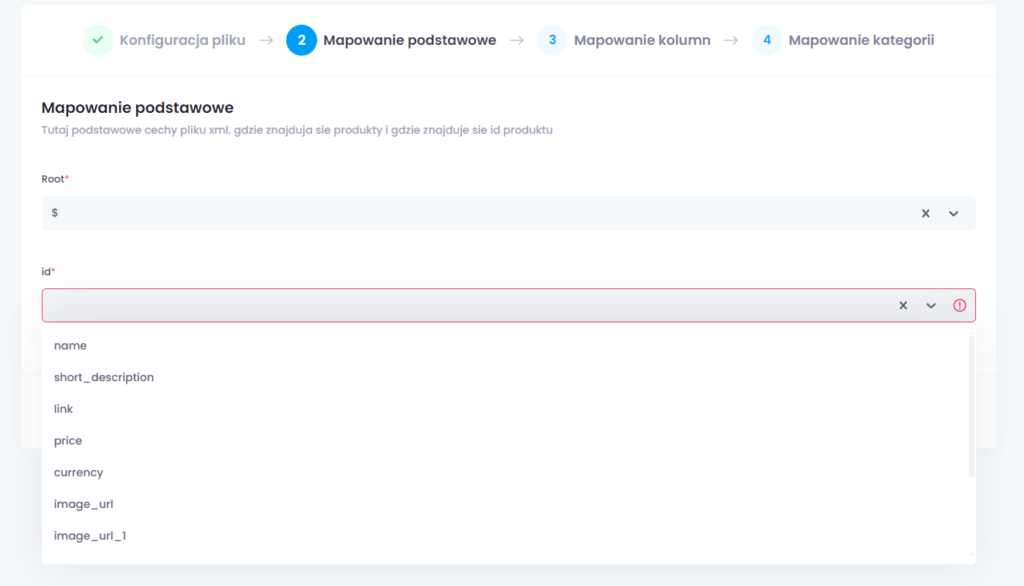
After selecting the appropriate option, proceed to the next step - column mapping.
In this step there are 2 segments to complete. The first one (on the left) allows you to assign the appropriate attributes of the Droplo attributes file.
The second (on the right) allows you to manually assign additional information such as price type, currency, delivery time, tax, or file language.
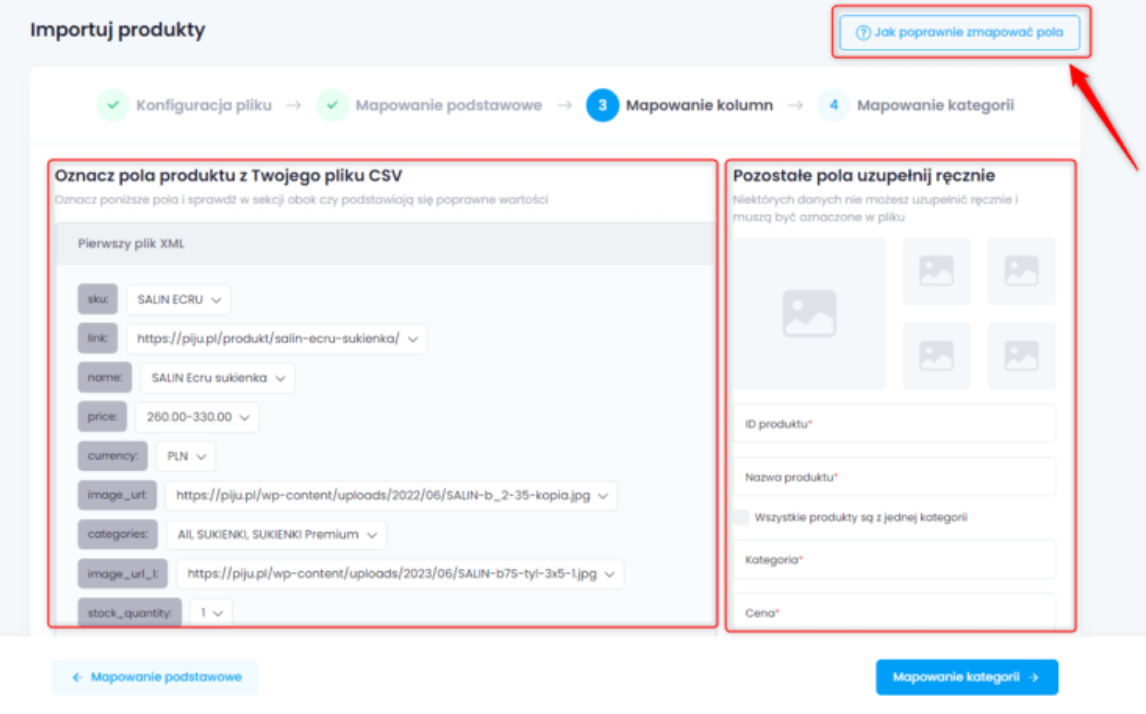
In the upper right corner you will notice a button How to properly map fields. Use it to read the brief instructions.
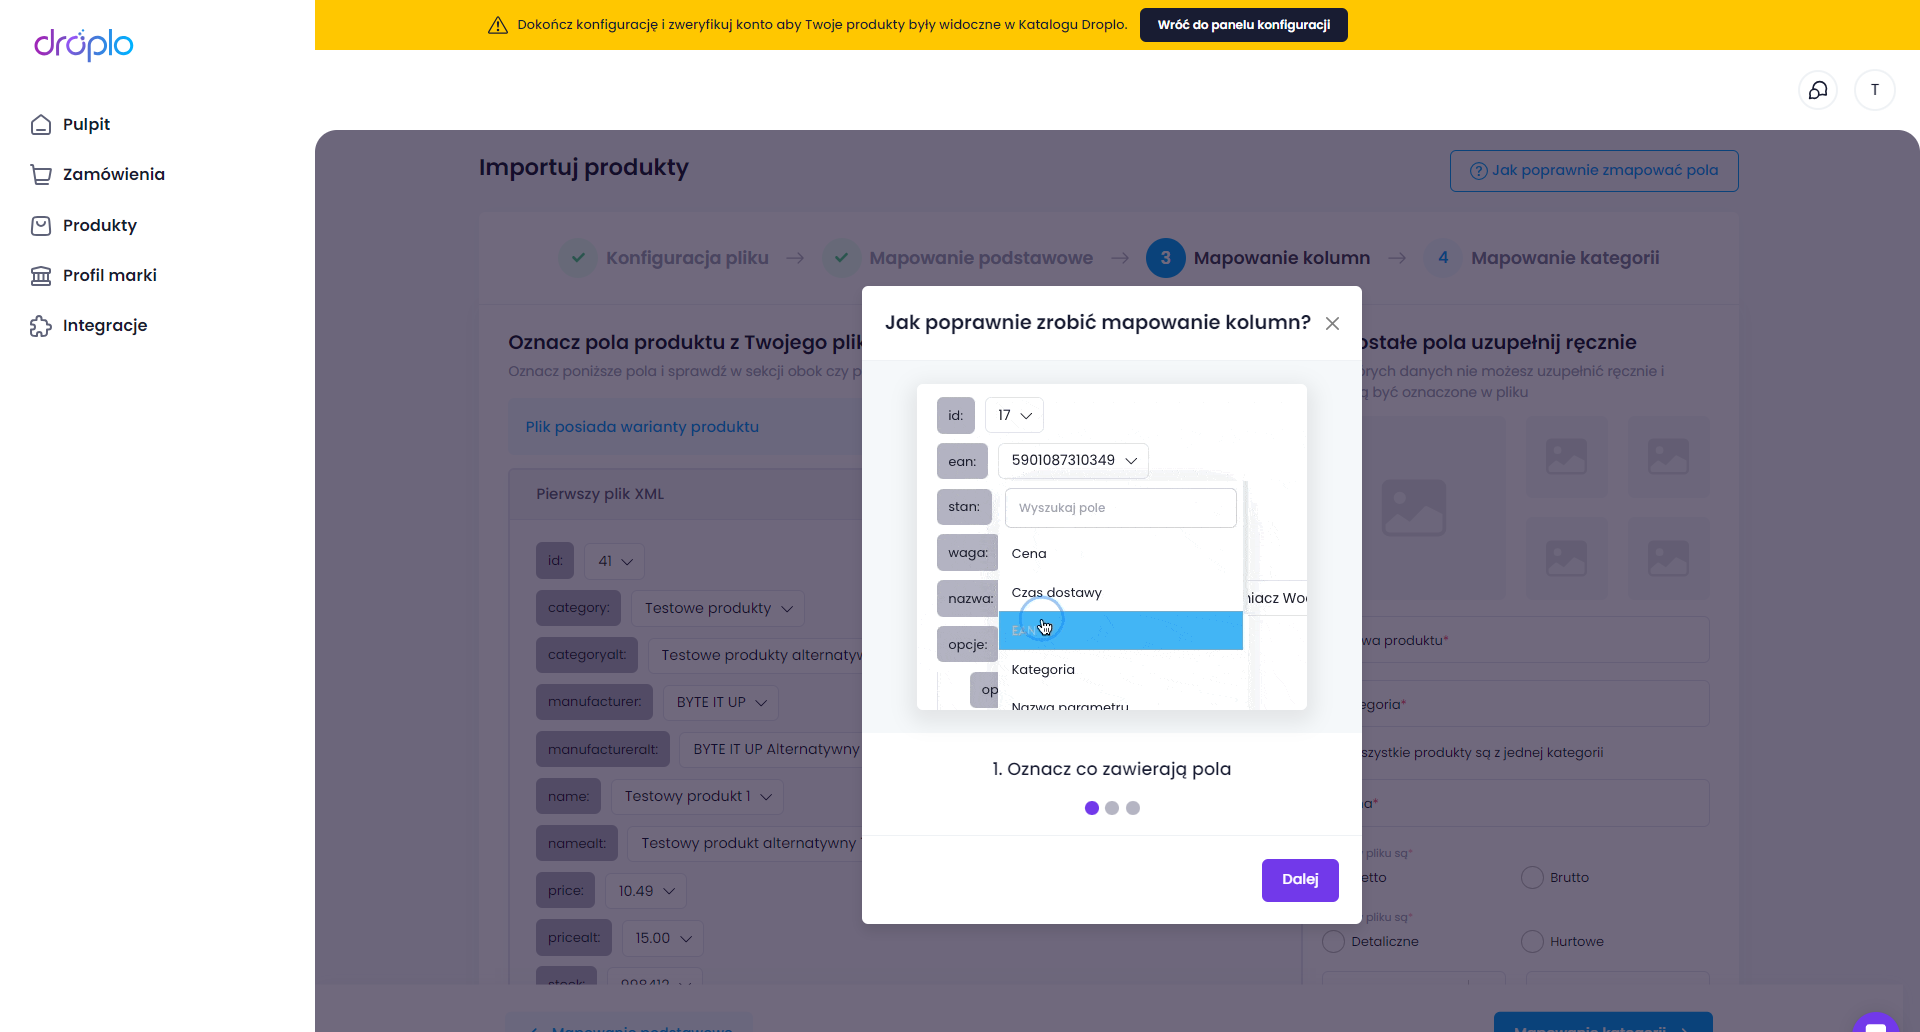
Very important to mark the correct version of the prices that are in the imported file: net / gross.
It is also possible to enter a discount on the prices on file.
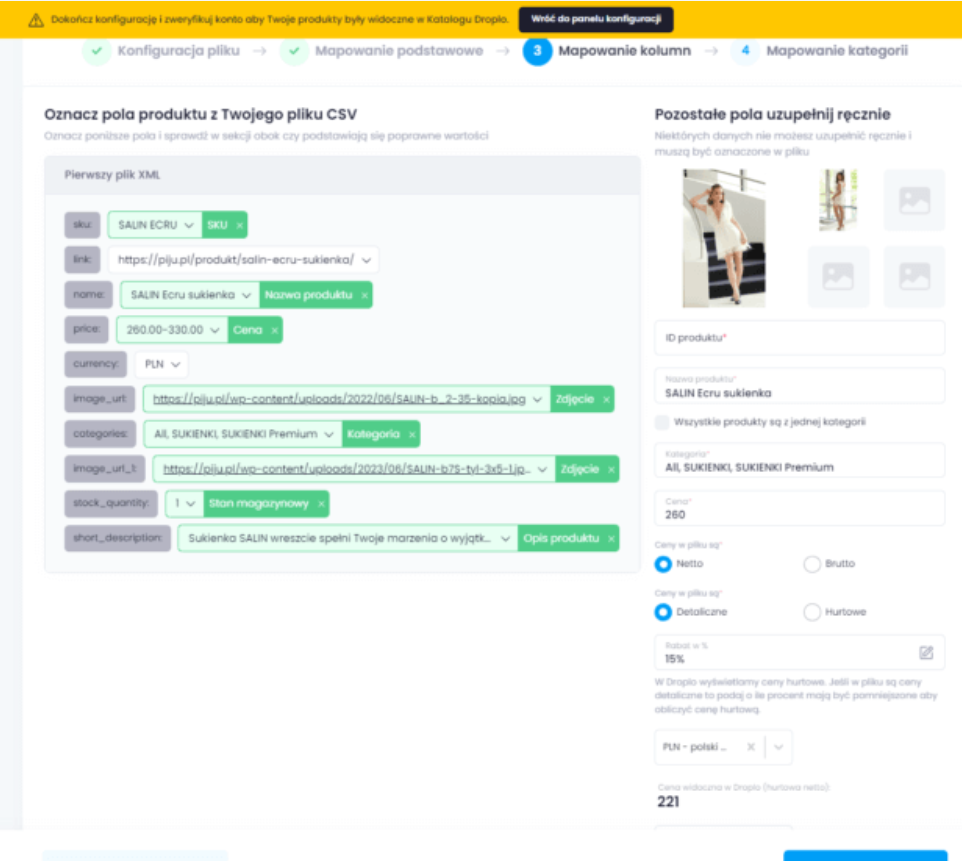
Once you have mapped all the required fields on the left and manually filled in the rest of the required parameters on the right, proceed to the category mapping.
In this step, you need to assign equivalent categories from the file to Droplo-side categories. You can do this by selecting multiple categories at once, and then set one Droplo-side category for the selected ones.
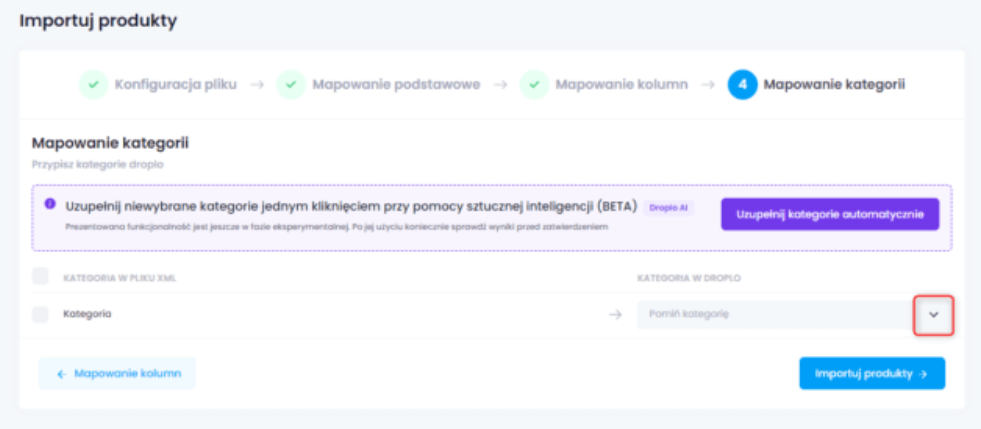
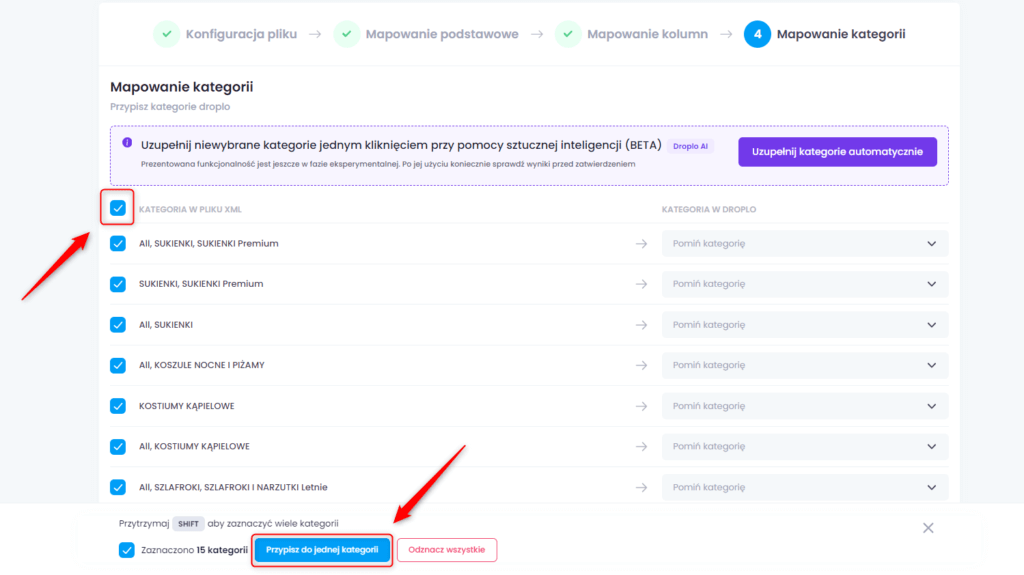
As of recently, you can also try out our new solution, which we have already introduced in BETA version - this is AI-based automatic category completion. However, this solution may still have difficulty recognizing each file format.
Once you've assigned the right categories, move on.
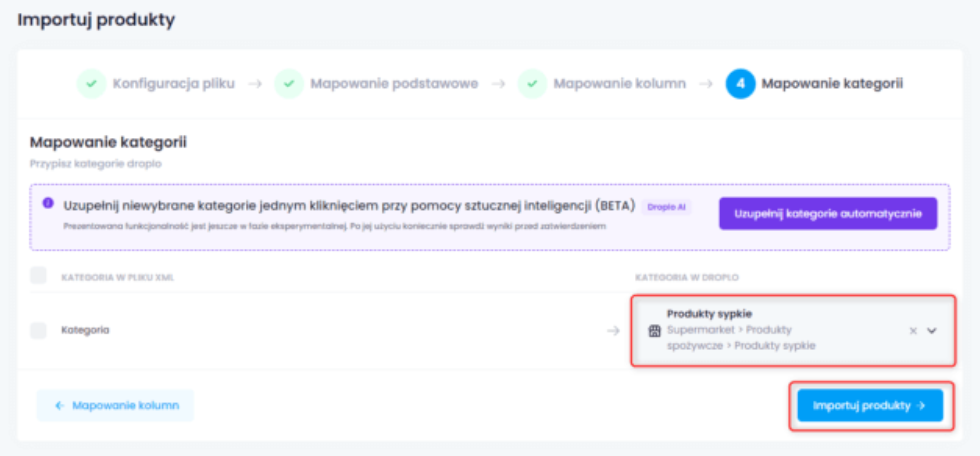
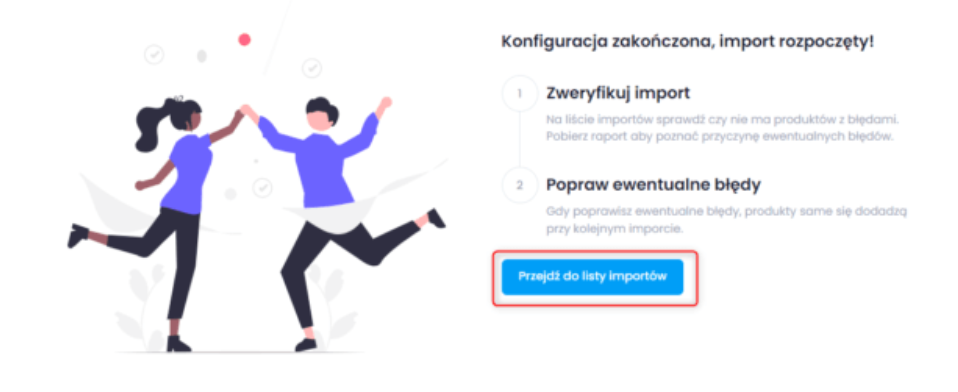
You should see a screen summarizing the correct import configuration. You will also see a Go to Import List button. Use it to check the progress of uploading products to Droplo.
The list of imports shows successively: the name that was given to the import in step 1 of the configuration, the status of the import, the date of the last update, the number of detected and correctly imported products (1).

In addition, if not all products were loaded correctly, you can download the import report (2) and check what was in the cause for each of the omitted products. If you want to edit (update) or delete an import, use one of the available functions.
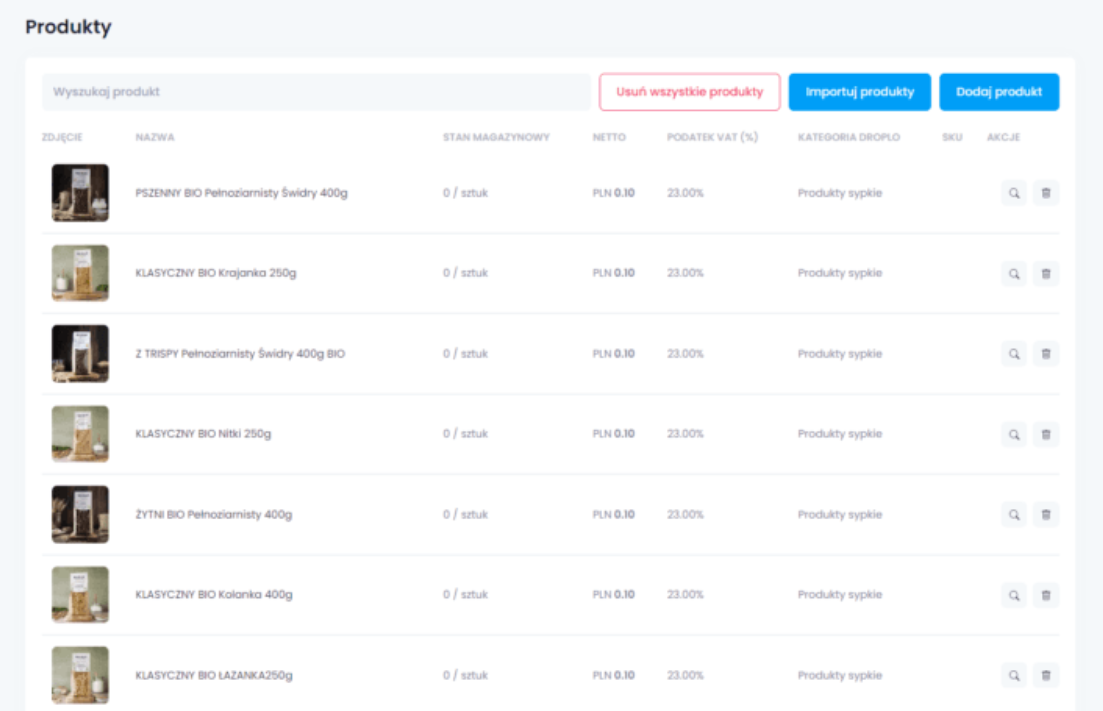
The imported products will appear in the Product List tab.
Once you have imported your products into Droplo, go to the Account Verification tab.
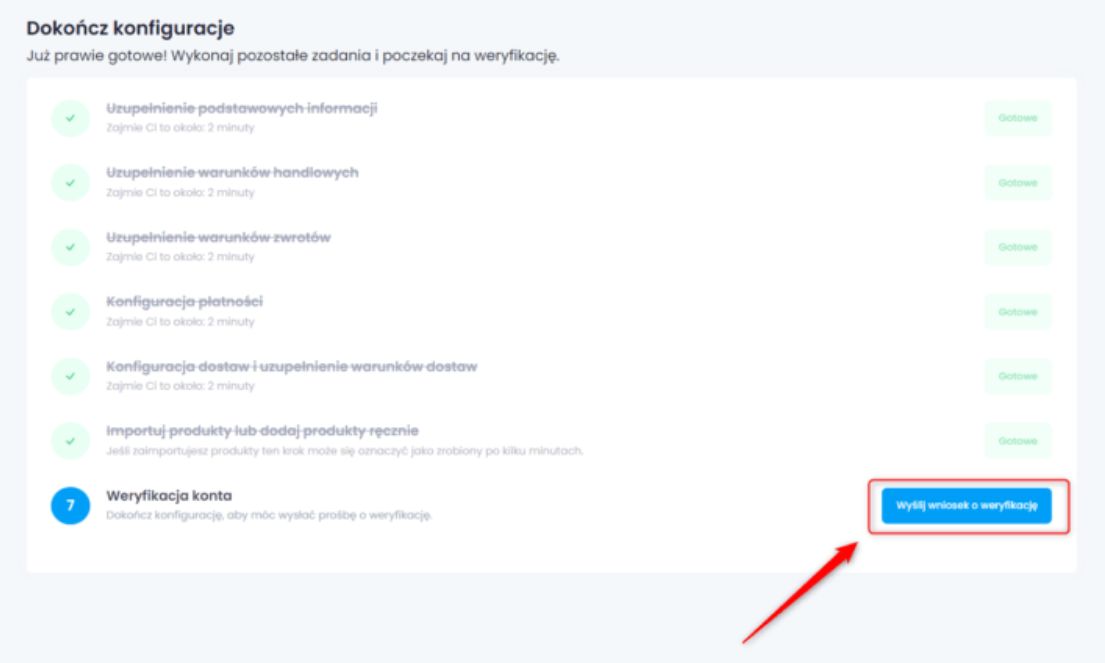
In the final step, send us a request for final account verification.
At Droplo, we pre-screen every new supplier who wants to join our platform. Verification is mandatory.
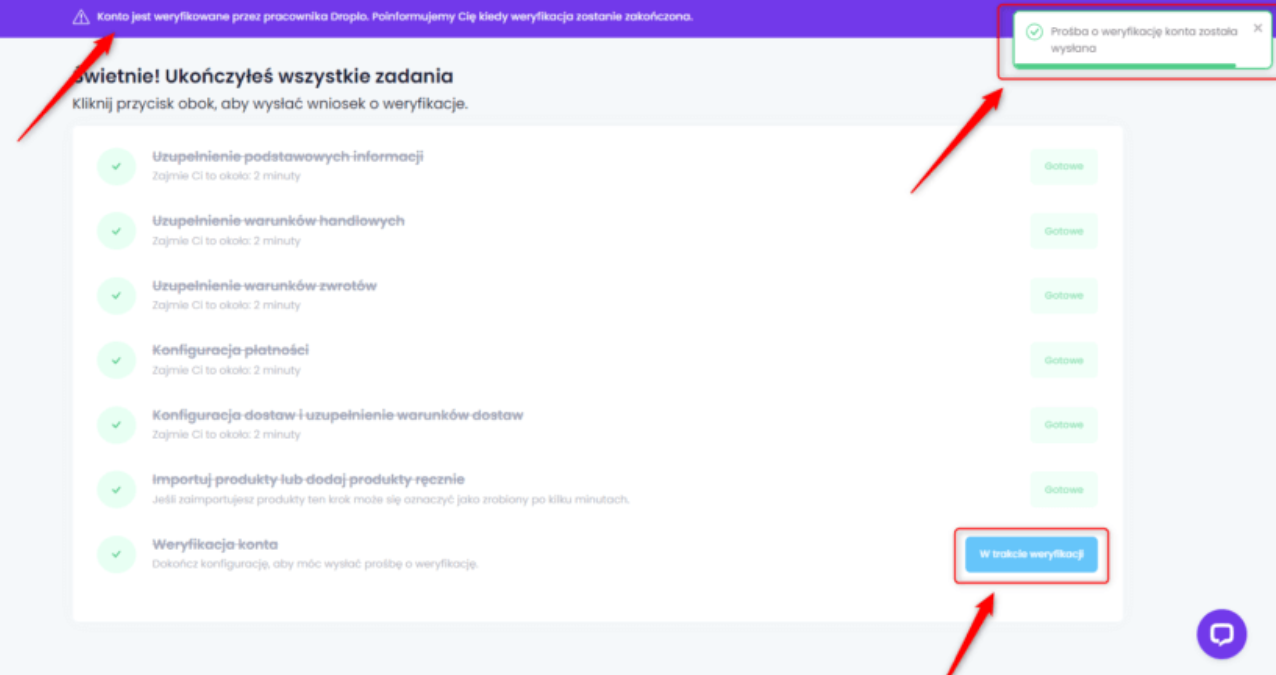
Once this process is complete, you will have full access to the Supplier Panel and your products will be displayed in the main Droplo product catalog and visible to all Sellers registered with Droplo.