Remember that you should first connect Droplo with Shoper. Once the connection is established, you will be able to go to the synchronization settings.
Check out the separate manual that will show you how to do this:
Connect Droplo with Shoper
Find out how to connect your Shoper account with Droplo to import products and synchronise orders from this sales channel.
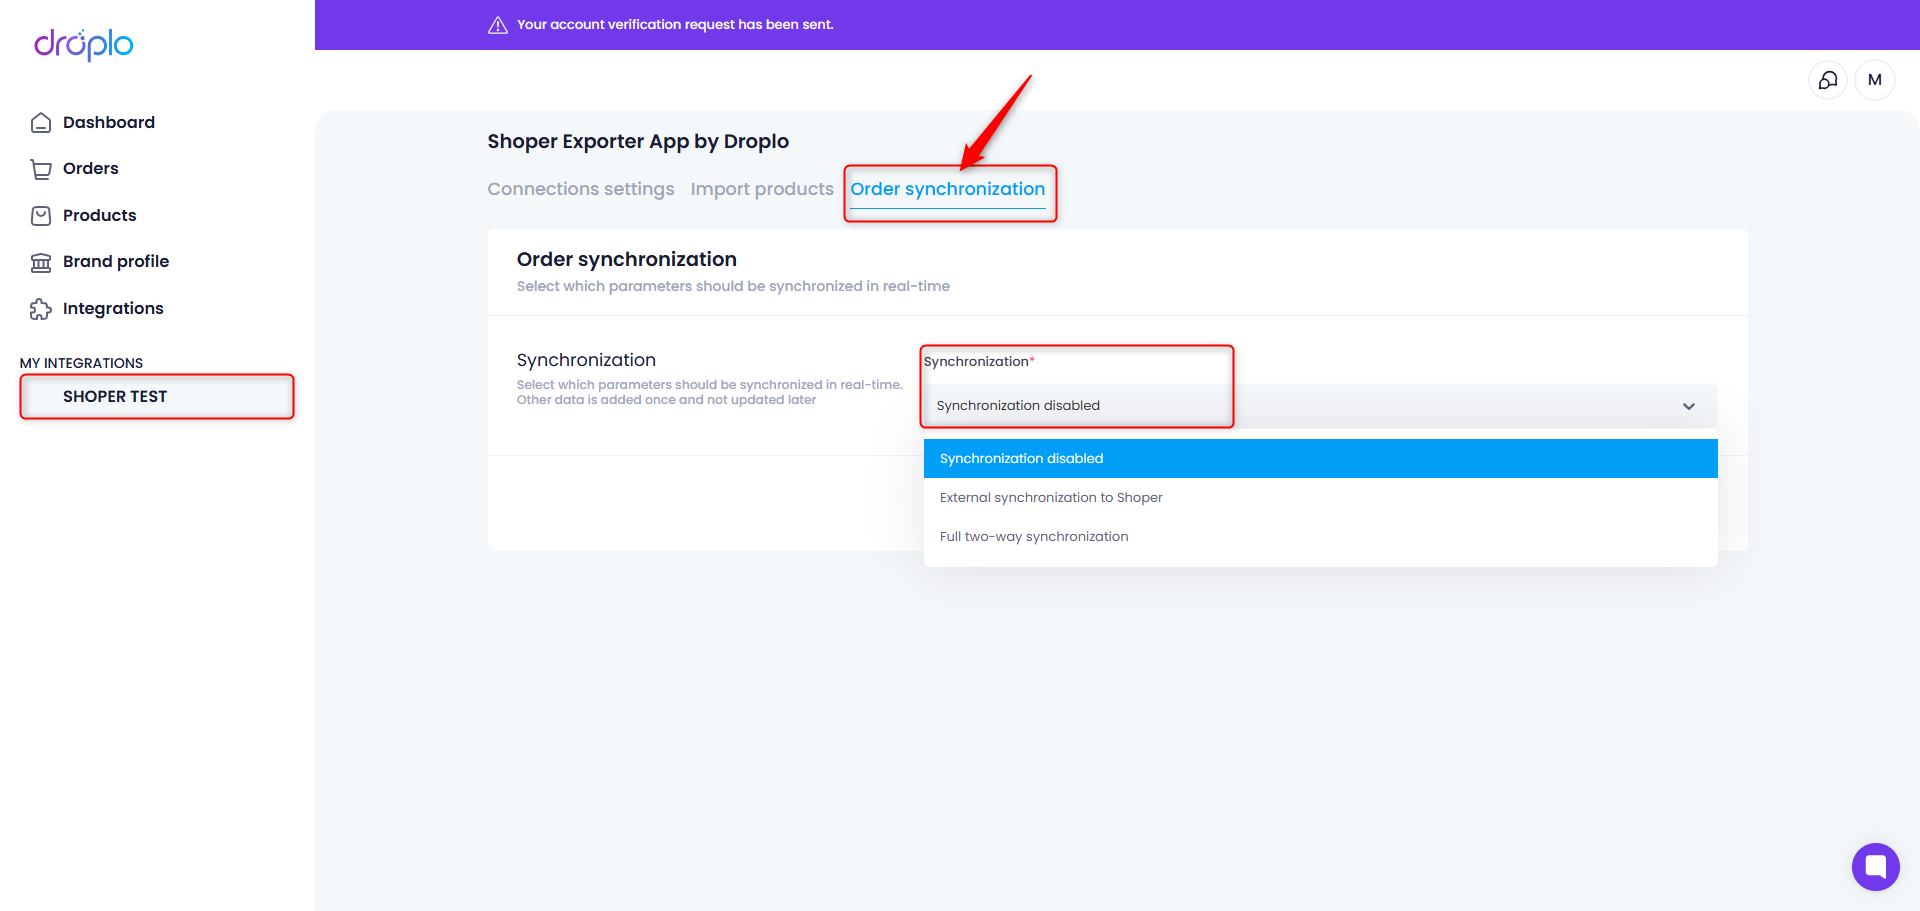
Once the connection to Shoper is properly established, a new tab will appear in the integration: Order Synchronization.
Here you can determine whether Droplo should exchange order information with your Shoper account.

Here you can choose from the available options:
With this setting, Droplo will not send new orders to Shoper.
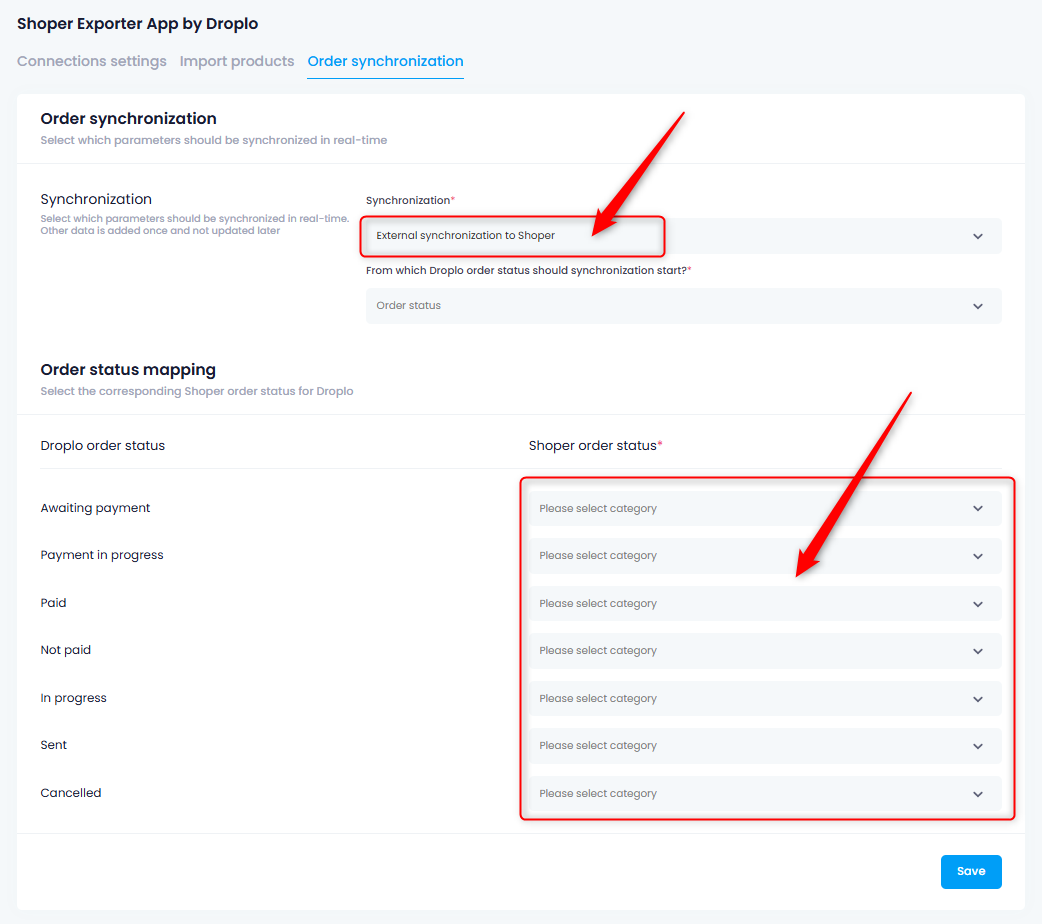
When you run this setting, all new orders that appear in your order list in Droplo will be imported to the panel in Shoper.
However, once an order is transferred, Droplo will not retrieve information about changes made on the order side in Shoper (one-way synchronization).
Selecting this setting, you will notice a new section where order statuses in Droplo should be linked to statuses on the Shoper side.

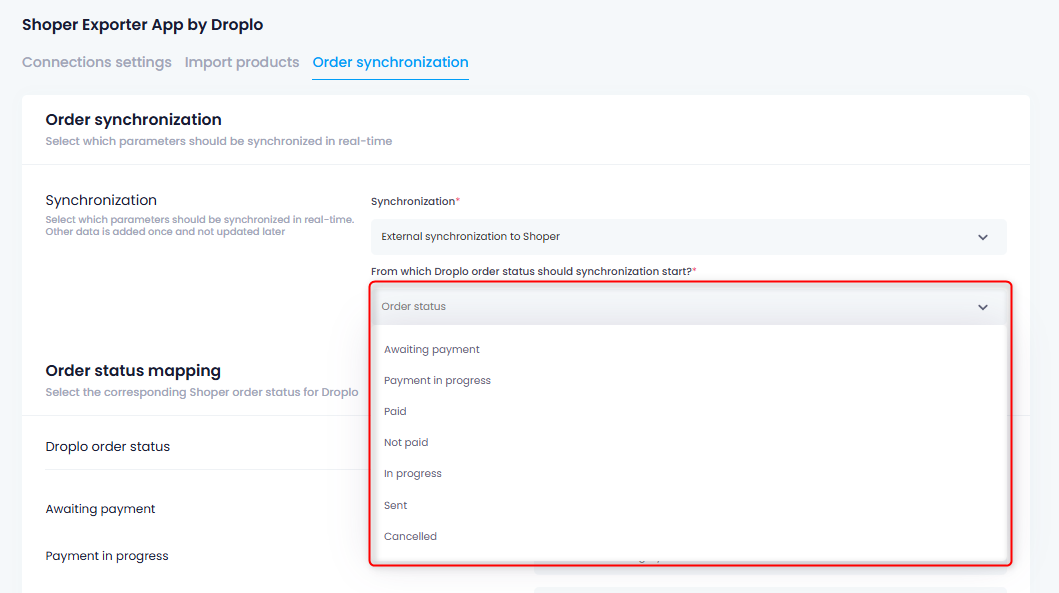
Also specify for which order status in Droplo, the order should be sent to Shoper.

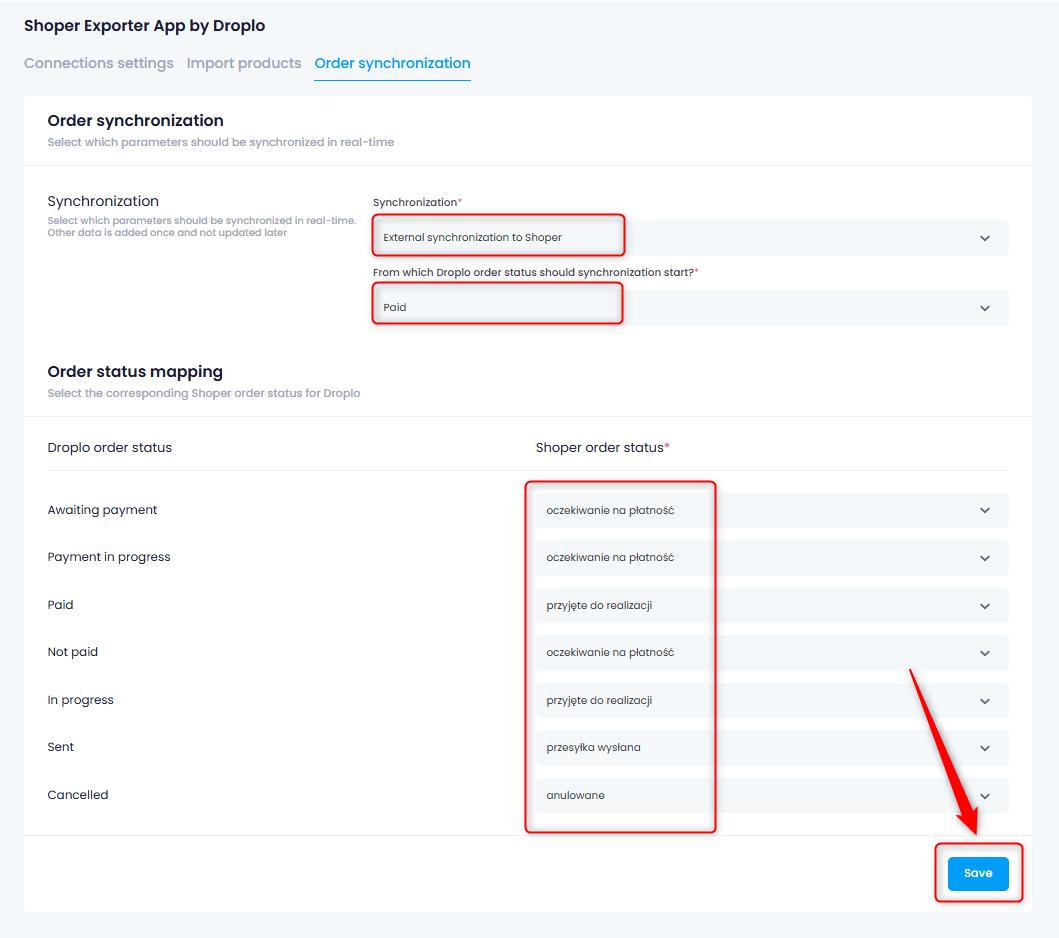
After completing all the required information, save the changes.

From then on, orders will be automatically and continuously sent to Shoper.
This setting will cause all orders created on the Droplo side to be transferred to your panel in Shoper. The orders will then be synchronized in real time in terms of status and shipment list (two-way synchronization).

Adequate to external synchronization, here you also need to complete the status for which orders will be sent from Droplo to Shoper.
The order will send to Shoper only when the product order on the Droplo side receives the status specified in the settings.
For example:
Selecting the “Paid” status will trigger an automation that will catch any order with this status in Droplo and import it into Shoper.