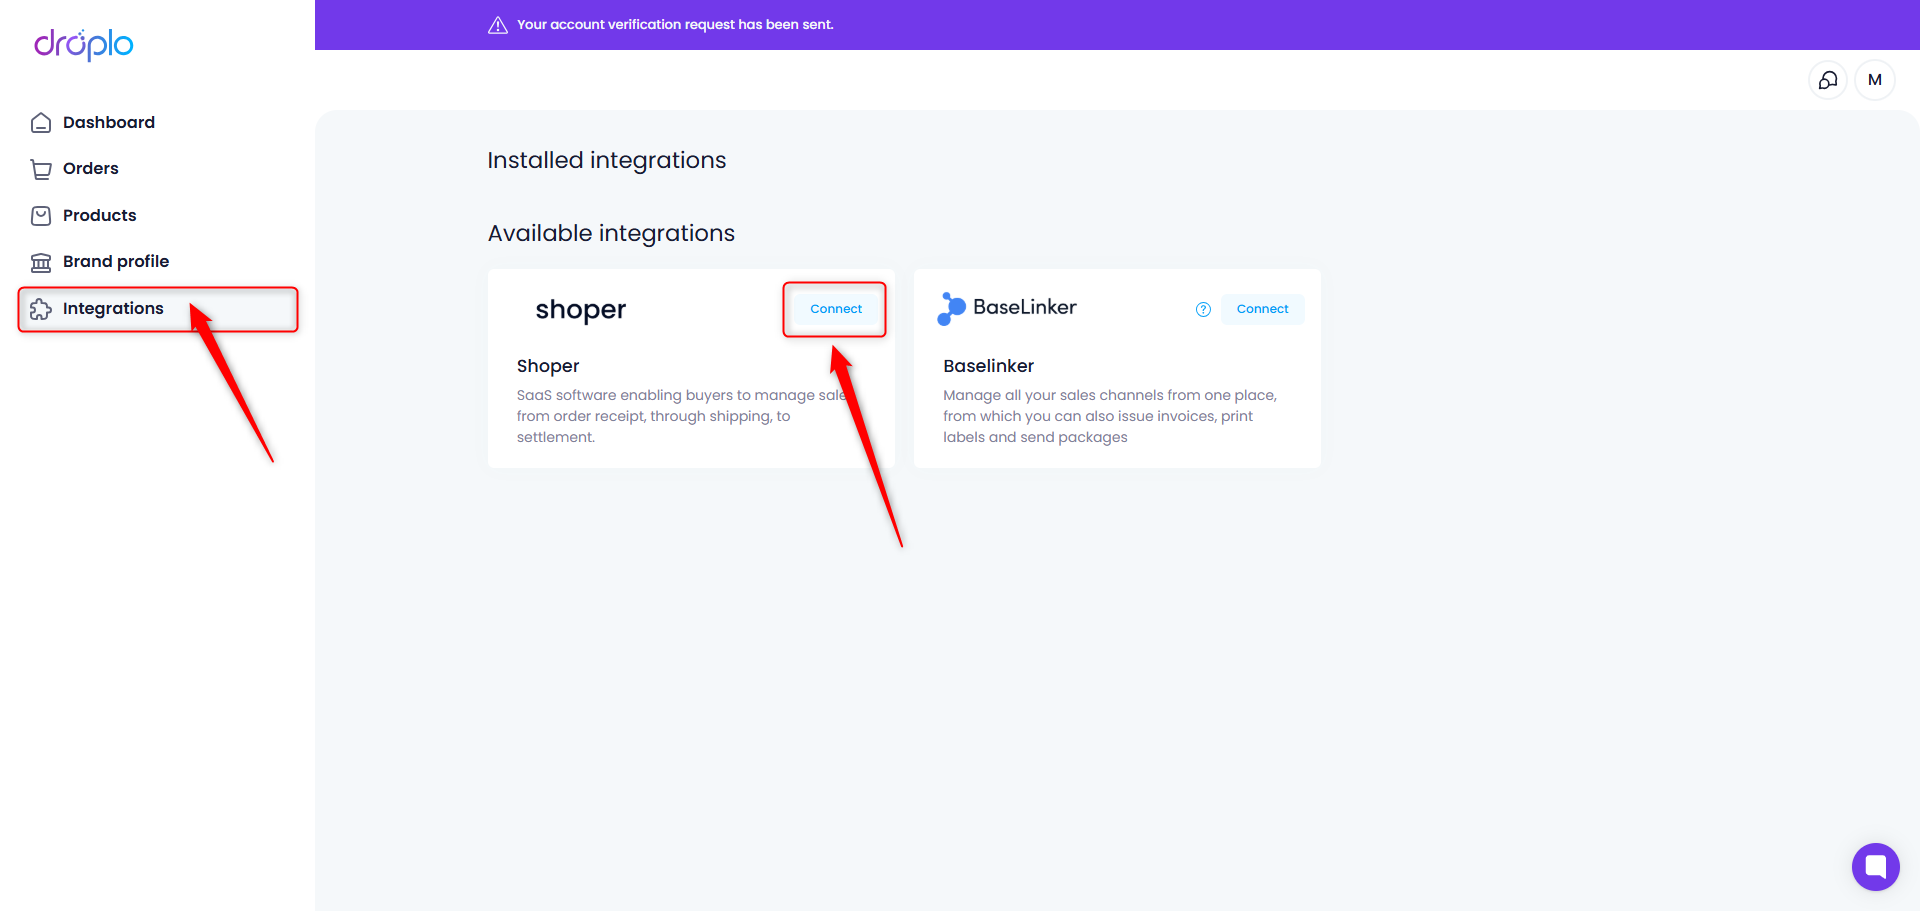
Firstly, log into your account and go to the Integrations tab, then click Connect next to the Shoper integration.
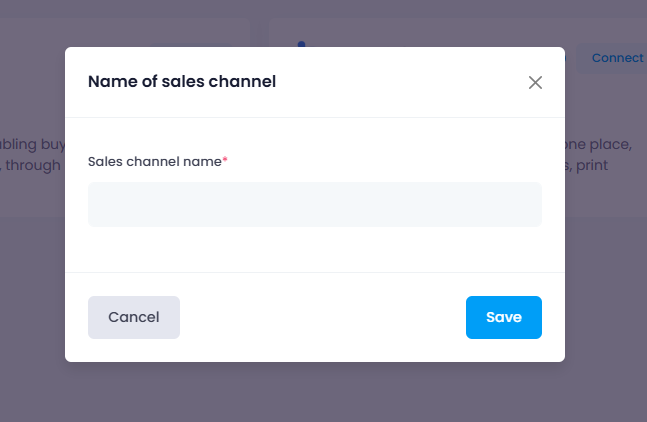
A new window will appear where you can give a name to your integration. Enter it and save it.
In the left menu you will see a new section called MY INTEGRATIONS. In this section you will find the Shoper integration tab, so you can easily access its settings.
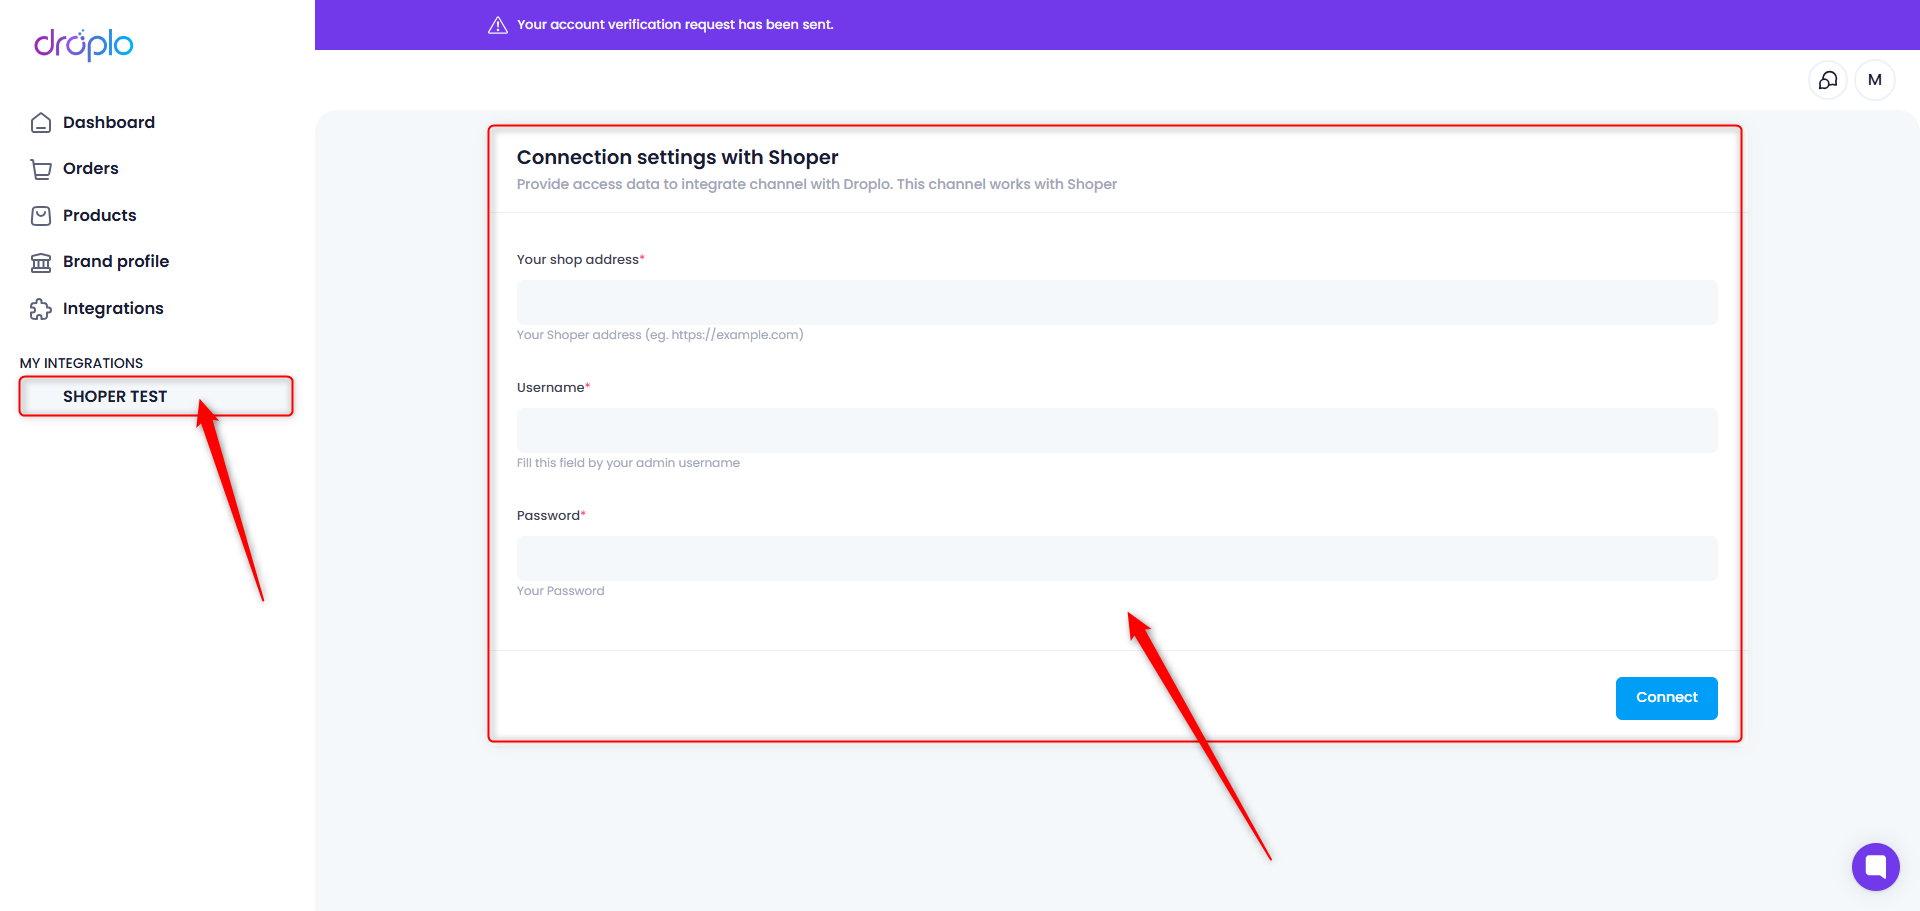
You will be taken to the connection setup window. To go through this step, you need to get authorization data from the Shoper admin panel:
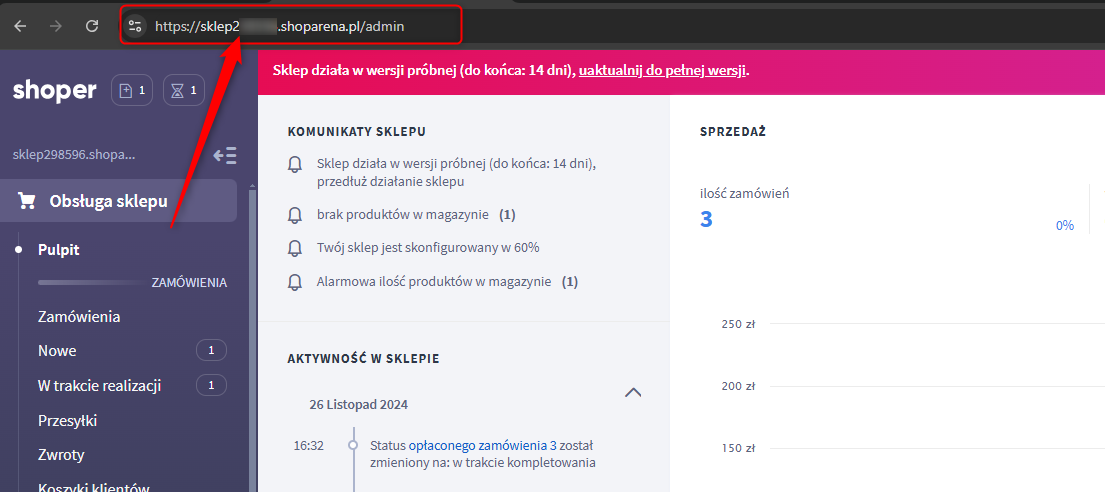
The URL of your store
User name (Shoper)
Password (Shoper)

Fill in the blanks in Droplo using your store's domain address and login and password.
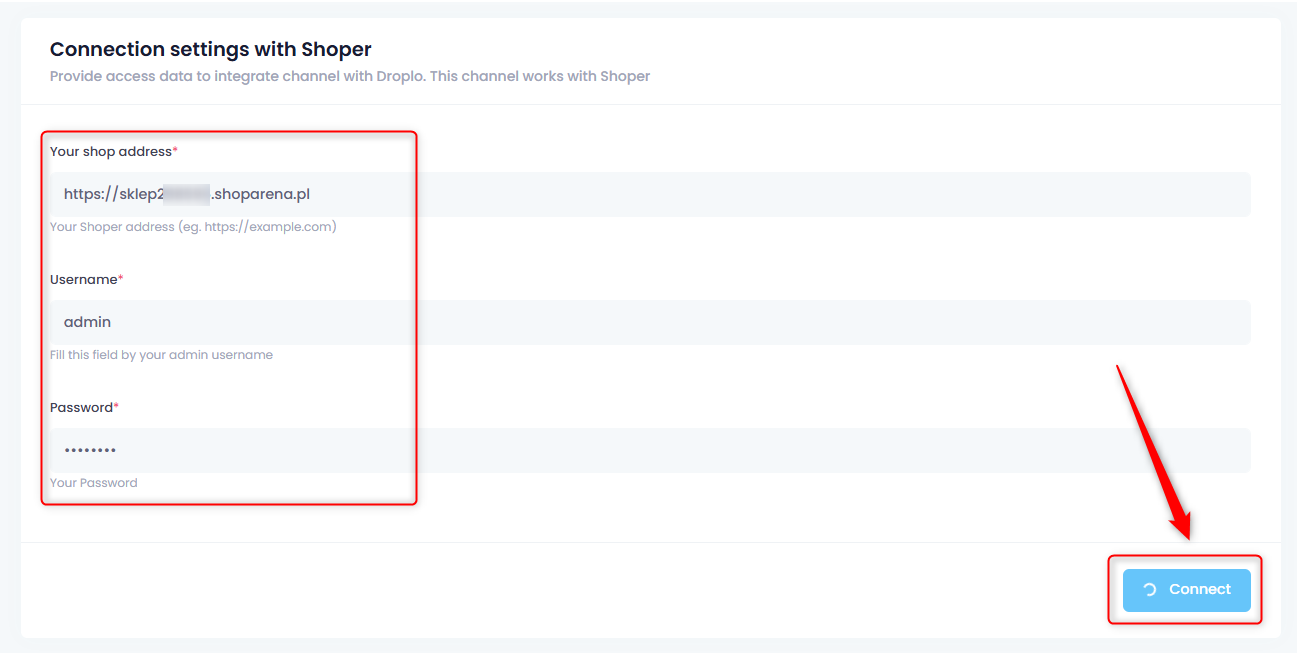
Finally, click Connect. The connection to Shoper will be established within a few seconds.
