Follow this instruction to successfully integrate Droplo with your Shopify store and list products in it. 🙂
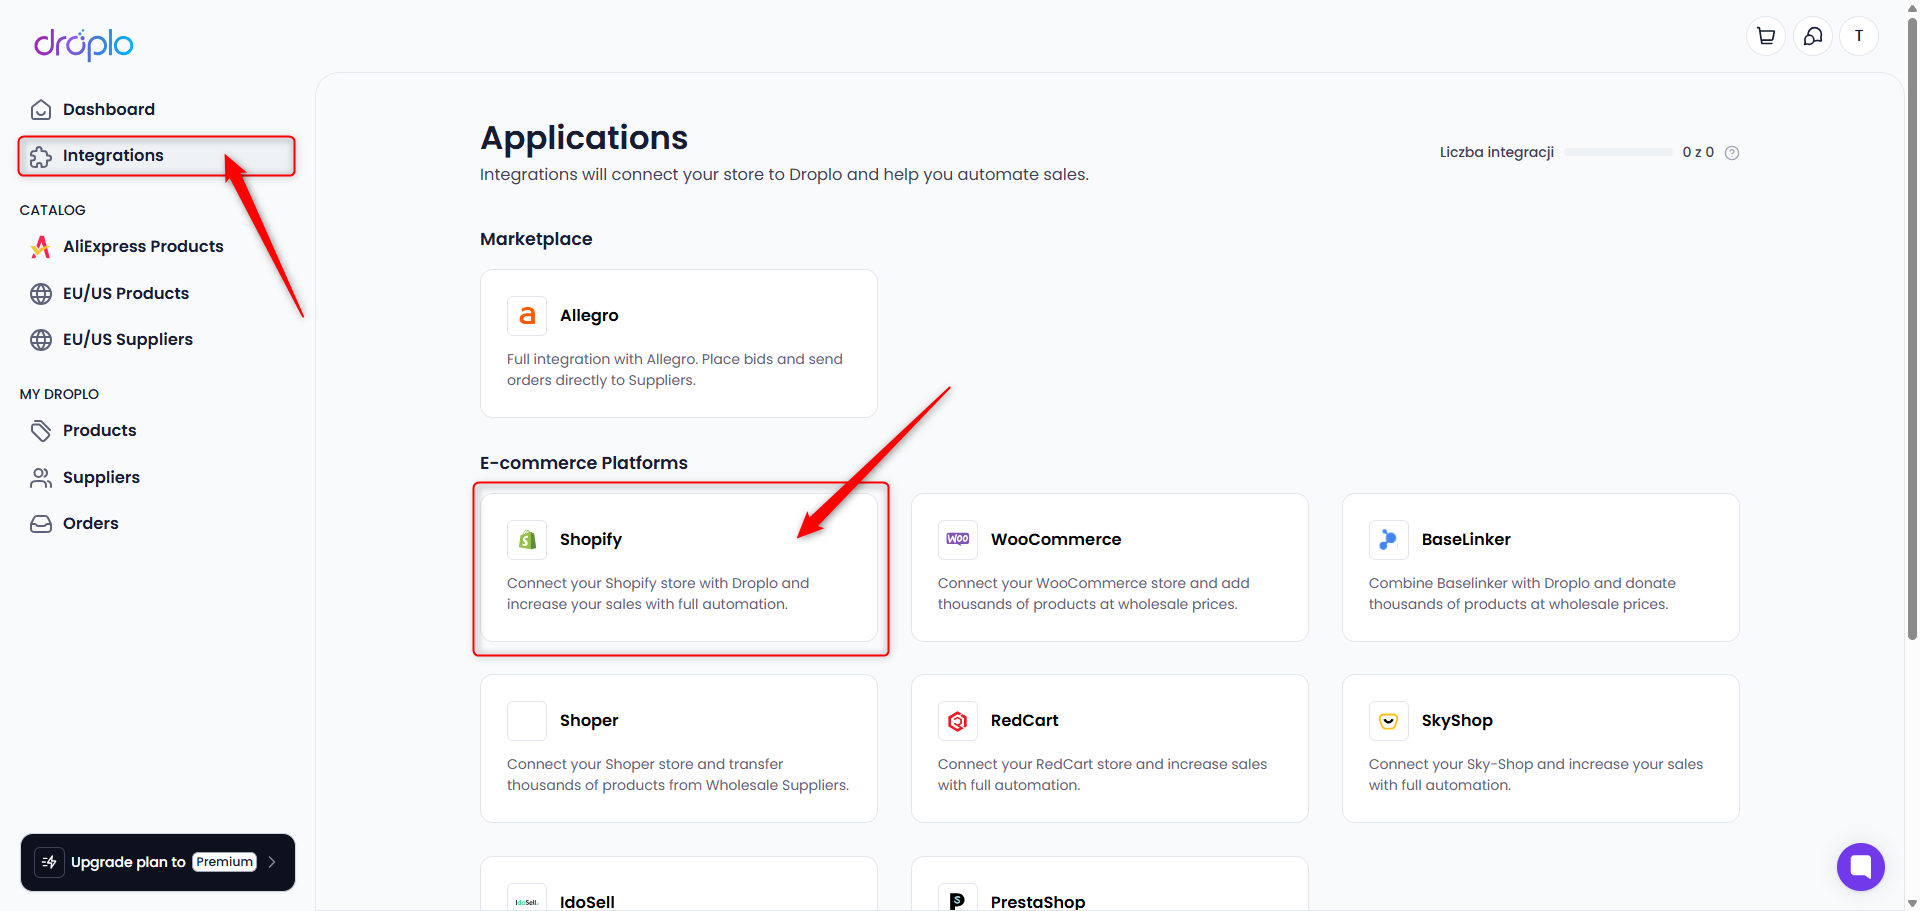
Go to the Integrations tab and click on the Shopify card.
A description of the integration will open. If you want to activate access right away, use the Purchase access button.
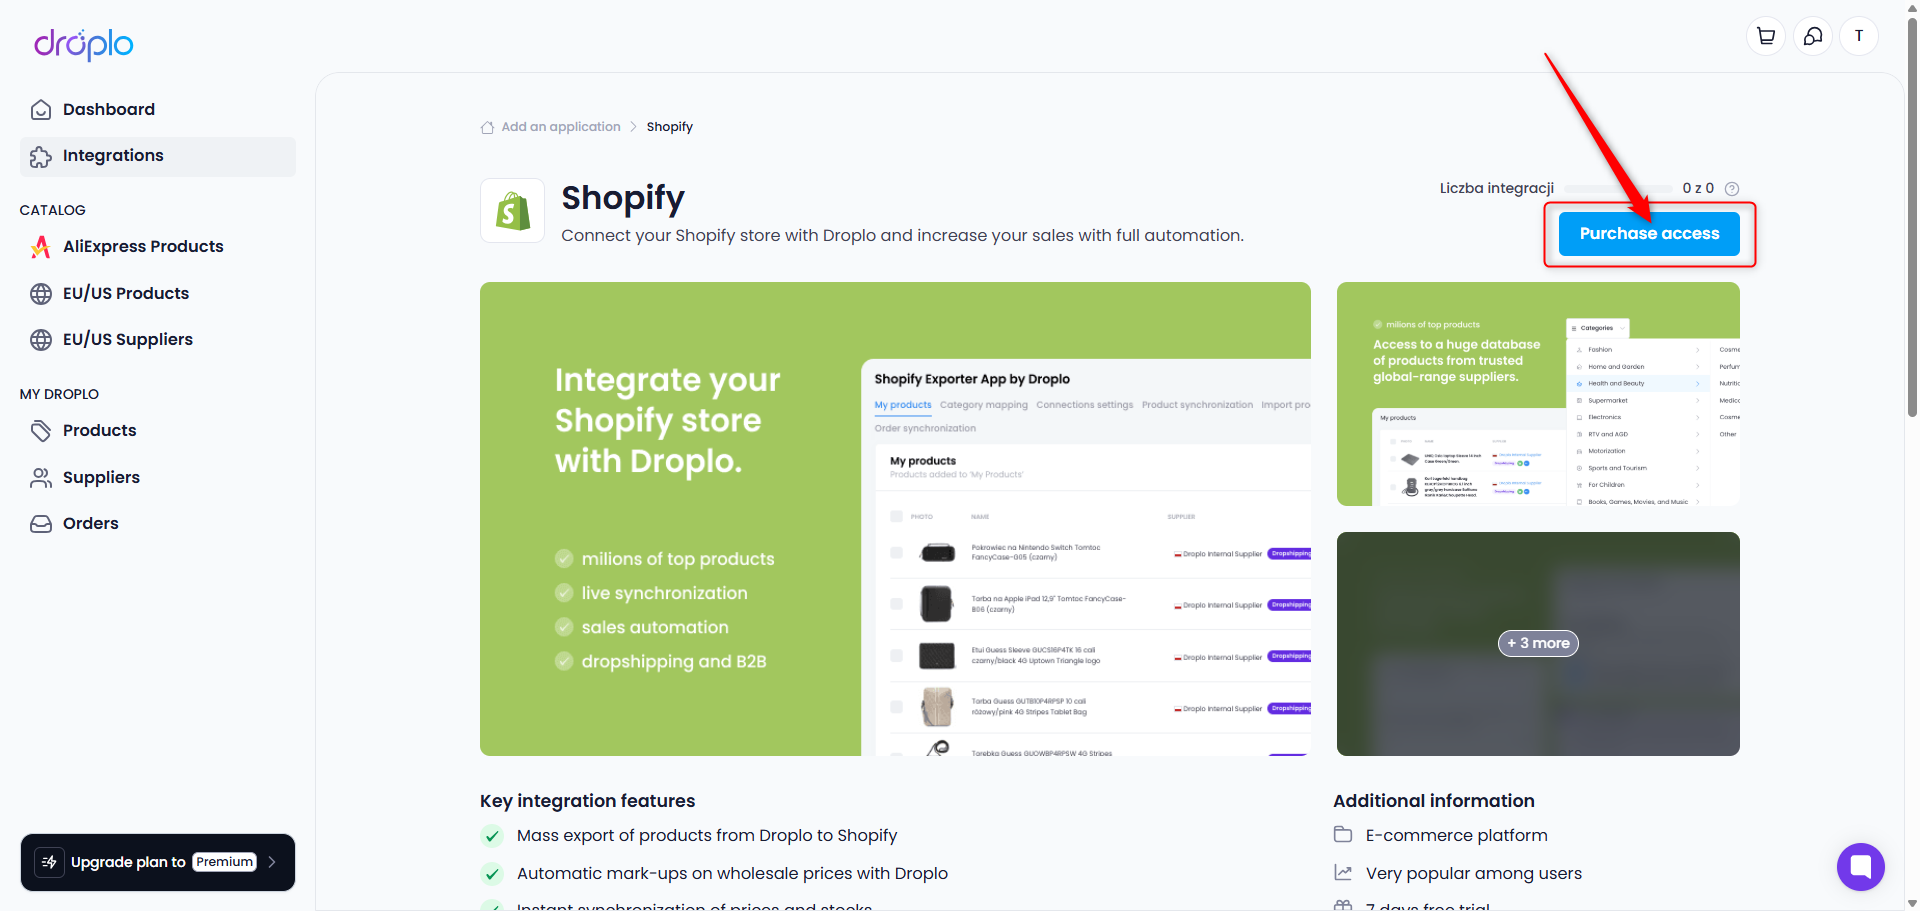
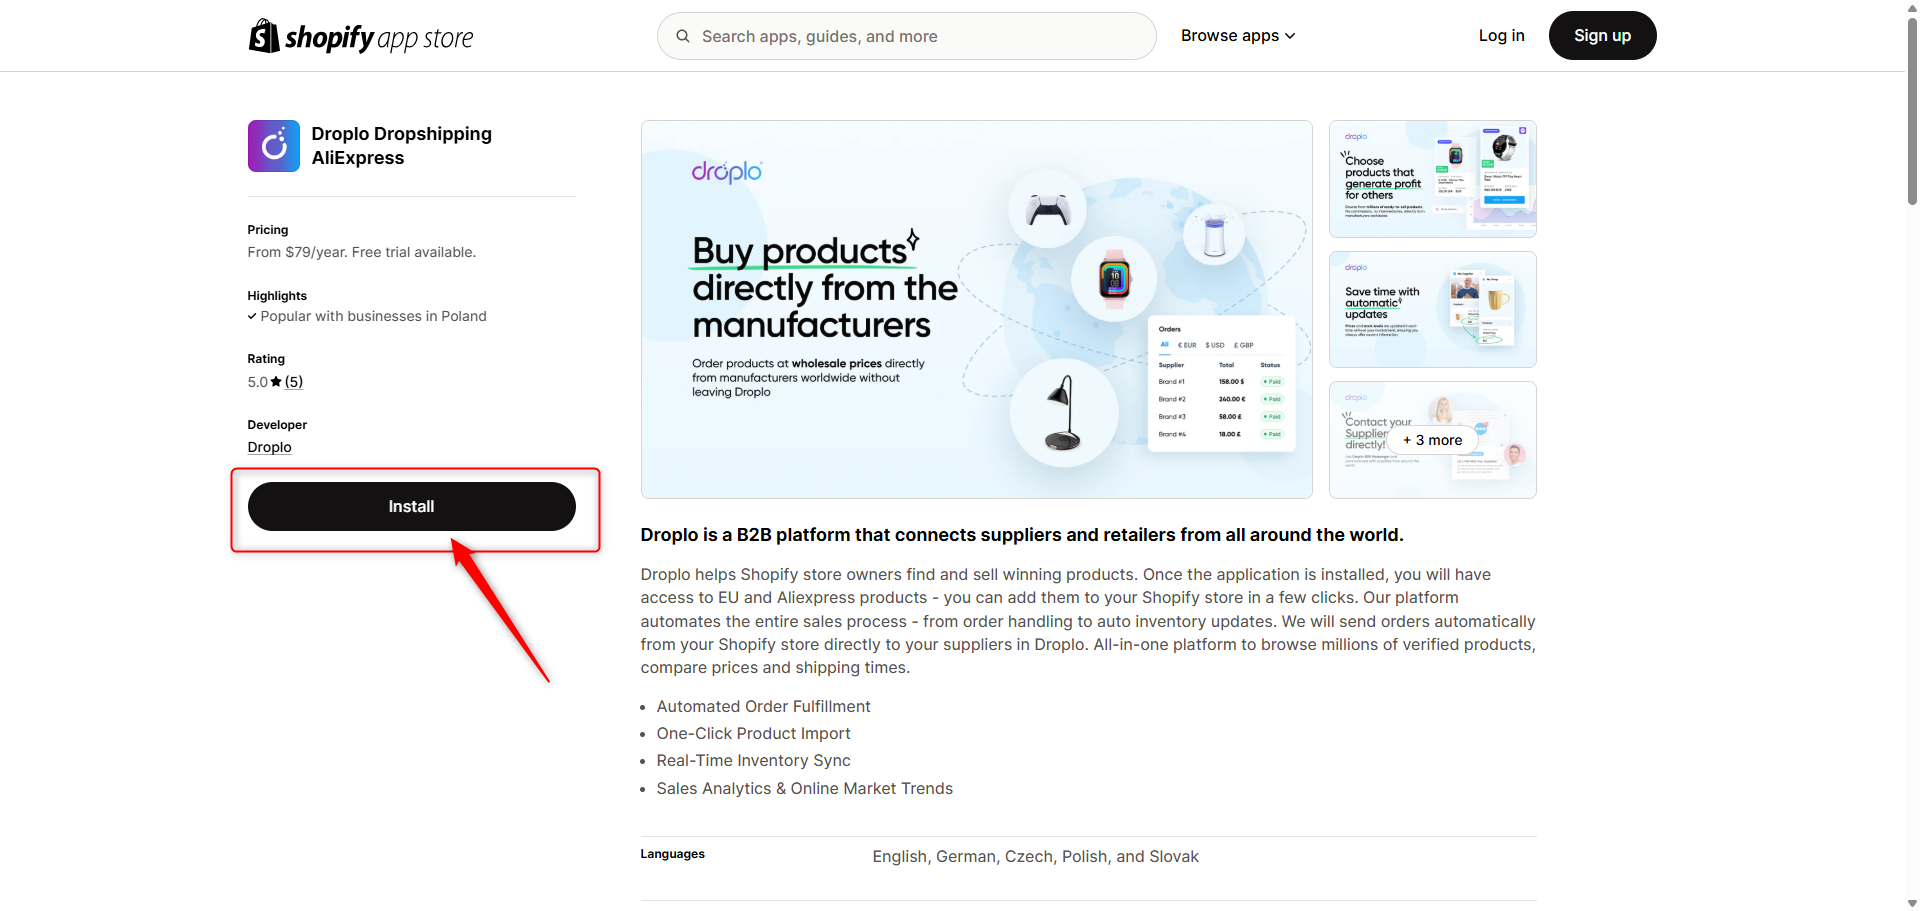
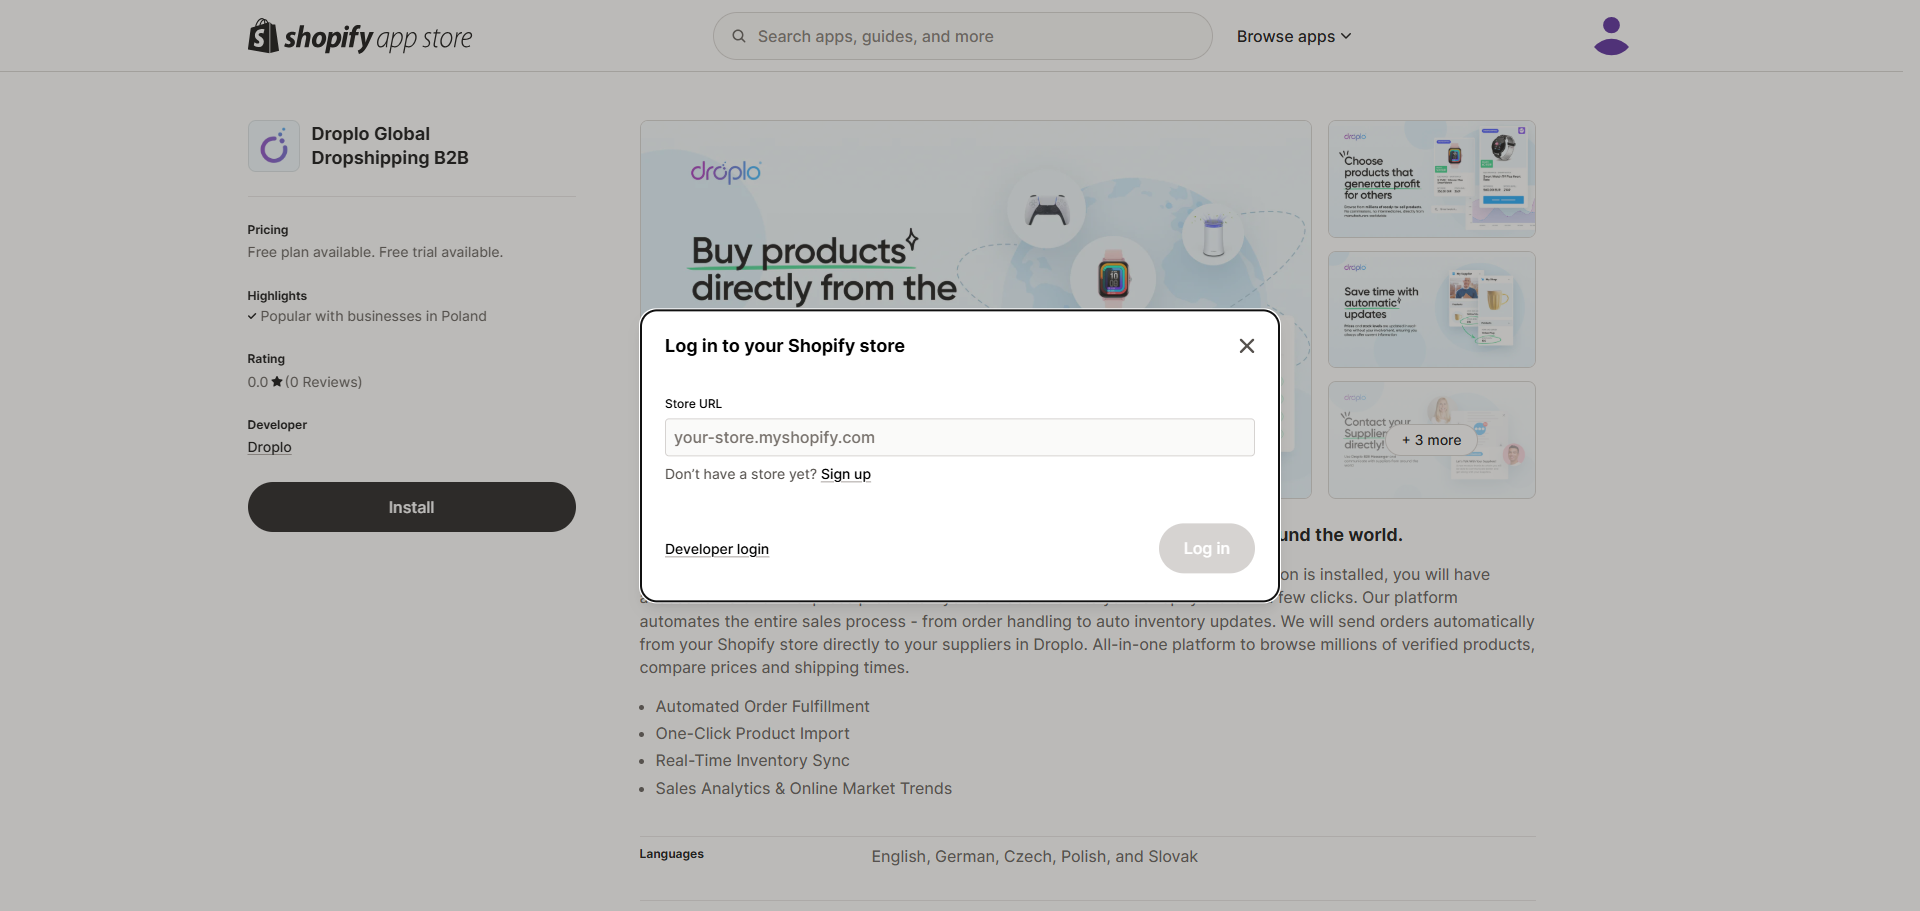
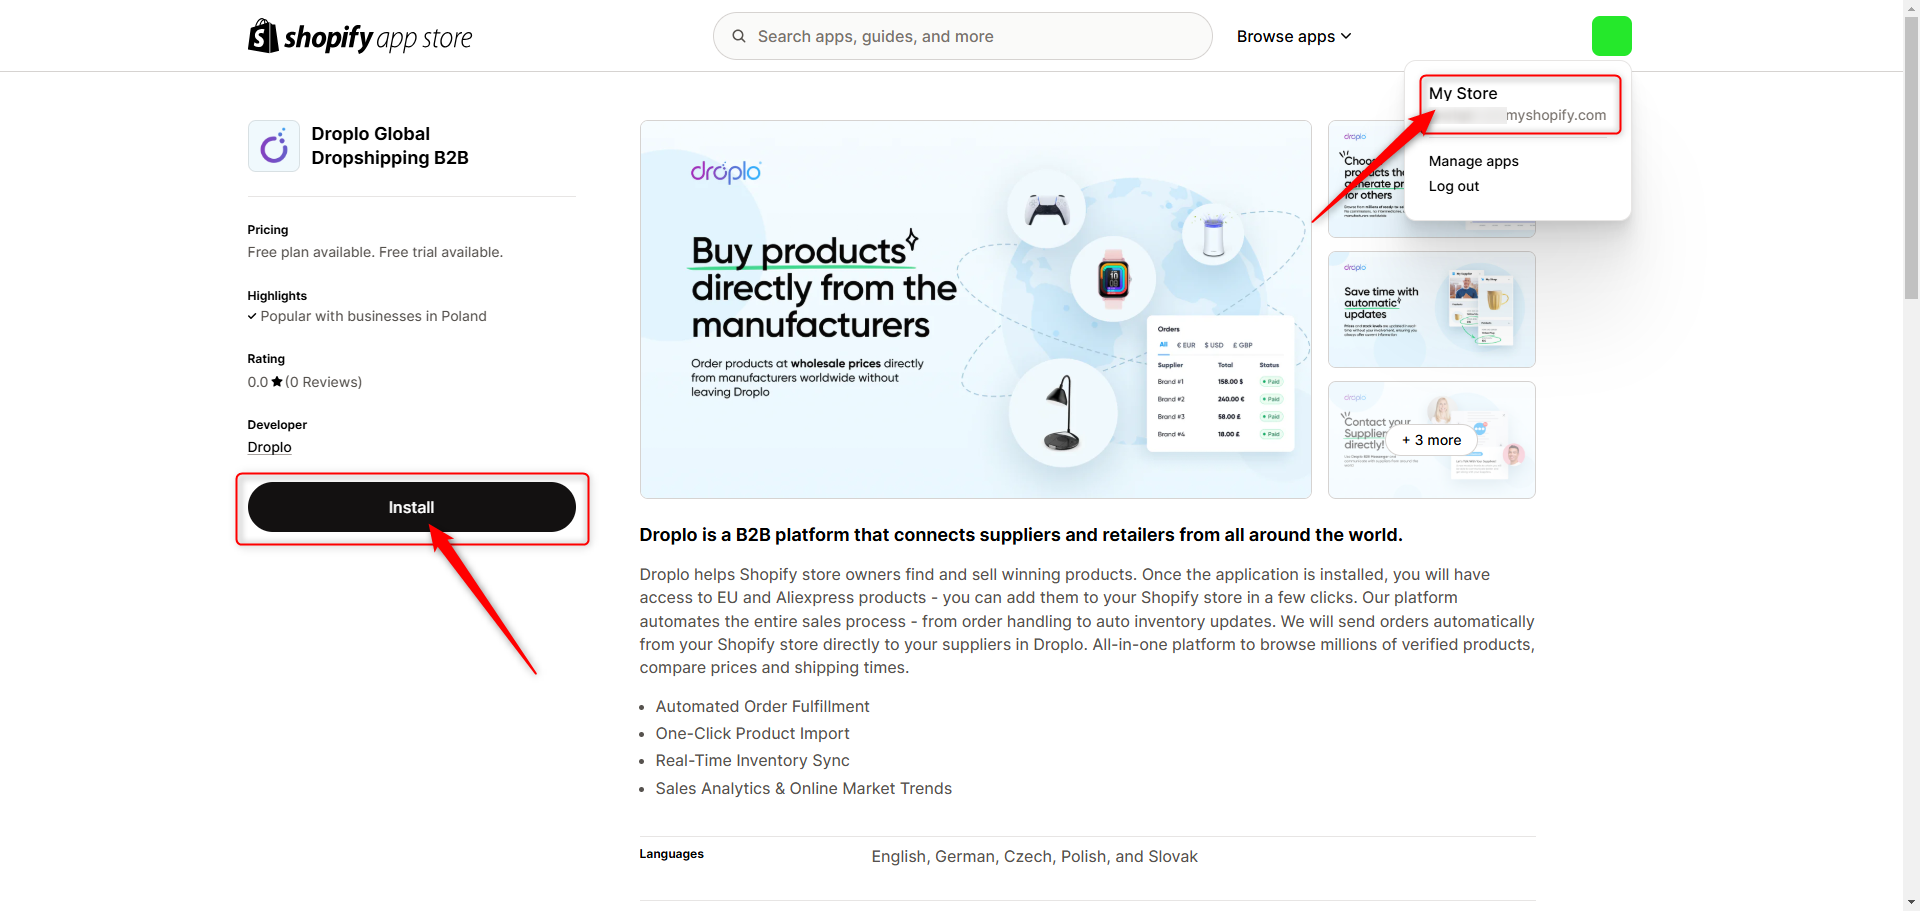
You will be taken to the Shopify App Store, where you should install the Droplo app:
If you were not logged in to Shopify, you will be redirected to the login panel. Log in to your account to proceed.
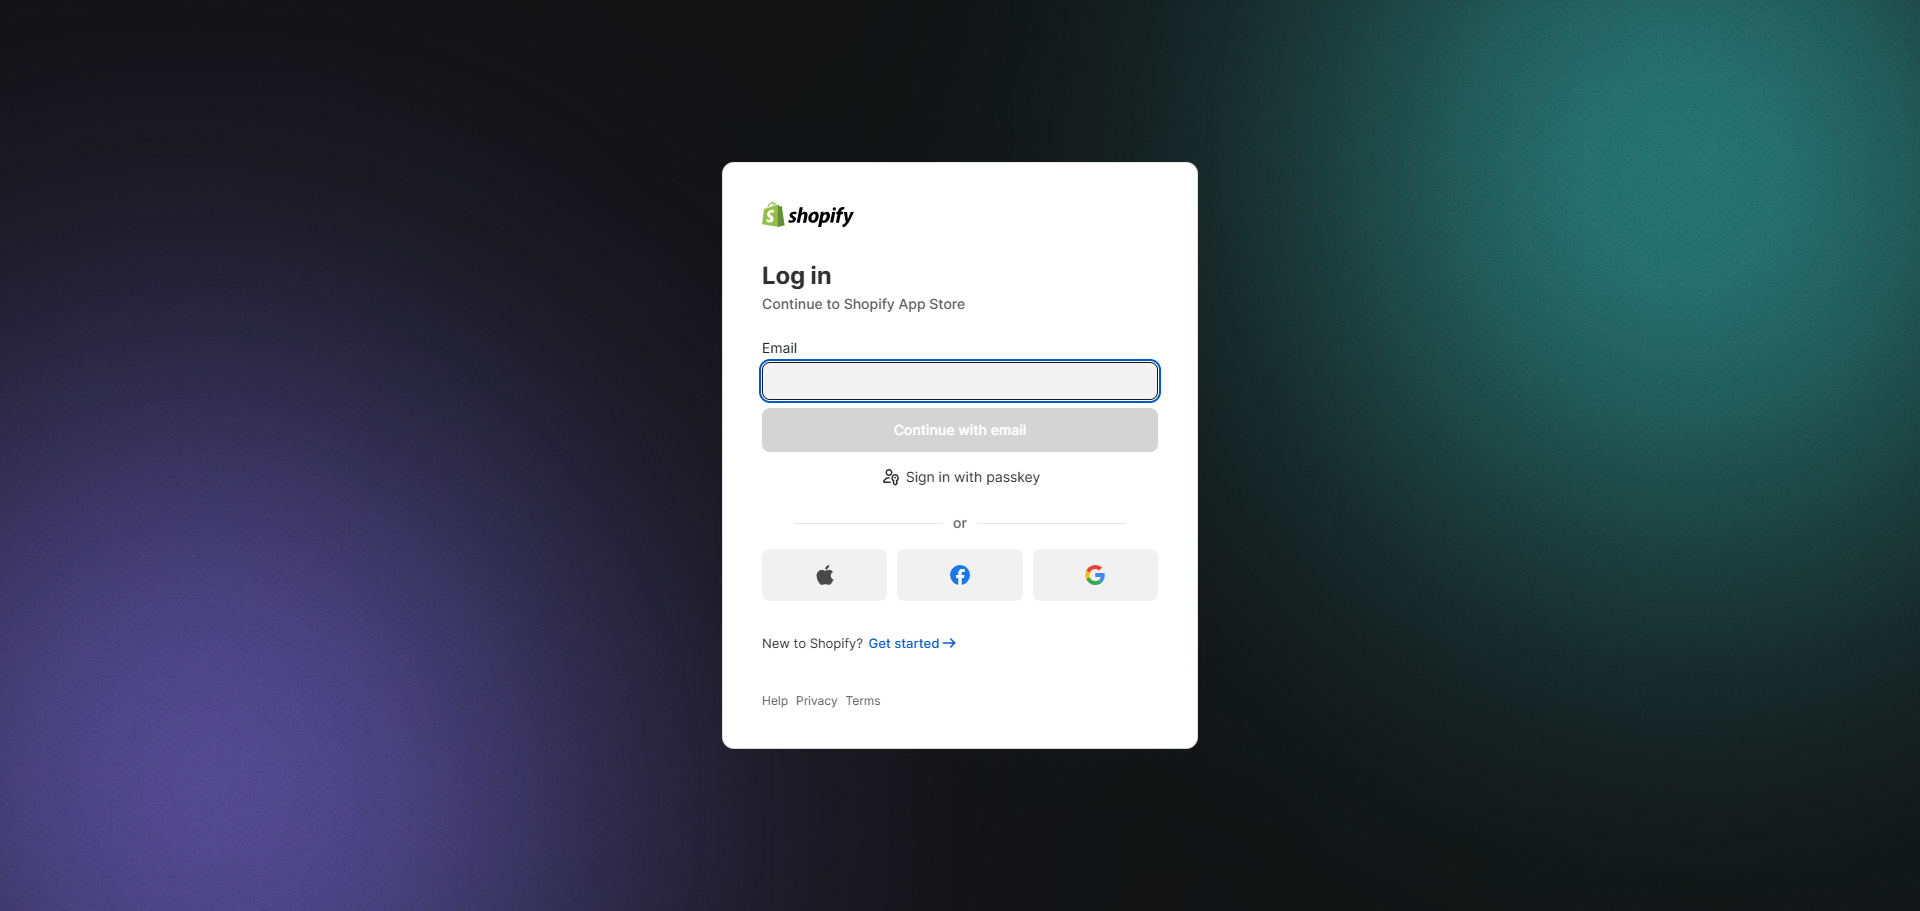
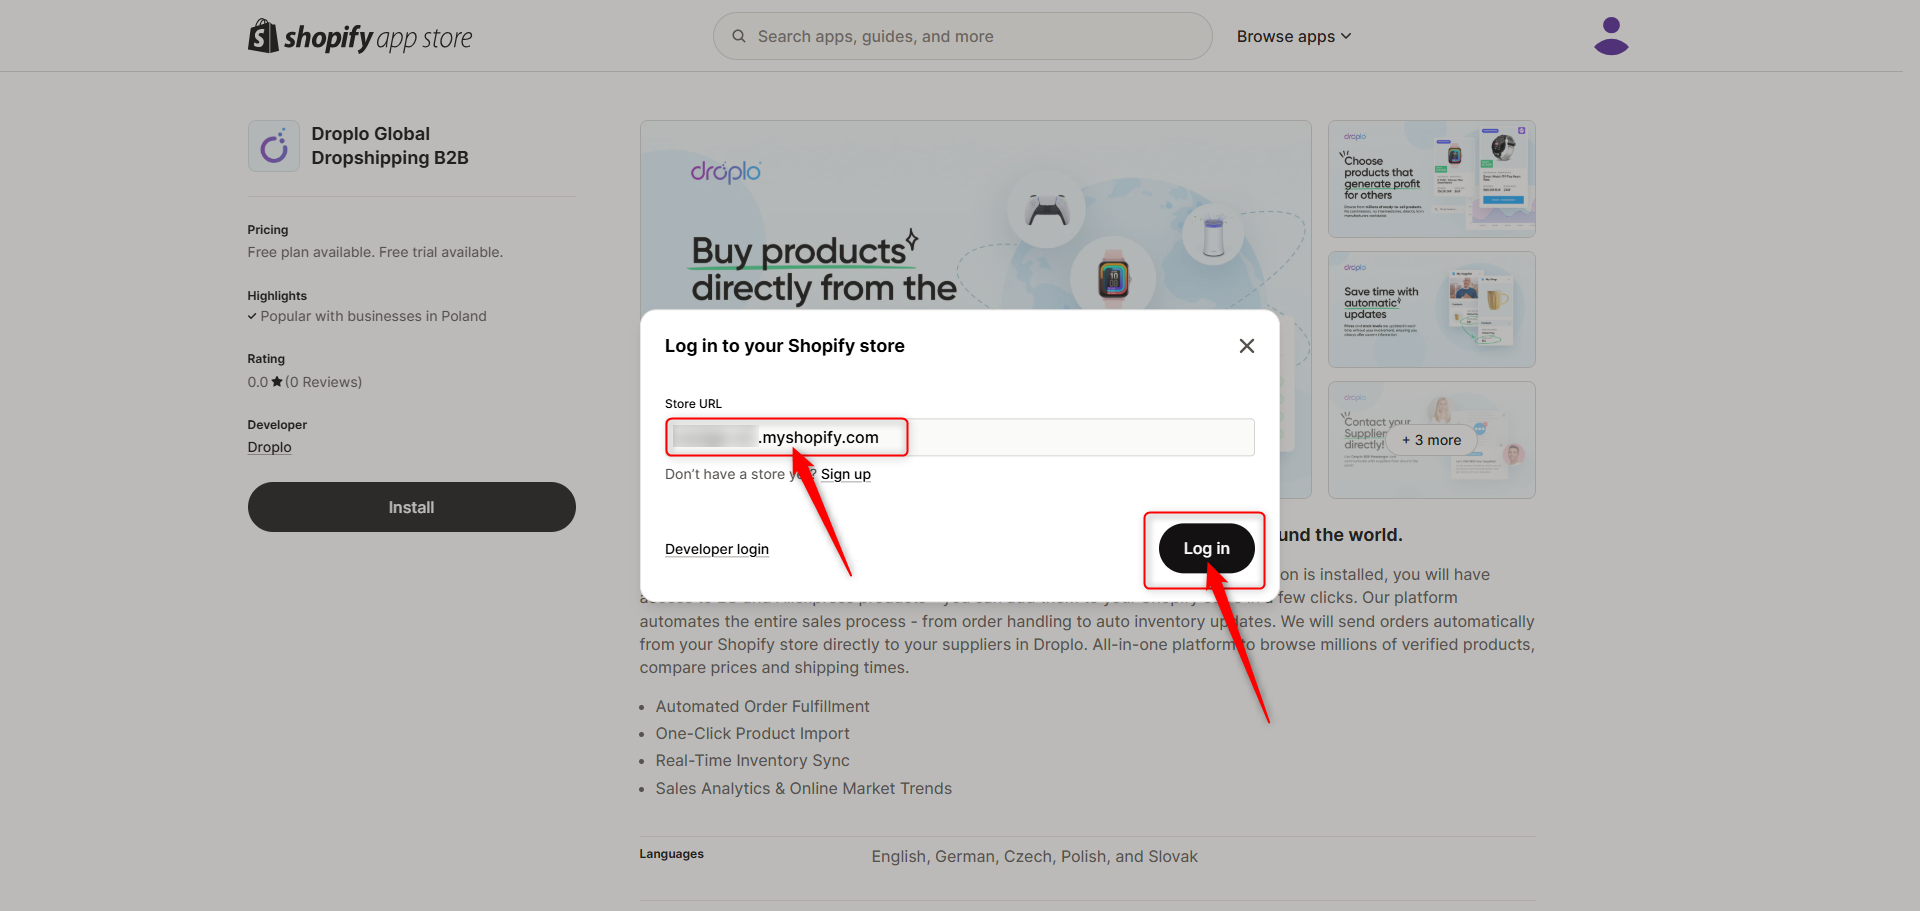
A new window may appear if you need to enter the URL of your Shopify store.

You can find your store’s technical domain address in your Shopify panel by navigating to Settings and then selecting the Domains tab.
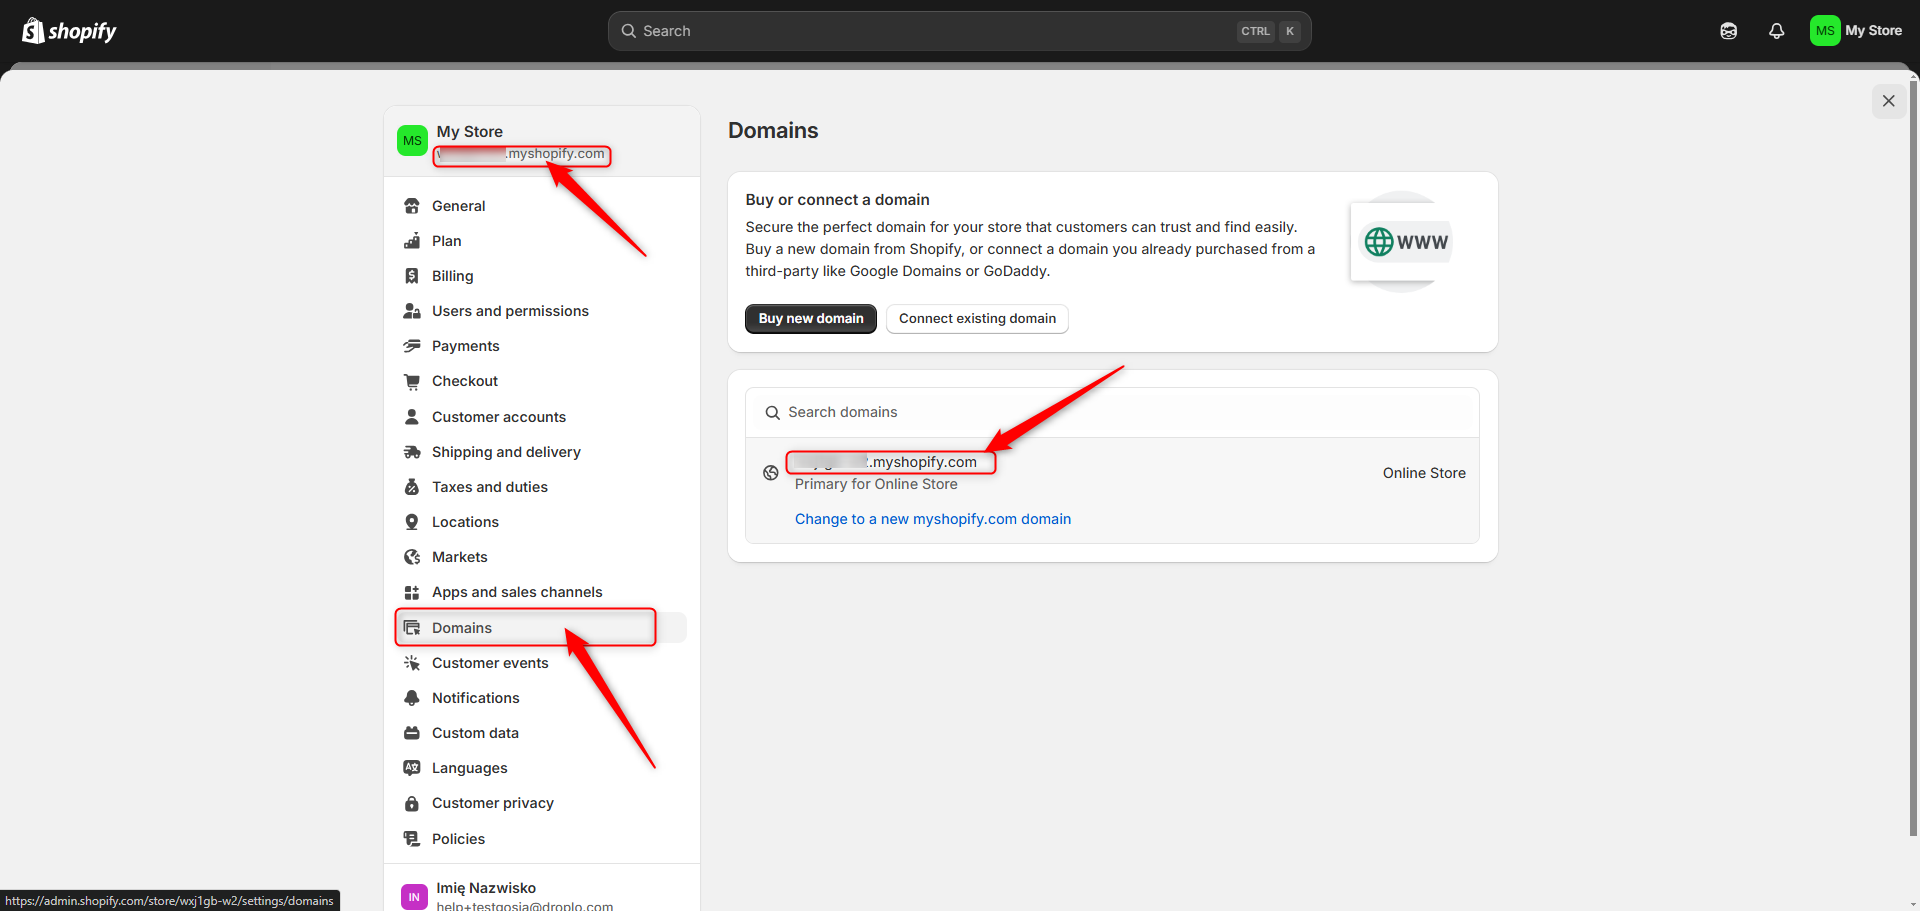
After entering the domain address (without the prefix https://) use the button Log in. This will allow the Droplo application to be installed in your store.
You are now logged in to the Shopify App Store panel as a shop. You may use the button Install again to finalize the installation of the application for your store.
A page will appear where you need to accept Droplo's access to your store's resources; this is also where you accept our privacy policy.
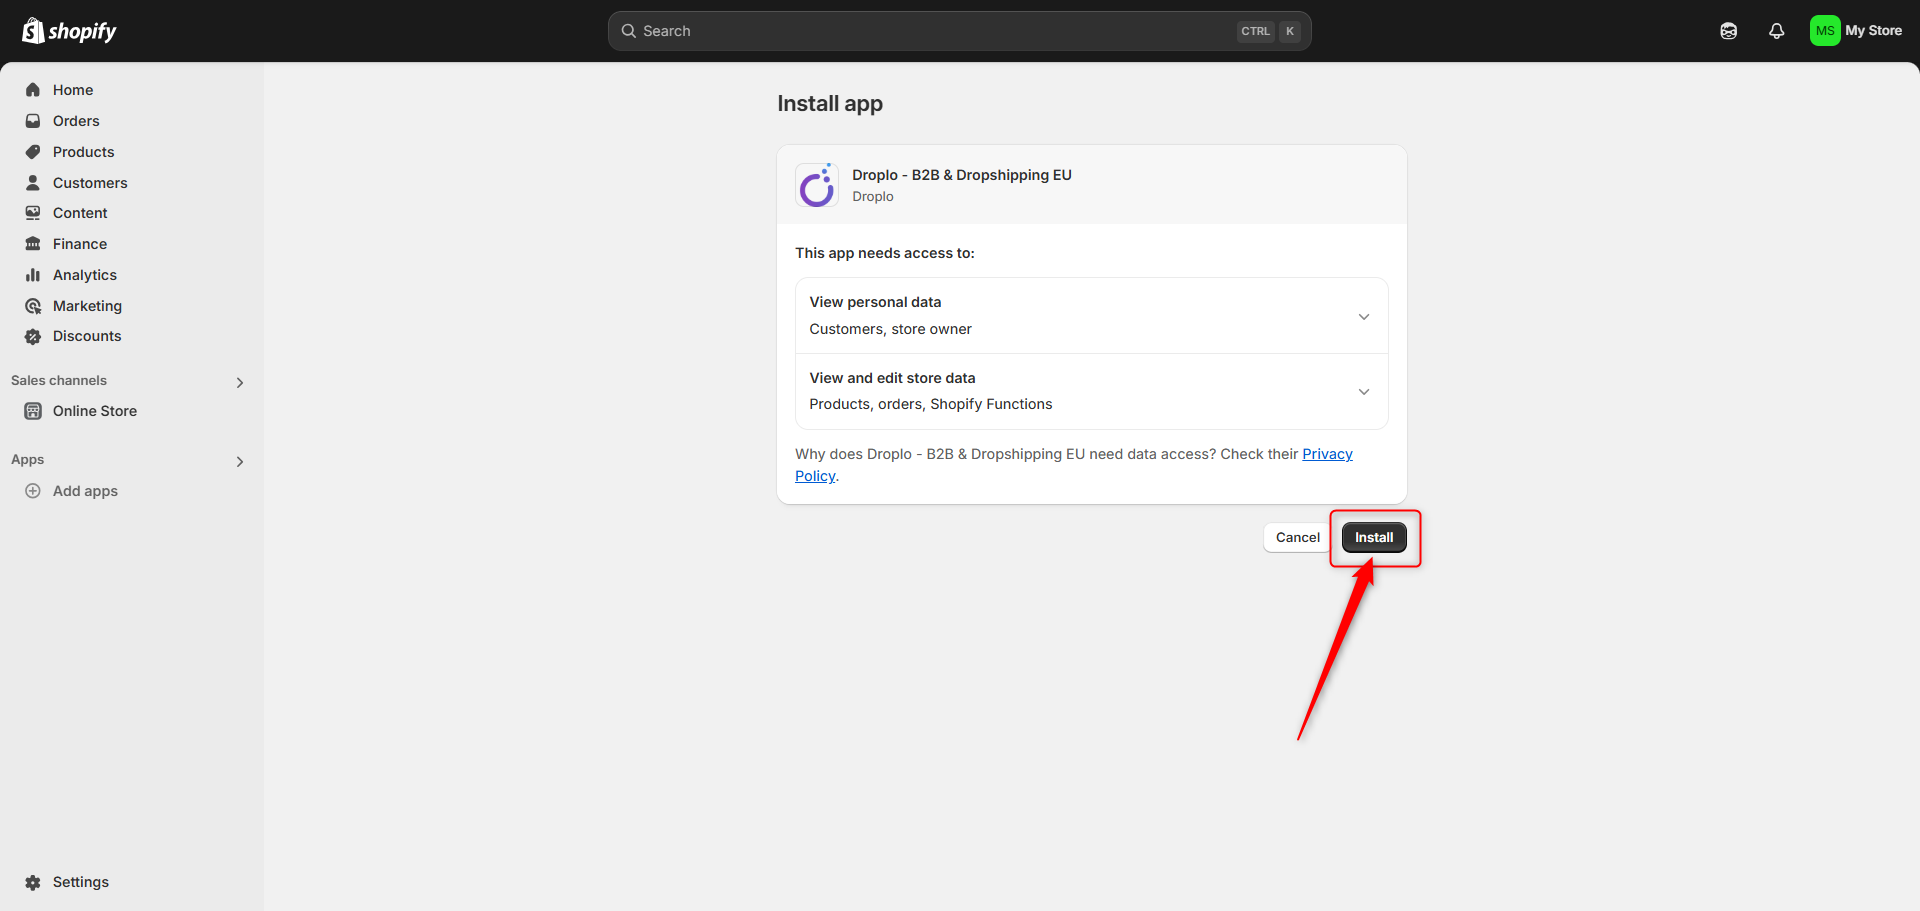
Next, you will be redirected to the Droplo panel.
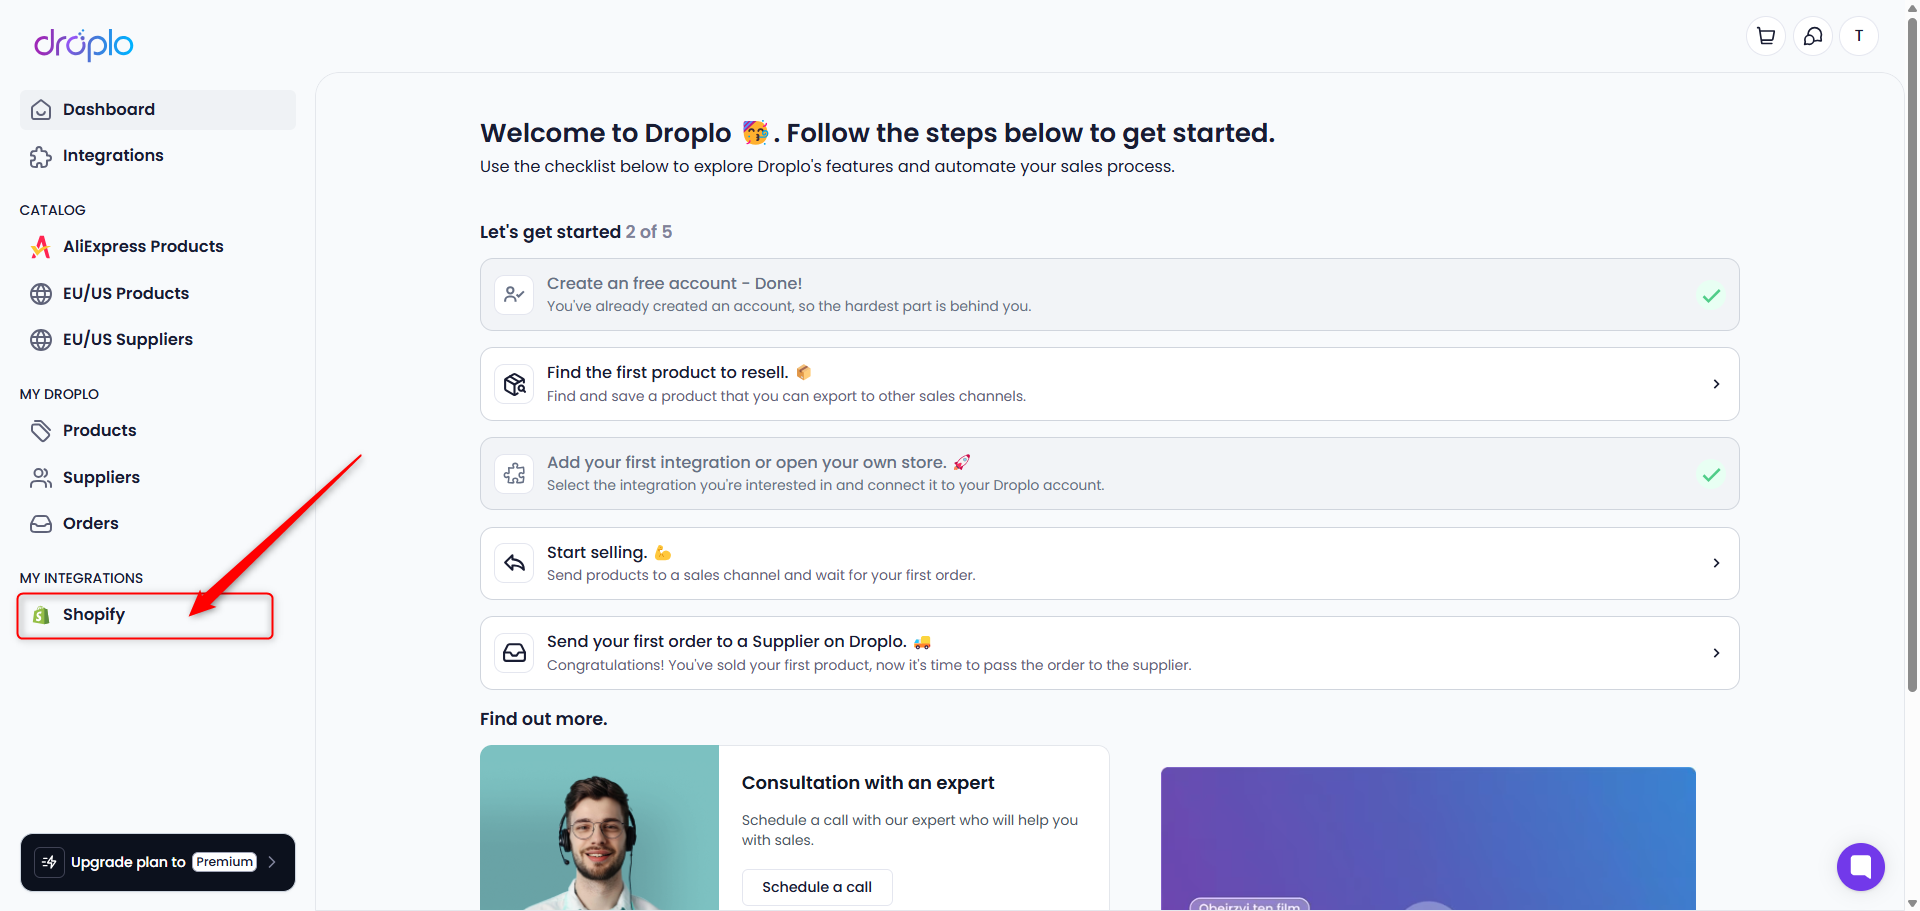
In the main menu on the left side of the panel in the MY INTEGRATIONS section, you will find a shortcut to your Shopify integration. Click on it to open the configuration panel.
You will gain access to the application Shopify Exporter by Droplo. This tool provides the ability to manage integration with your Shopify store.
In the exporter, you can easily configure various integration parameters, such as:
Global price markup
Currency
Automatic synchronization of prices and stock levels
Warehouse
Product export language
Tax value
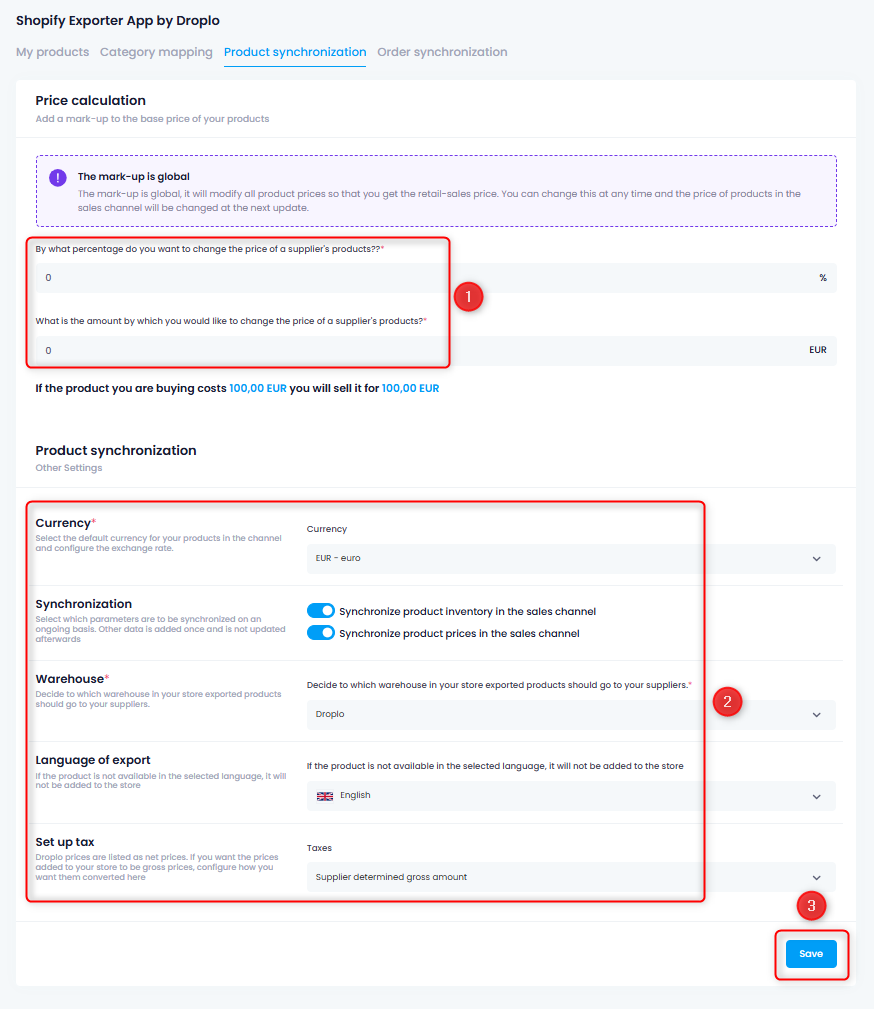
After completing the setup, select the Save button.
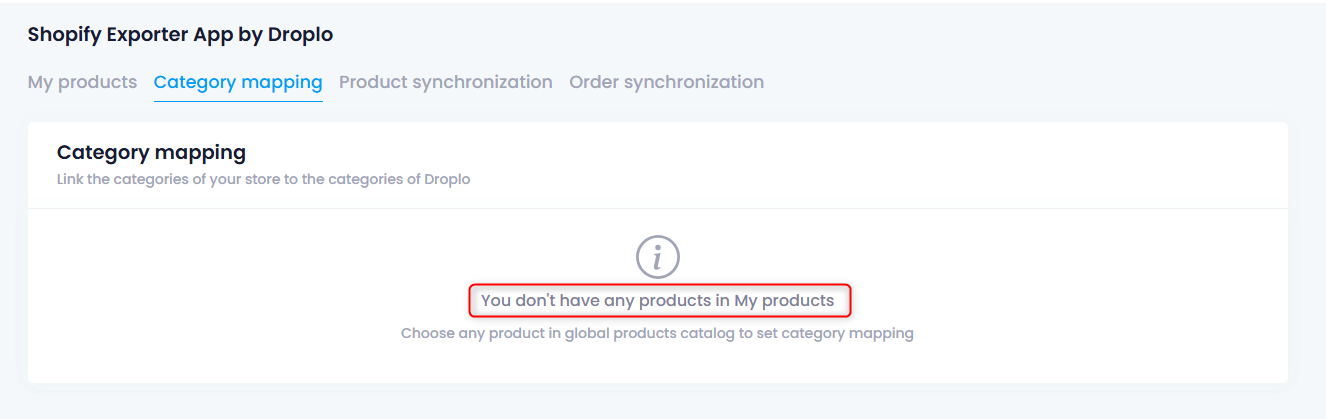
If you have already created categories in the Shopify panel, you need to map these categories with Droplo before exporting products to the sales channel.
Go to the Category Mapping tab (1) and assign the Droplo categories to the related versions of categories from your store (2).
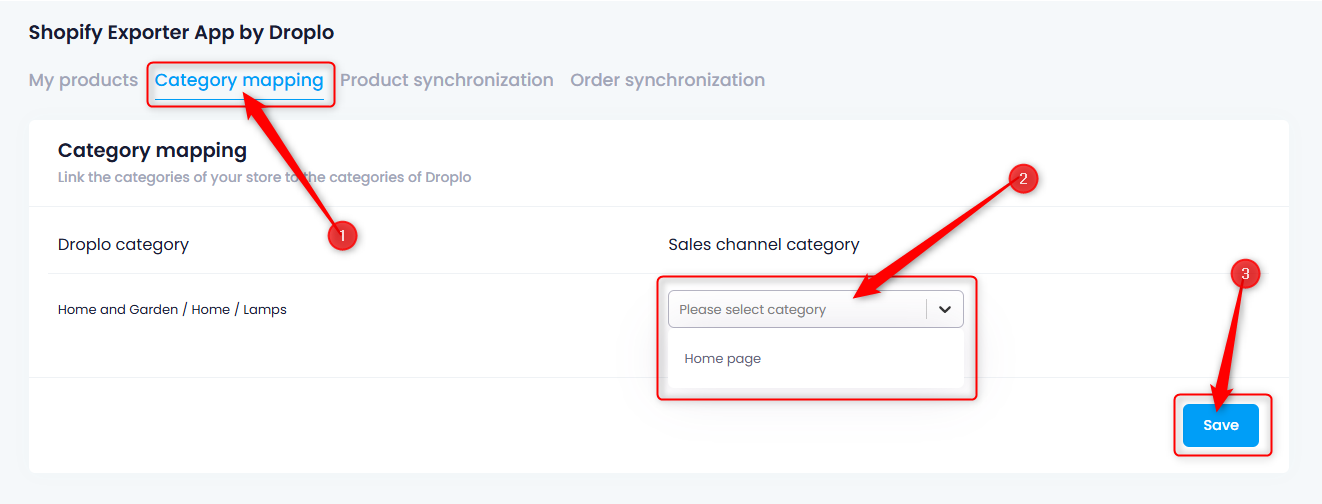
Once you finish assigning each category from the list, use the Save button (3).

After saving the category mapping settings, you can go to the Products tab and export the selected offers to Shopify using the More Actions -> Add to Sales Channels function.
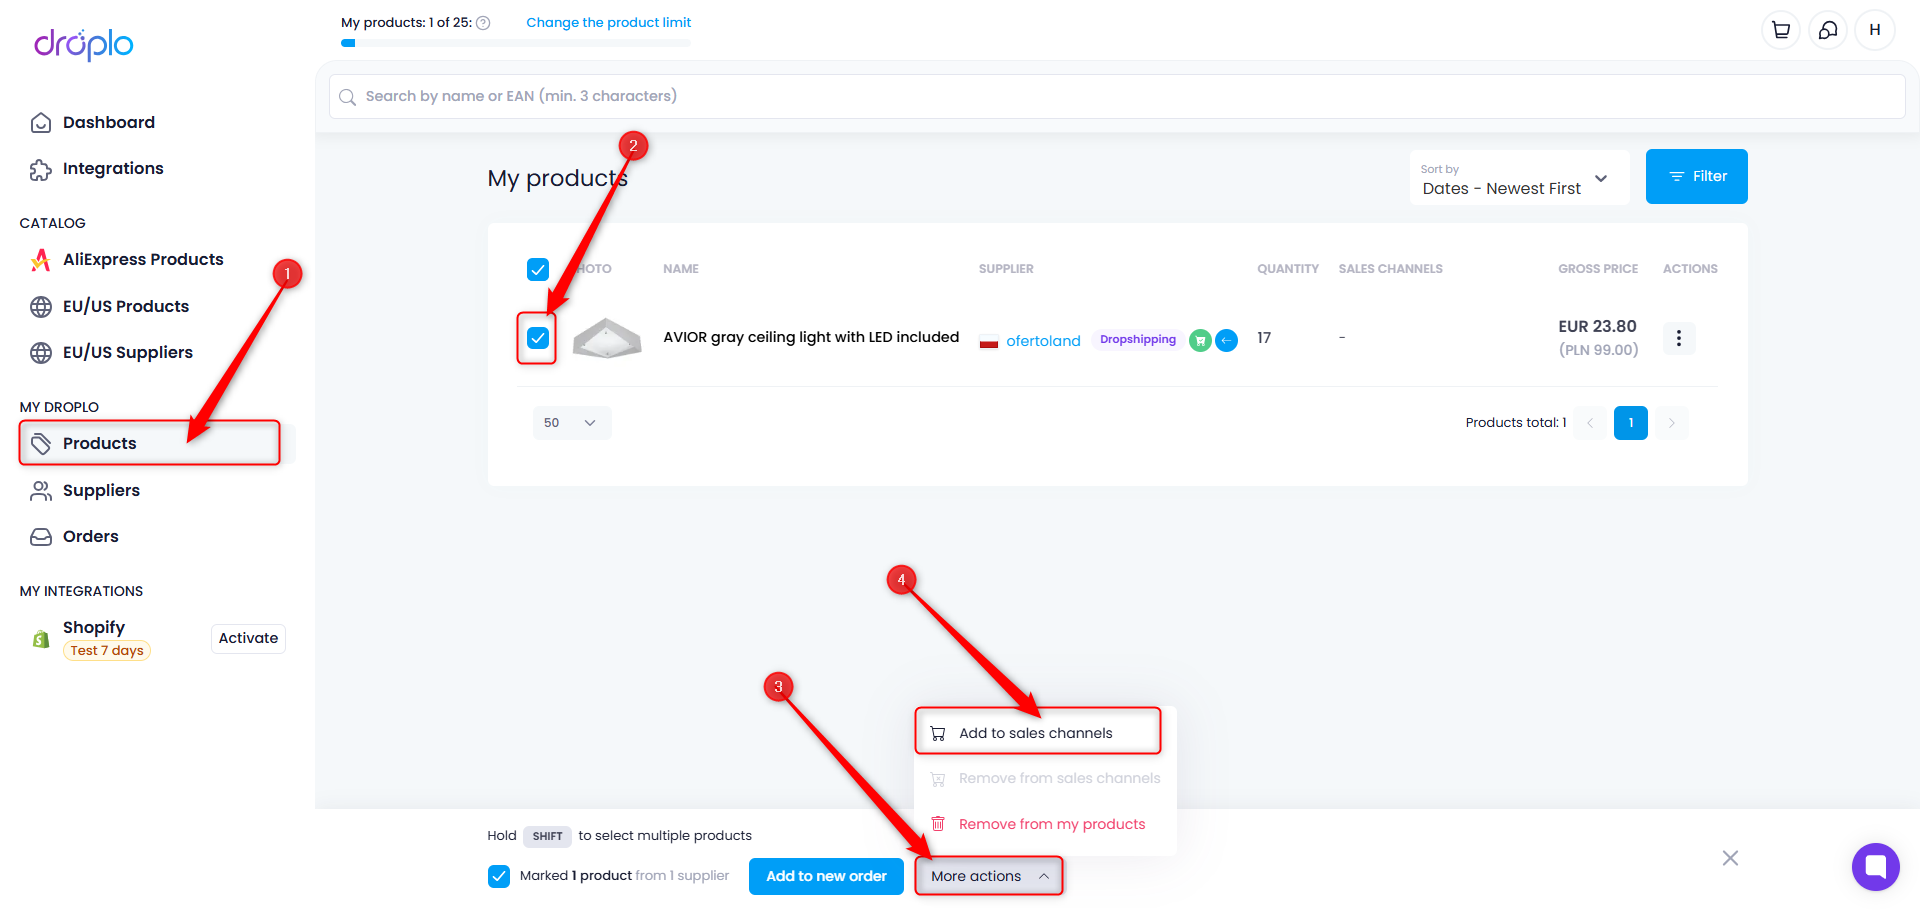
A new window will appear where you can select which integration you want to send the products to. If the integration encountered errors, e.g., with the connection, a message will appear at the top of the window.
In such a case, double-check whether the configuration was done correctly on both Droplo and Shopify.

Remember that Droplo is the source of updates for products in your store. Making changes to products outside of Droplo may cause synchronization issues.
❓How to completely delete a product from Shopify?
In Droplo, in the Products tab, select the products you want to remove from the Shopify panel and use the function Remove from sales channels.
Note: In Droplo, the product will still be visible on your list, but it will no longer be visible in Shopify—neither to your customers nor to you in the shop panel.
❓How to remove a product from the store without deleting it from the Shopify panel?
In Droplo, in the Products tab, select the products, and then use the action Remove from my products.
Note: In Droplo, the product will no longer be visible on your list. However, the product synchronization will no longer be active. The products will remain on your Shopify list with stock levels set to 0.
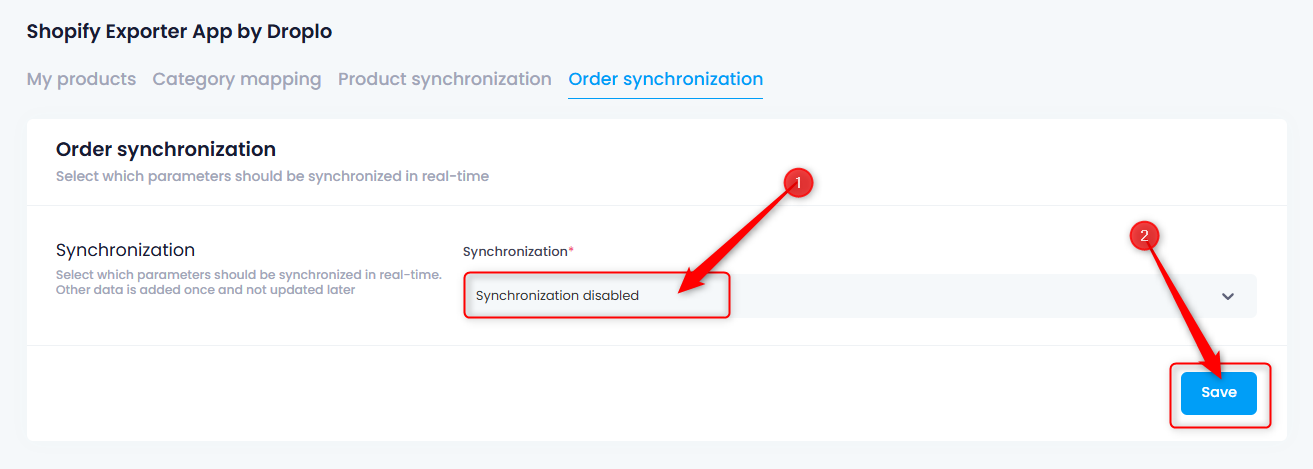
In this tab, the function for automatically downloading orders from your store (orders for products listed through Droplo) will be activated.
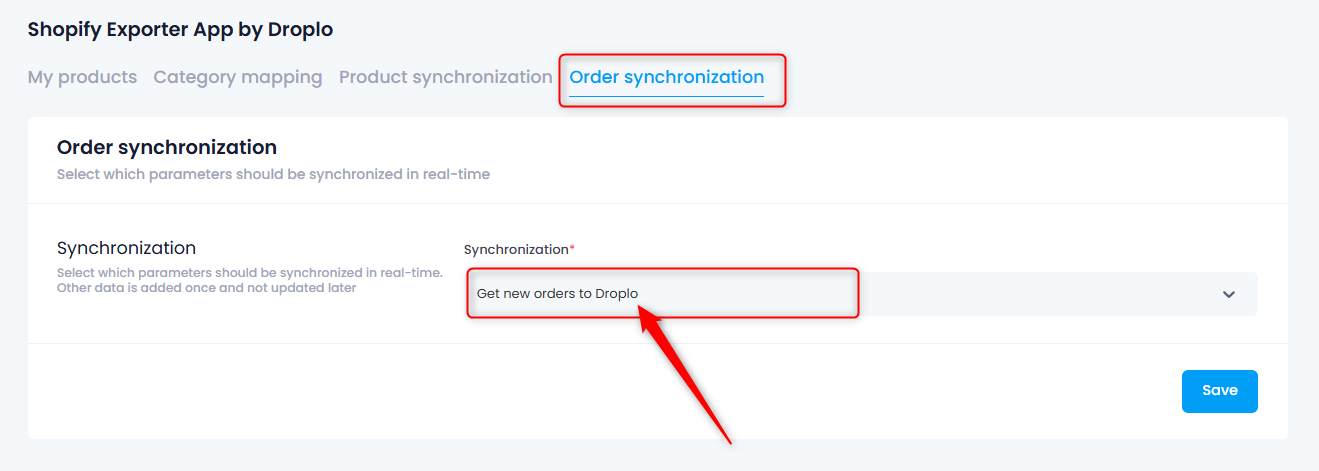
You can disable this function at any time. Simply select the option Synchronization disabled and save the changes.