Follow these instructions to successfully integrate Droplo into your Shoper shop and display products in it. 🙂
Go to the Integrations tab and click on the Shoper tab.

A description of the integration will open. If you want to activate access right away, use the Purchase access button.
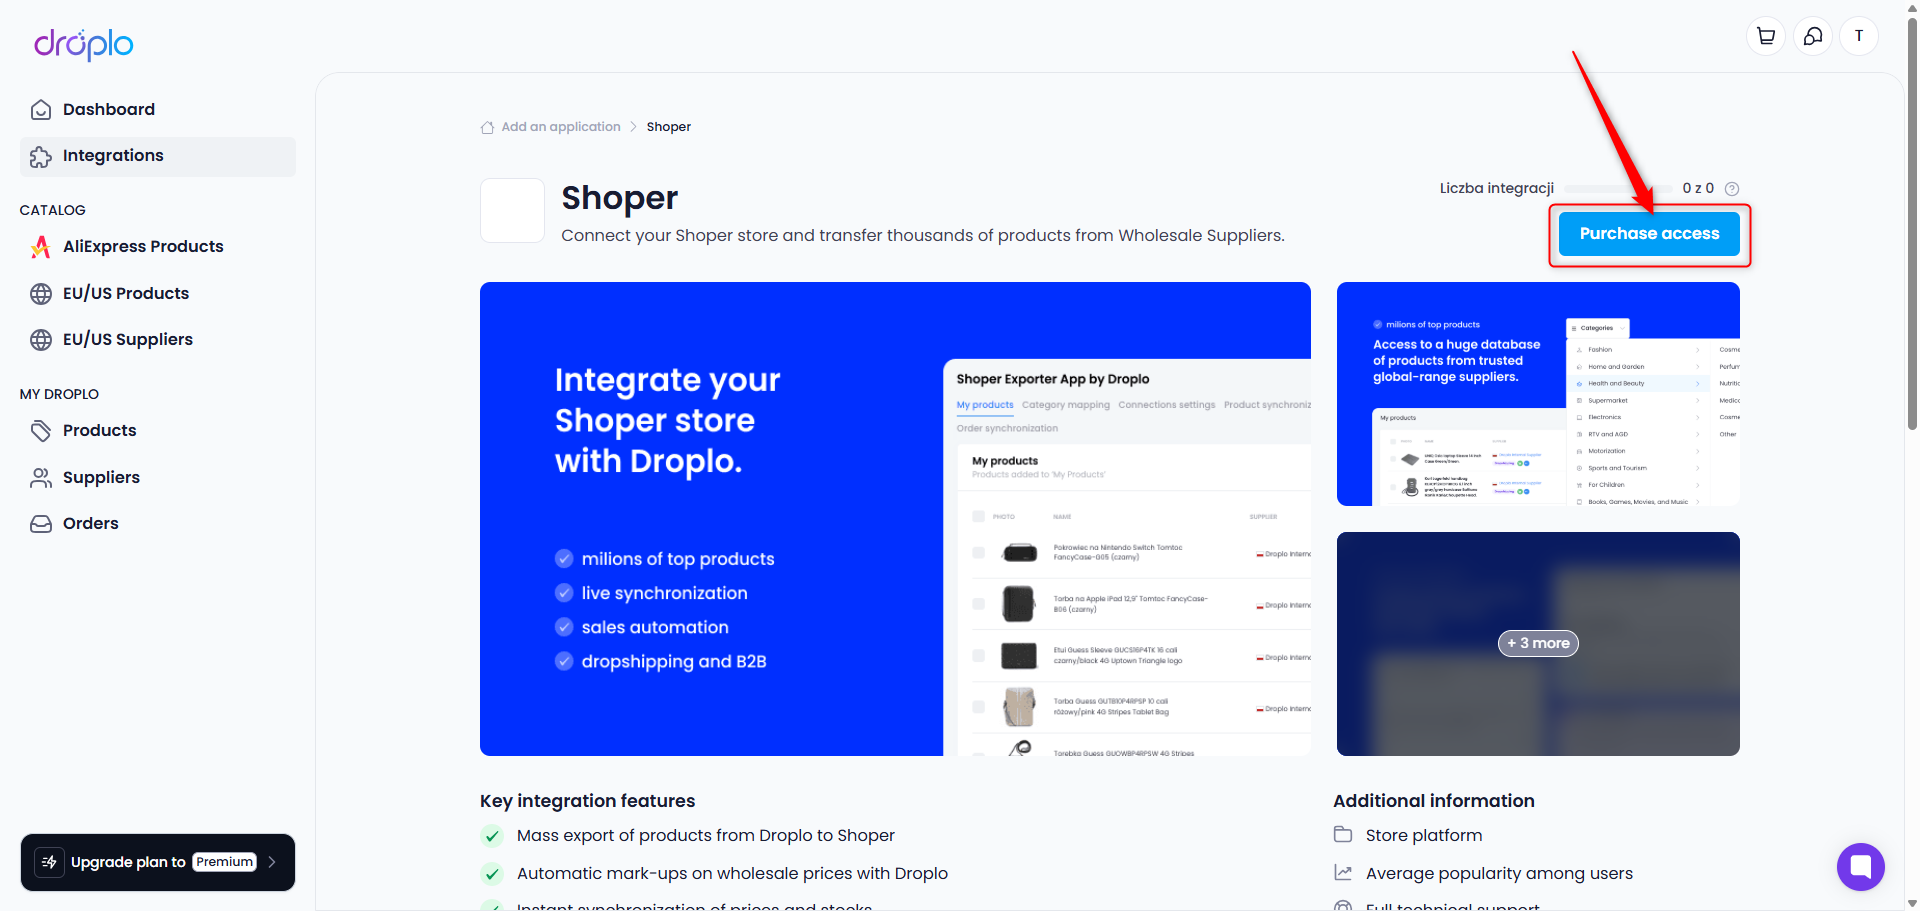
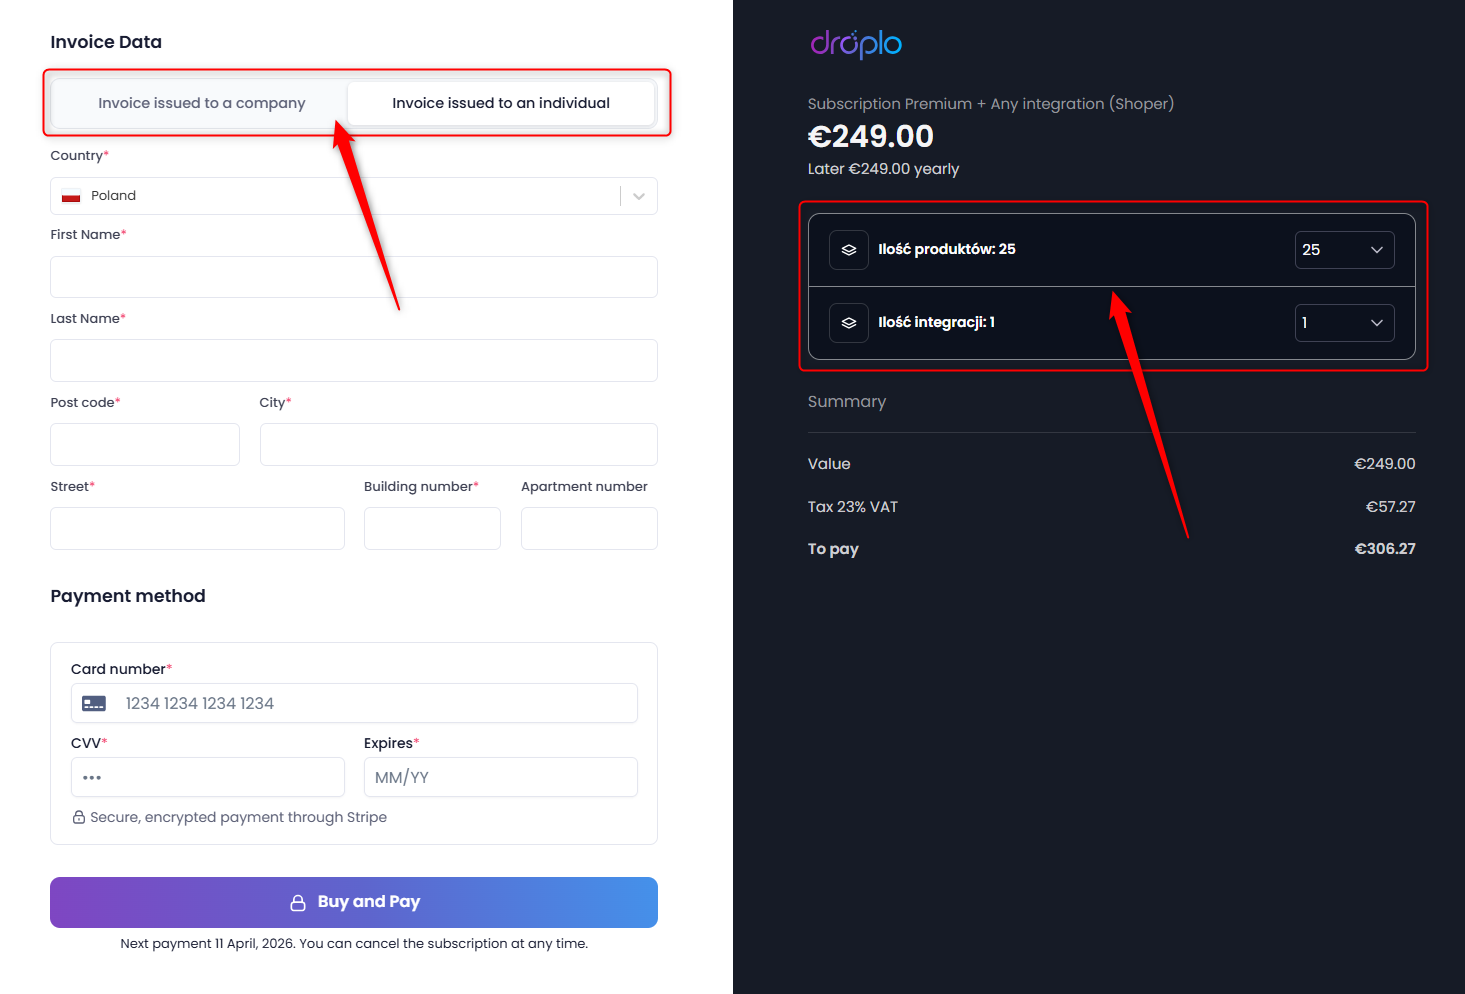
Selecting the Purchase access option will take you to the Premium plan activation tab.
Select how many products you want to list through Droplo on Allegro. By default, the integration allows you to list 25 products (free limit).
Once the first payment is accepted, the integration will be fully activated for your account.
Once access is activated, a new section will appear in the main menu on the left side of the panel: MY INTEGRATIONS. In this section you will find a shortcut to your IdoSell integration. Click on it to open the configuration panel.
Go to the Shoper configuration panel in Droplo using the shortcut in the left menu:
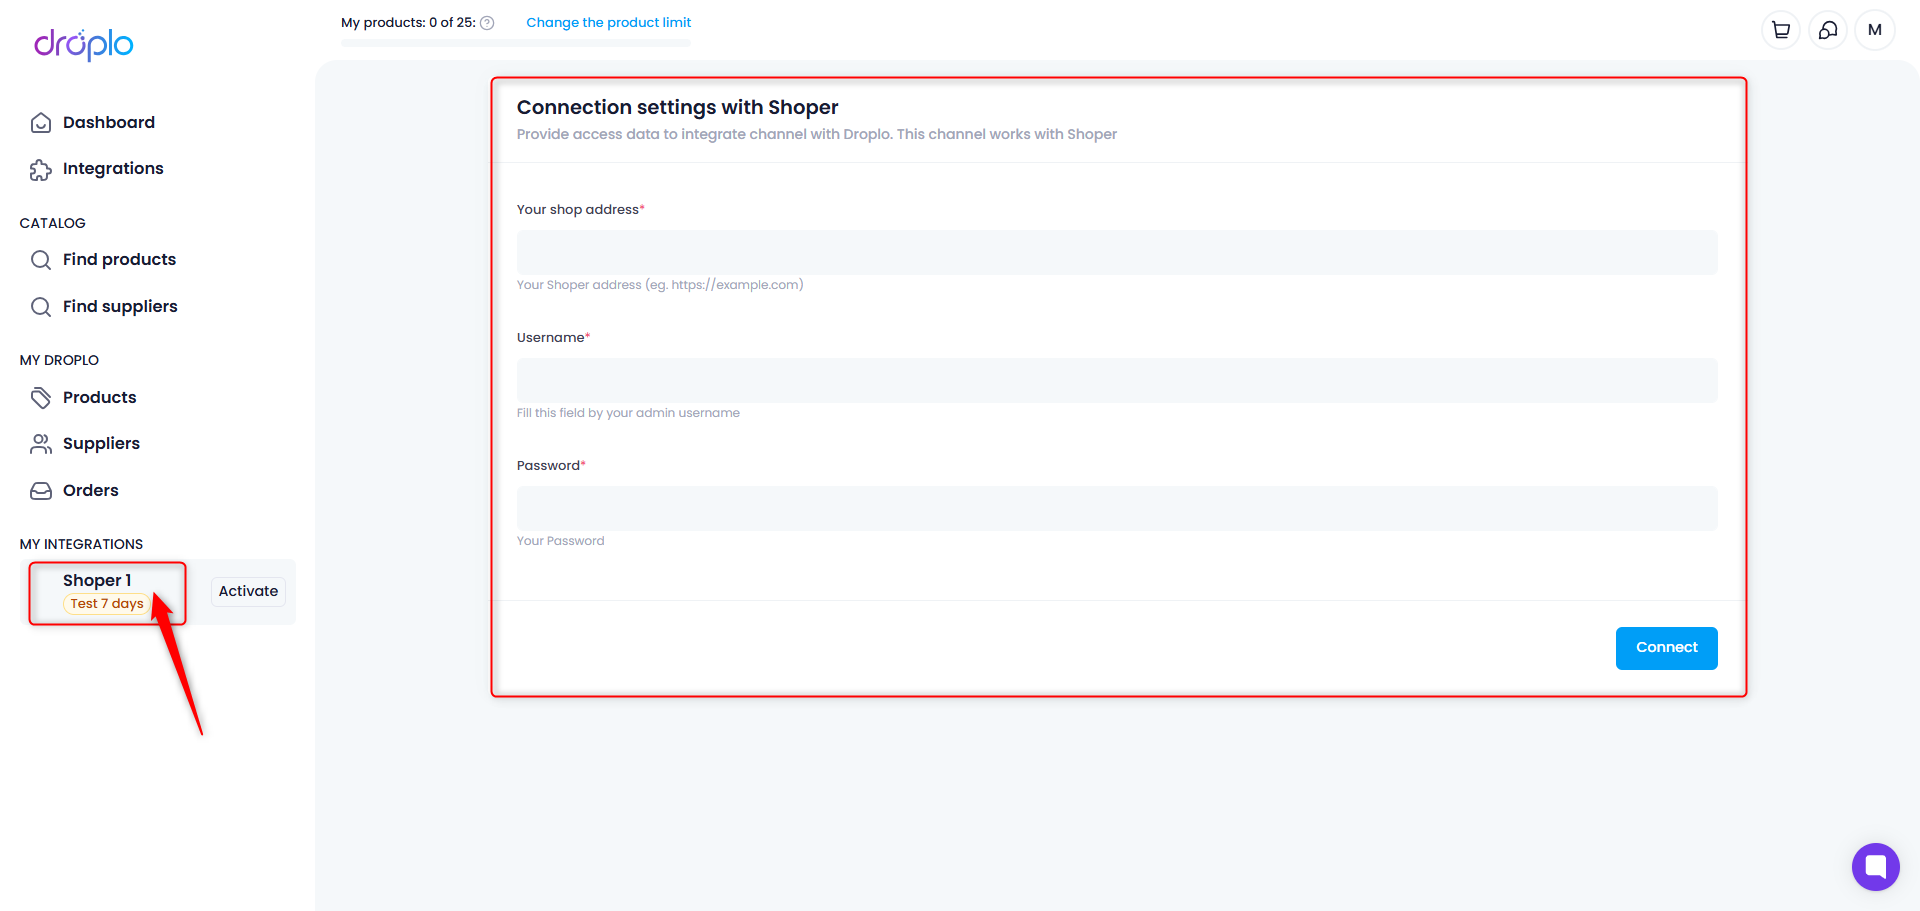
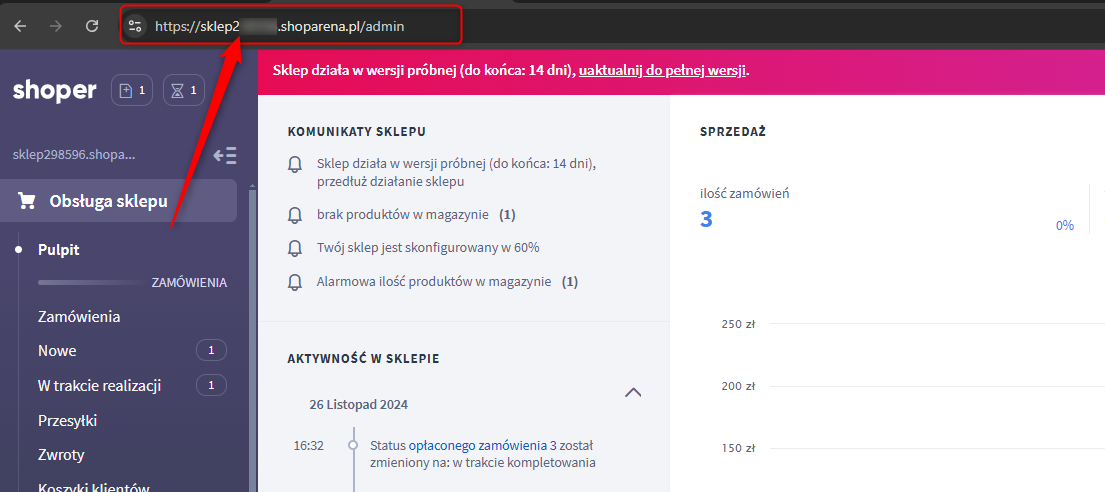
In order to connect your shop to Droplo, you need to get authorization data from the Shoper admin panel:
API key
URL address to your shop

Fill in the blanks using your store’s domain address and your login and password. Then click on Connect button.
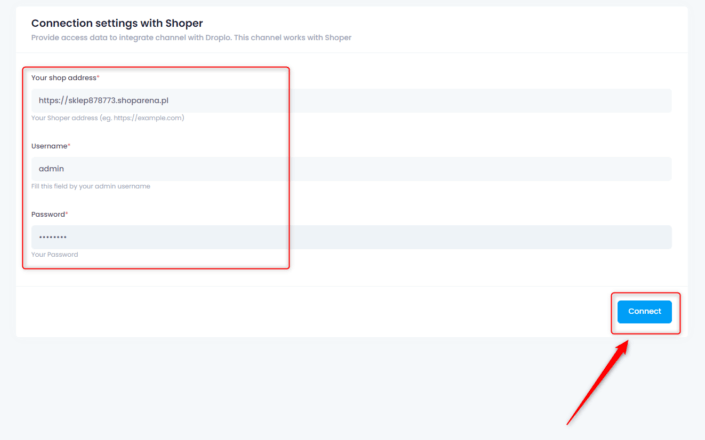
The connection with Shoper will be established in a few seconds.
You now have access to the Shoper Exporter by Droplo. This tool gives you the ability to manage your Shoper store integration.
You can easily configure various integration parameters in the exporter, such as:
Global mark-up – set the percent or amount margin on exported products;
Currency – choose the currency of your sales channel;
Synchronization – turn on/off automatic synchronization of prices and inventories;
Export language – choose in which language should the products be exported
Set tax – you can choose how the prices should be calculated regarding taxes
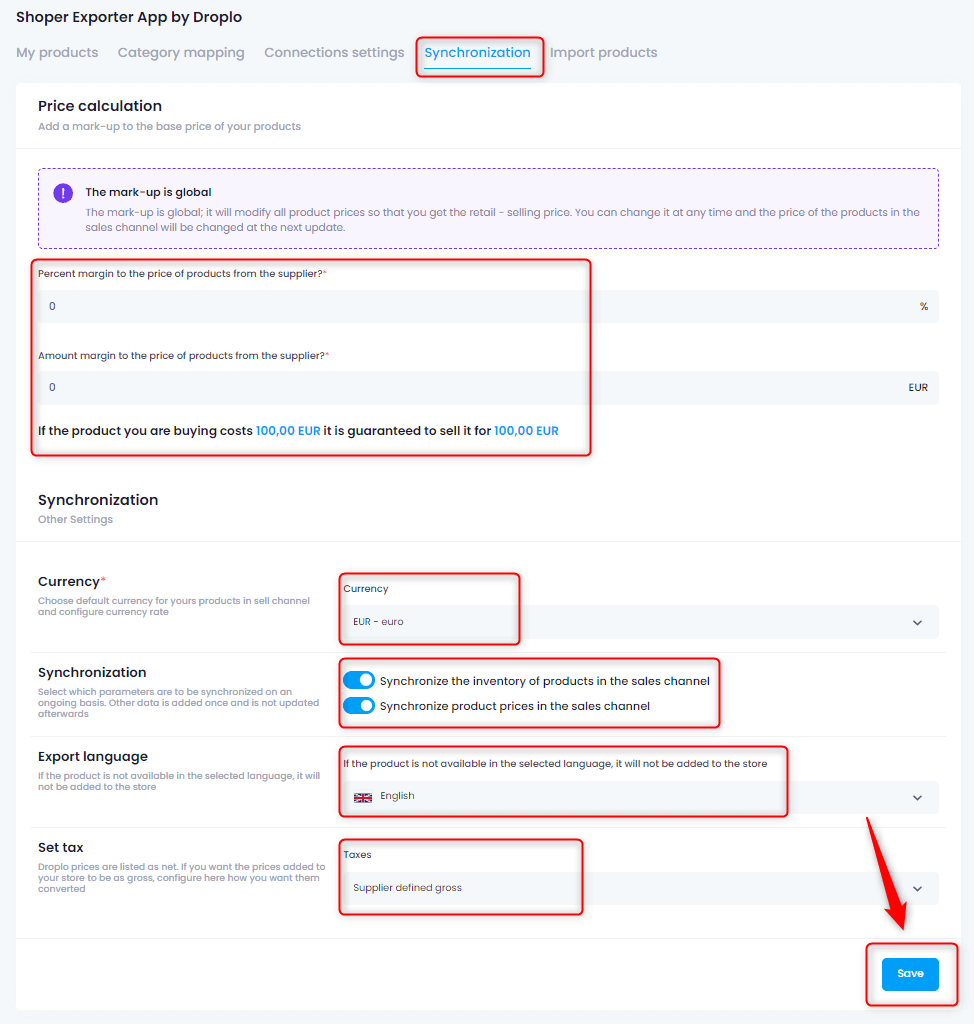
When the configuration on this page is complete, use the Save button.
If you’ve already created categories in your Shoper dashboard, you’ll need to map those categories with Droplo before exporting products to the sales channel.
Important! Category mapping will only be available if at least 1 product from any supplier is saved in your list.
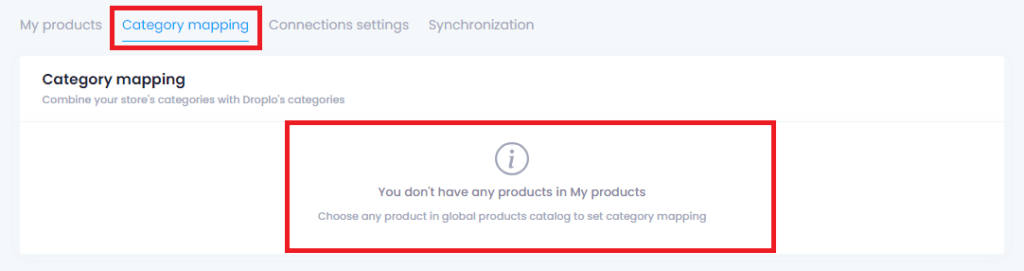
Once you’ve saved product(s), go to the Category Mapping tab and assign Droplo categories to the most related versions of categories from your store.
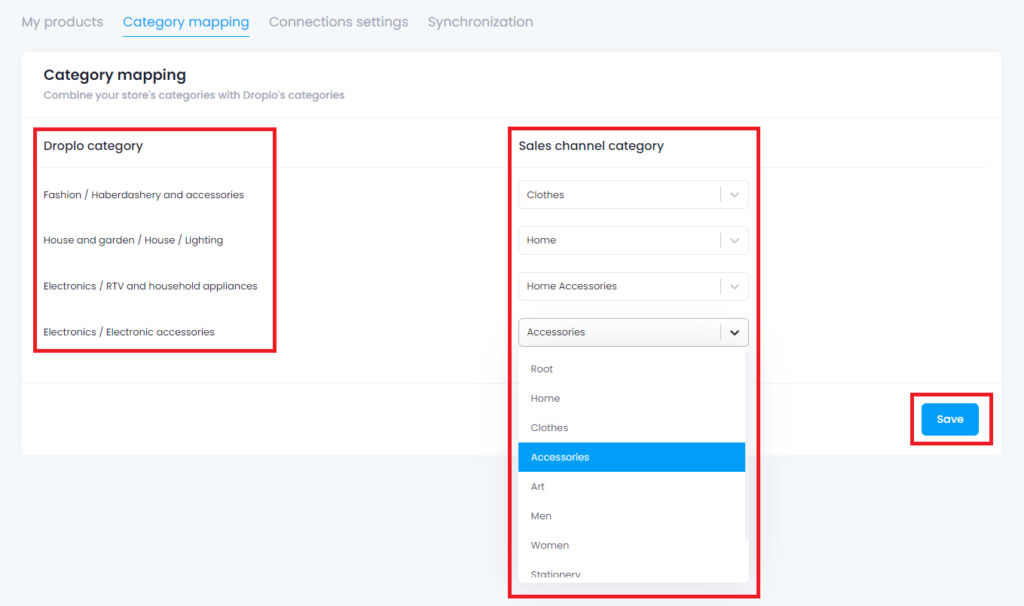
When you finish assigning each category in the list, click on Save button.
After saving your category mapping settings, you can go to the My Products tab and export the selected products to Prestashop via the More Actions -> Add to sales channels function.
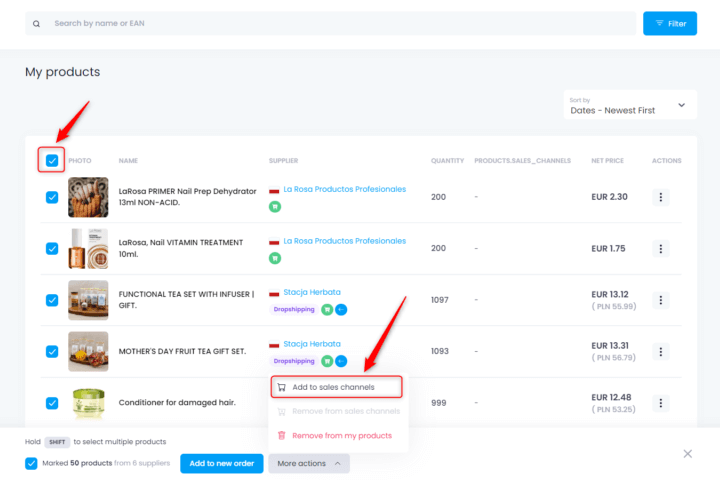
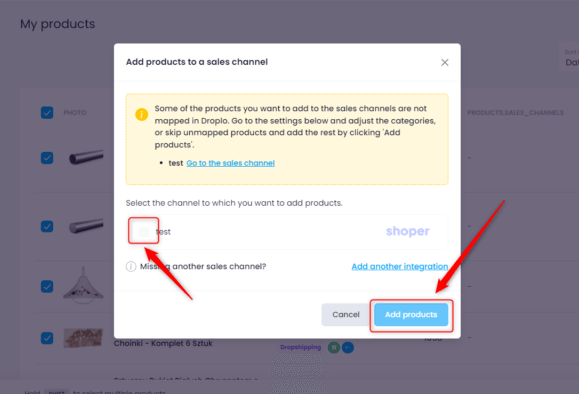
A new window will appear where you can choose which integration you want to upload products to. If the integration has encountered errors, e.g. with the connection, a message will appear at the top of the window.
In this case, check again that the configuration has been done correctly on the Droplo side as well as on the Shoper side.
This is because Droplo is the source for updating products in your store. Operating on products outside of Droplo may cause synchronization issues.
However, if you don’t want prices or inventory to be updated automatically on the store side, change the synchronization settings for your Shoper integration in Droplo.
