Follow the instructions to integrate the Droplo supplier database with your Allegro Business account.
First, go to the Integrations tab and click More details on the Allegro card.
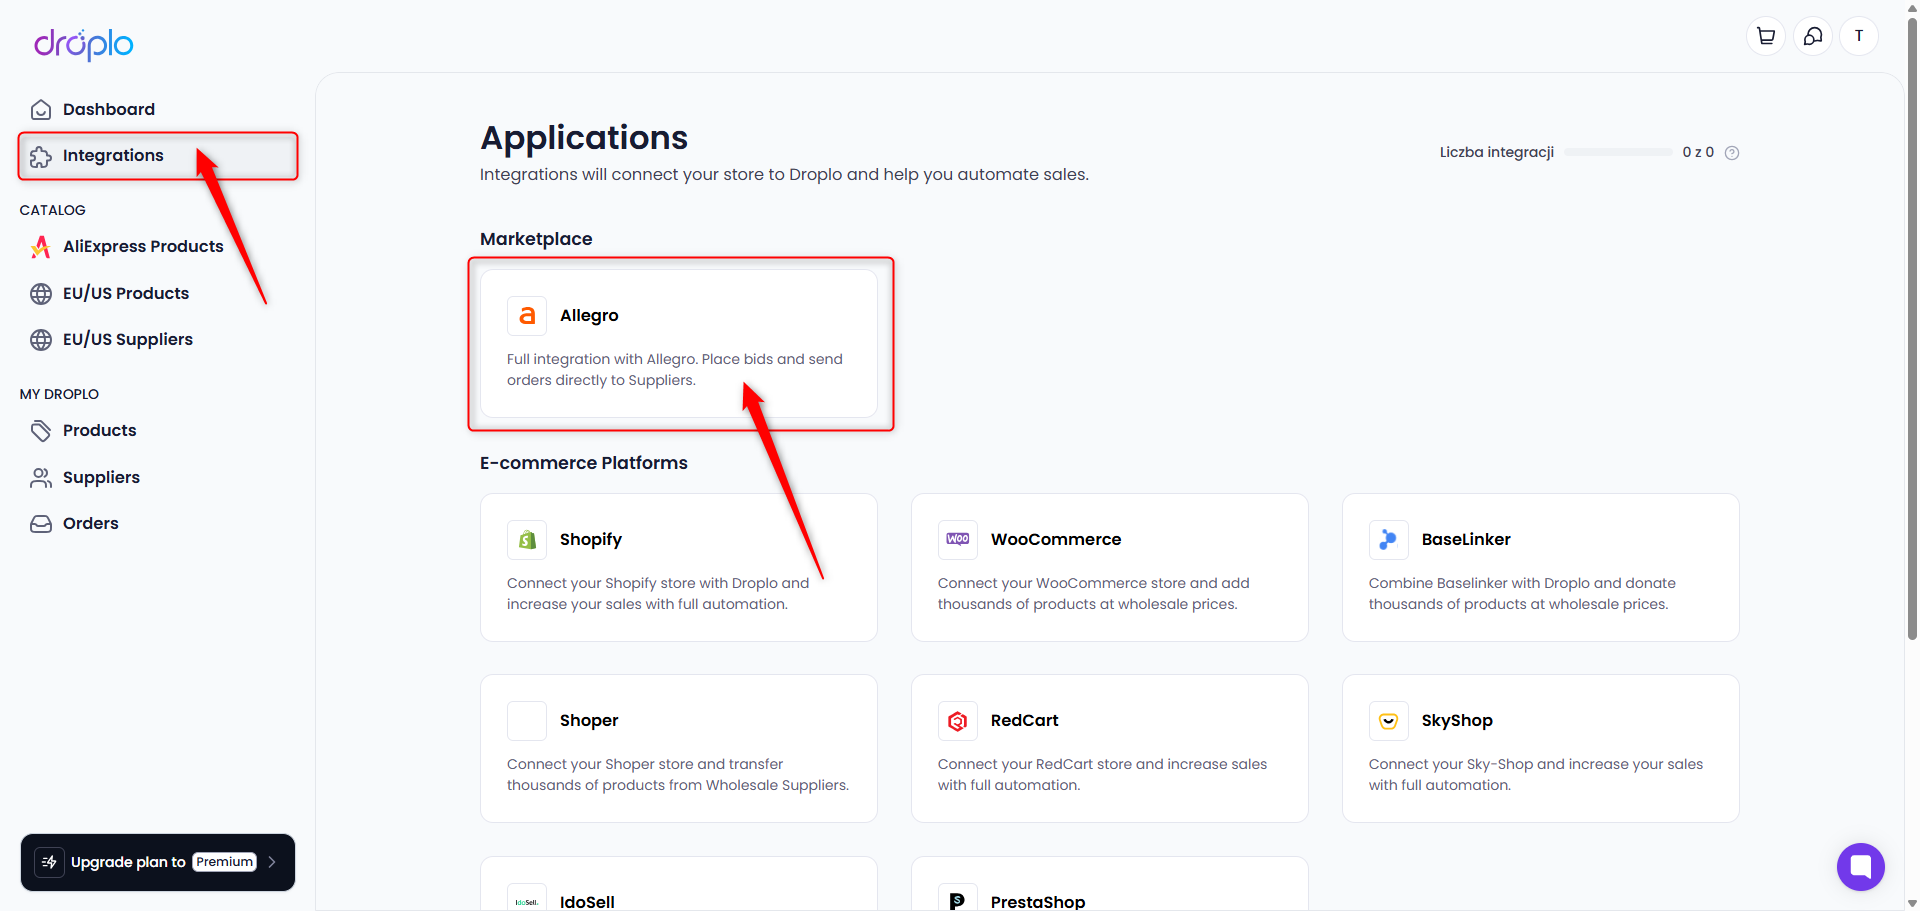
A description of the integration will open. If you want to activate access right away, use the Purchase access button.
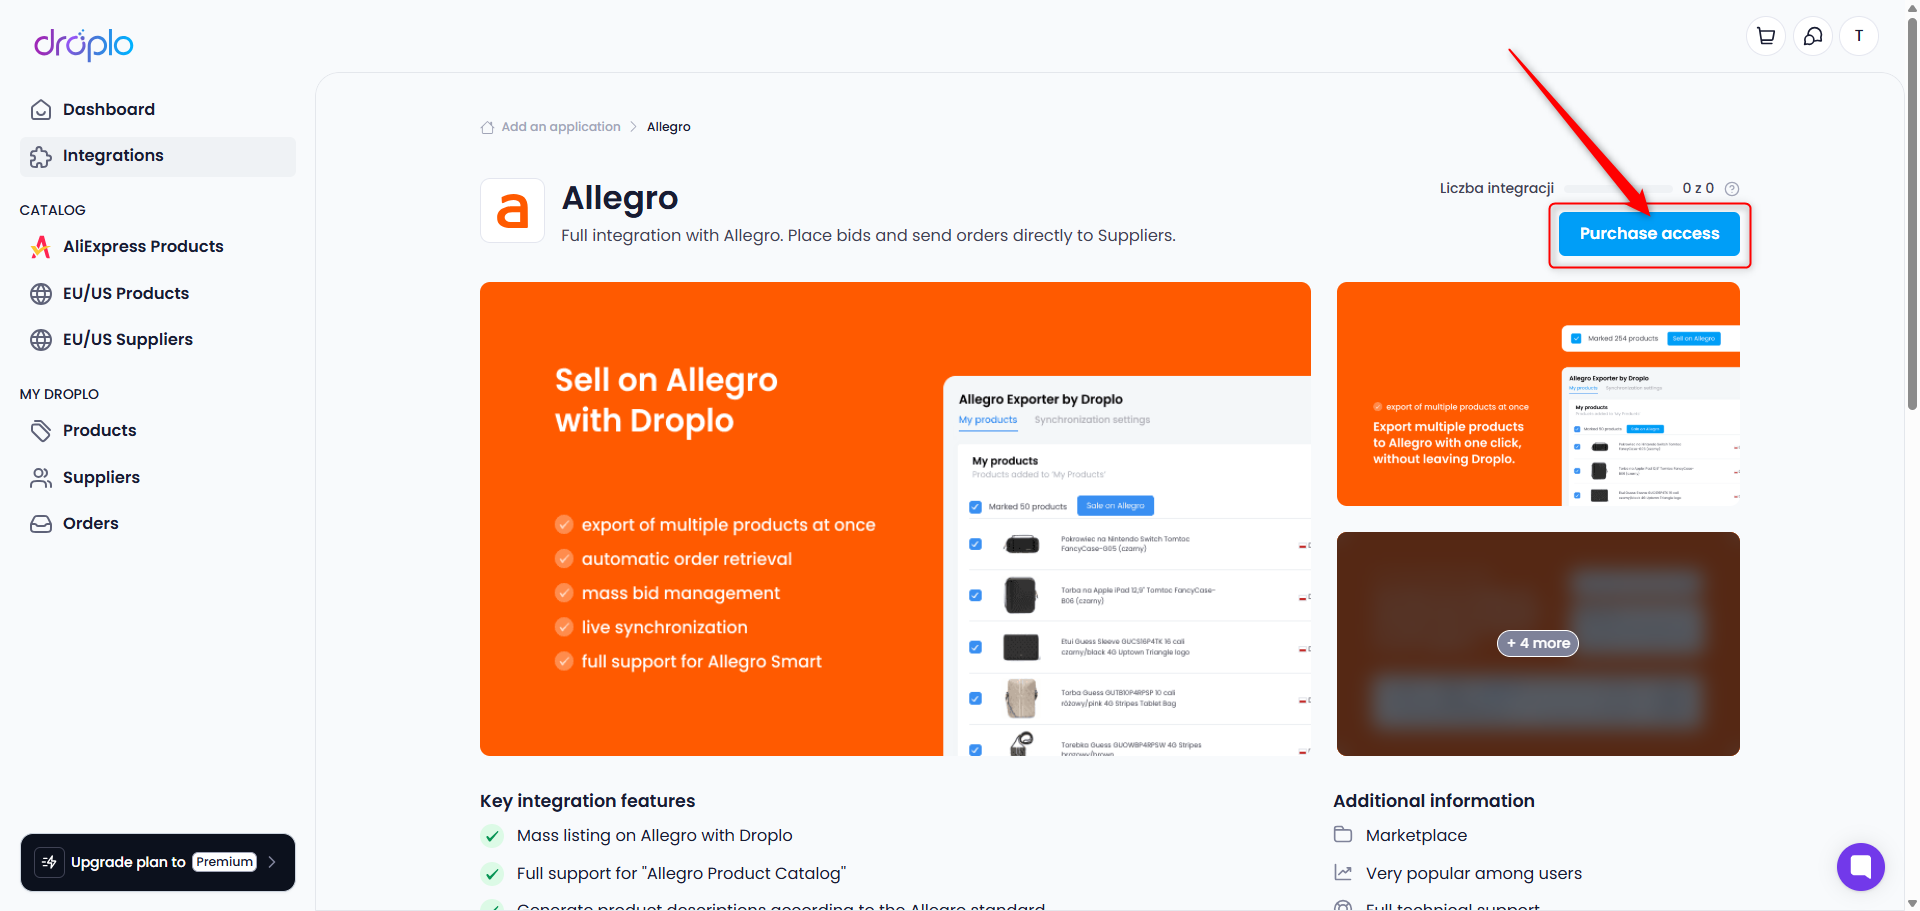
Selecting the Purchase access option will take you to the Premium plan activation tab.
Select how many products you want to list through Droplo on Allegro. By default, the integration allows you to list 25 products (free limit).
Once the first payment is accepted, the integration will be fully activated for your account.
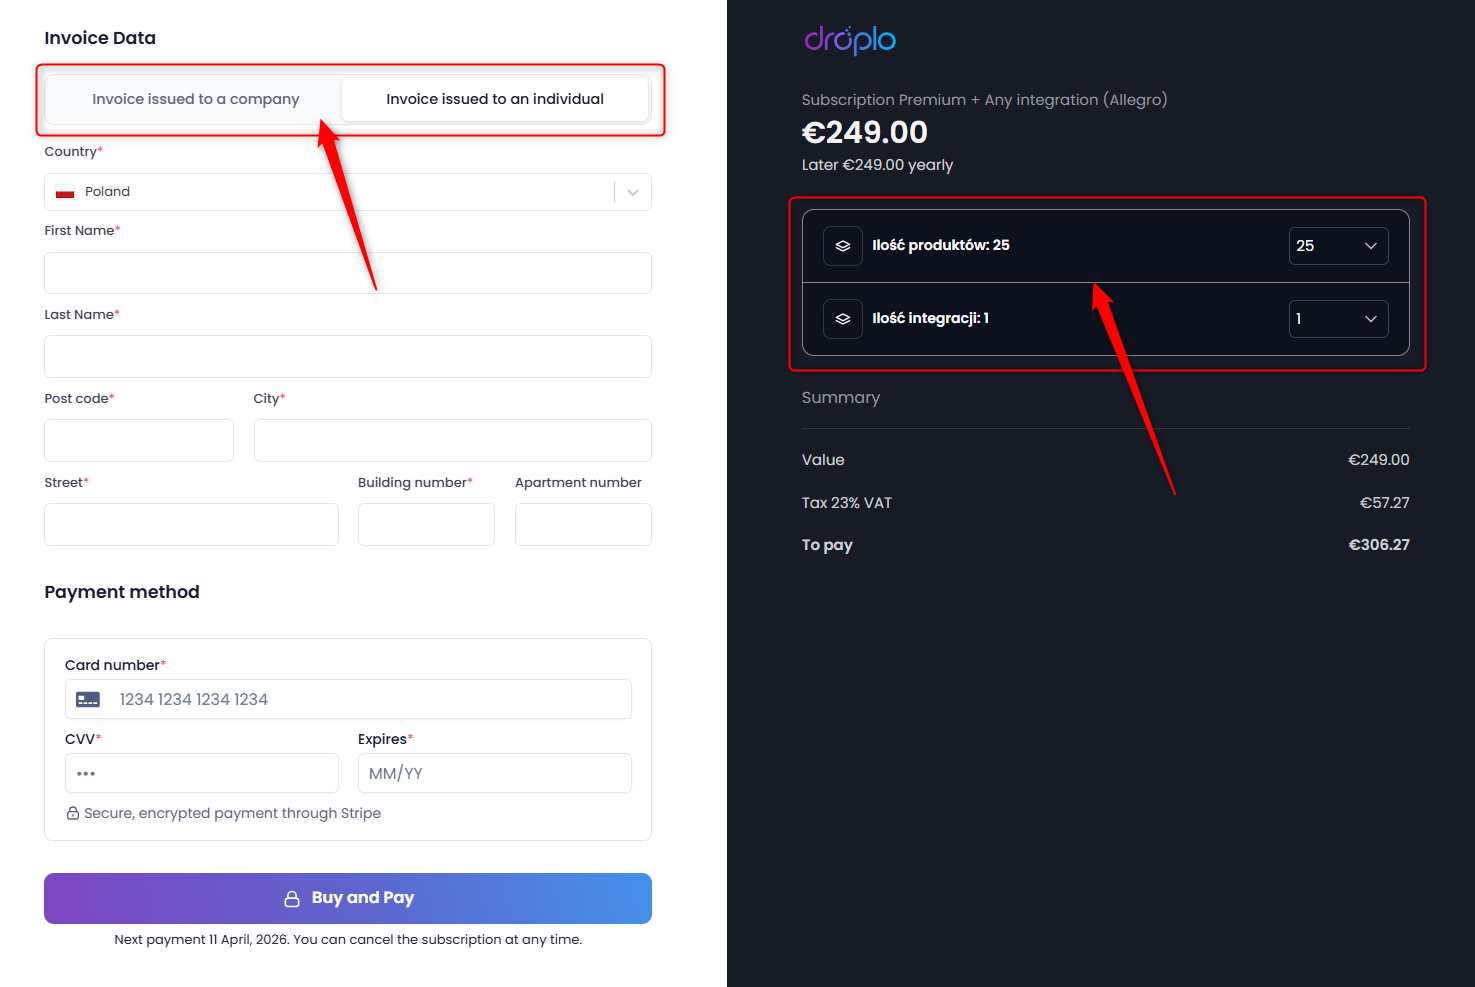
After activating access, a shortcut to your Allegro integration will appear in the left menu. Clicking on it will take you to an integration management panel called Allegro Exporter by Droplo:
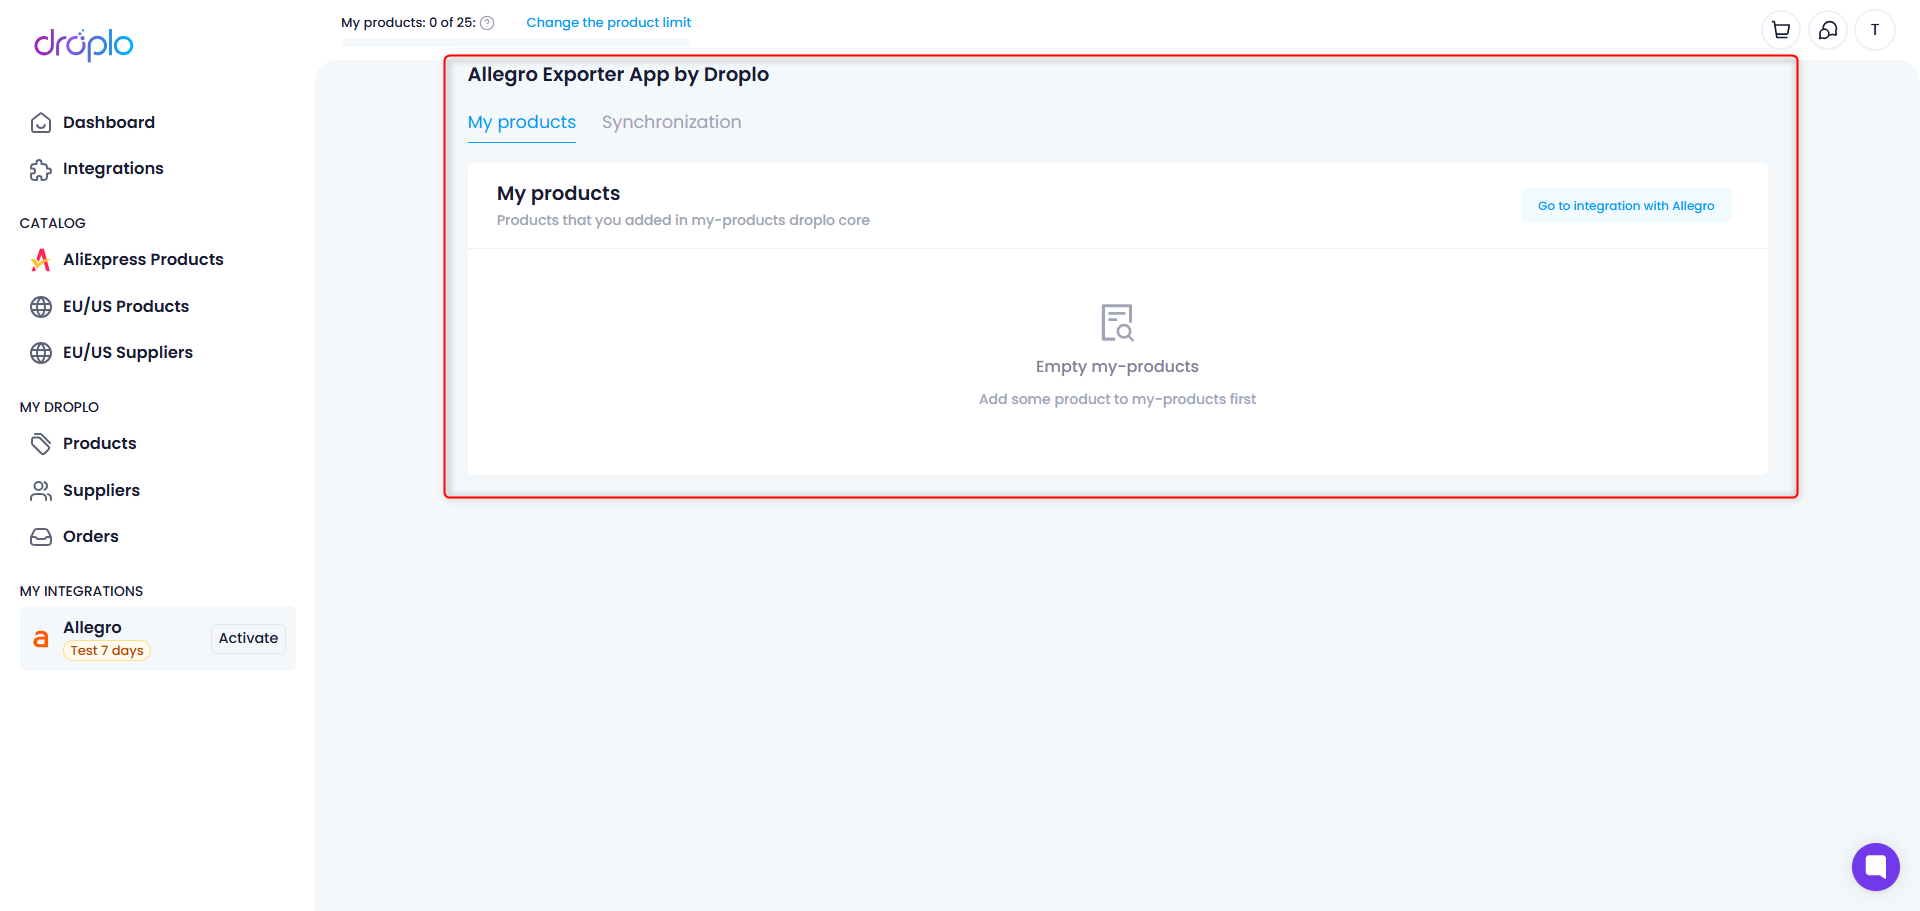
Once the integration is activated, a new section will appear in the main menu on the left side of your panel: MY INTEGRATIONS.
In this section, you will find a shortcut to your Allegro integration. Click on it to open the configuration panel.
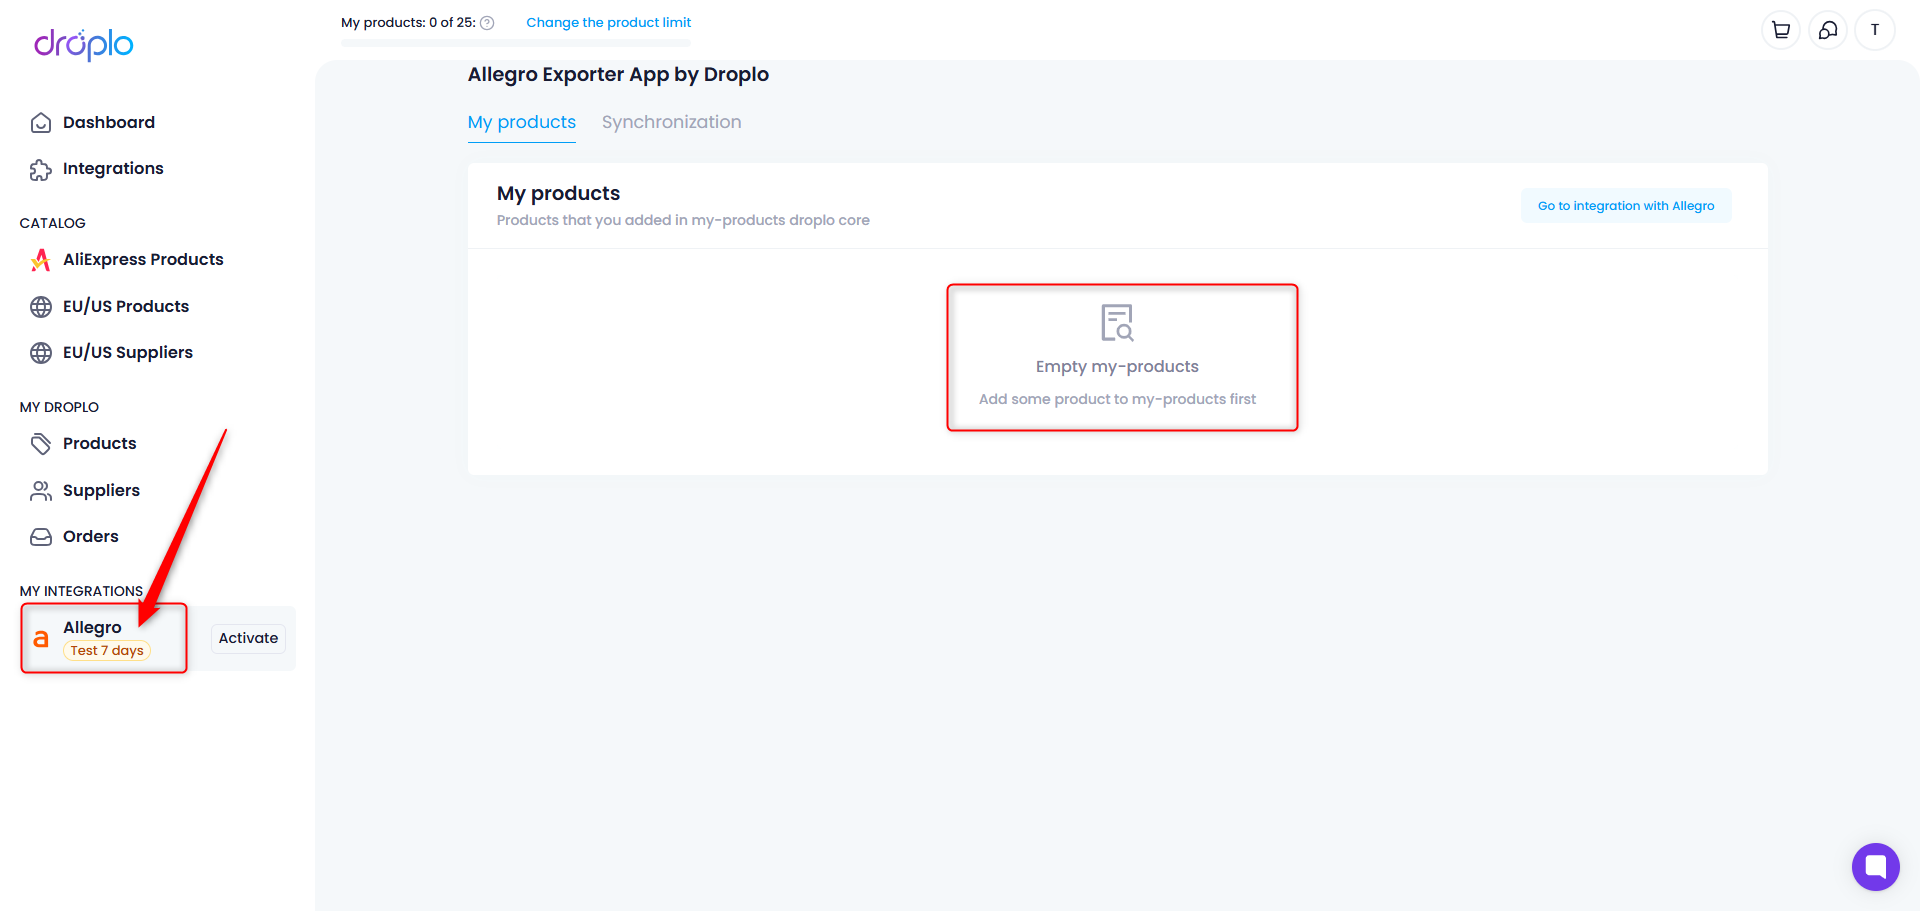
If you have already saved products in Droplo, they will appear in the Products tab.
In the top right corner, you will see the button Go to Allegro integration – click on it.
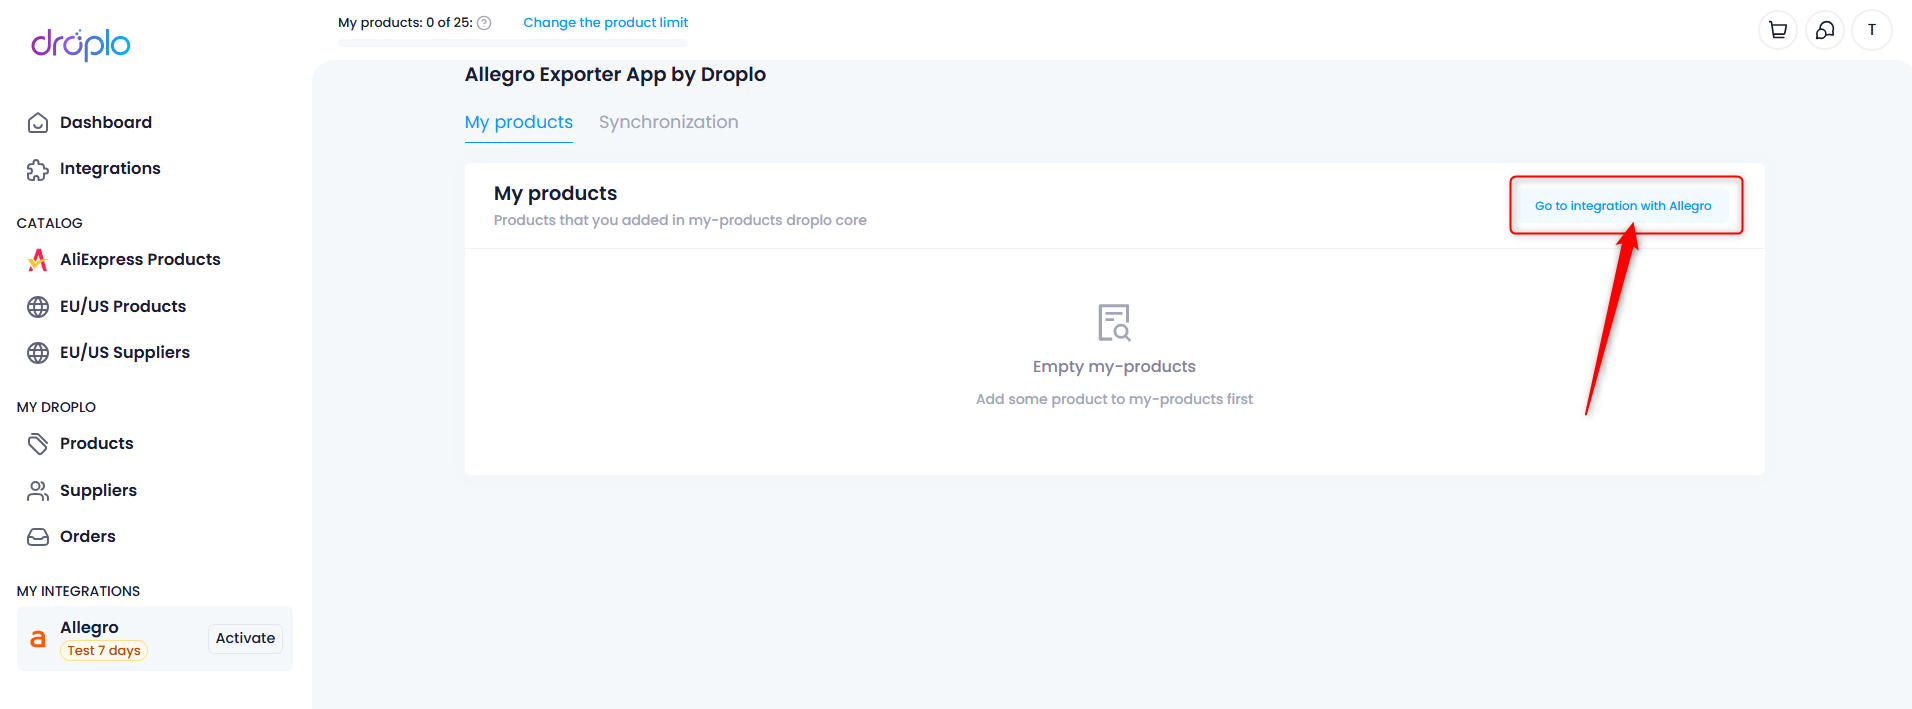
A new browser tab will open with the first step of configuring the connection. Use the button Link account, and you will be redirected to Allegro to confirm the operation.
After successfully linking the accounts, the integration will be active.

After linking the account, you will be redirected to the Allegro auction management panel.
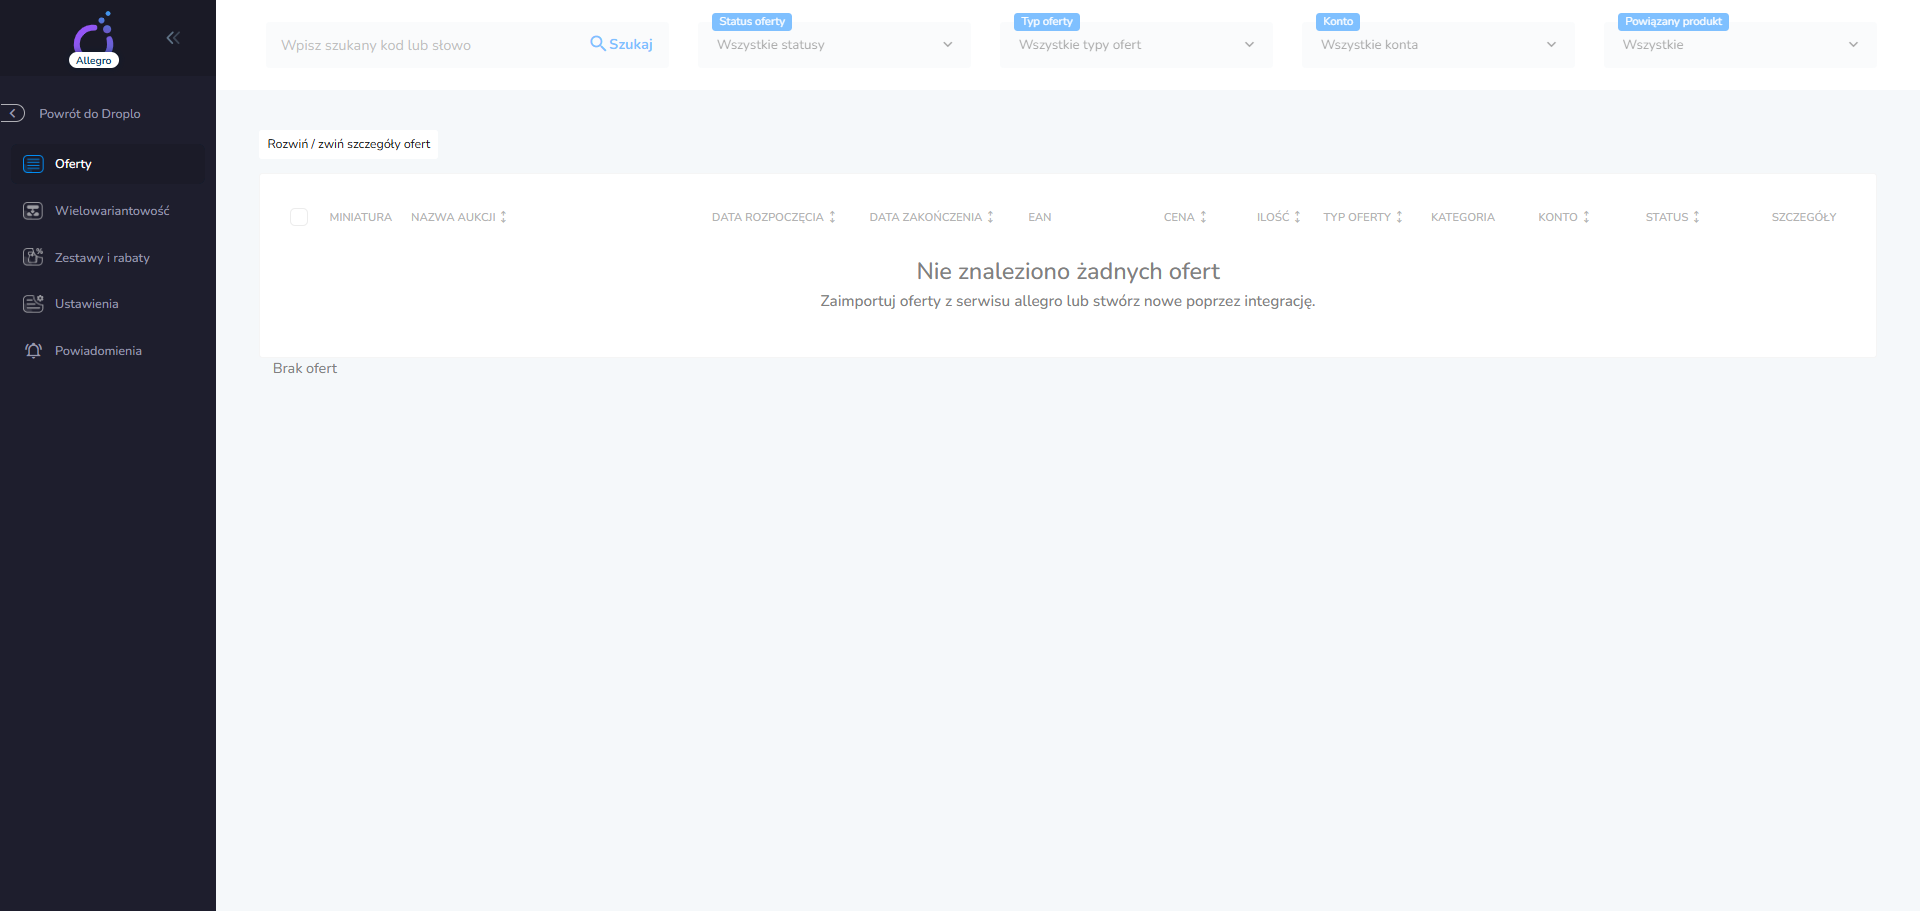
You can close this tab. Return to the previous browser tab:
Now go to the Synchronization Settings tab.
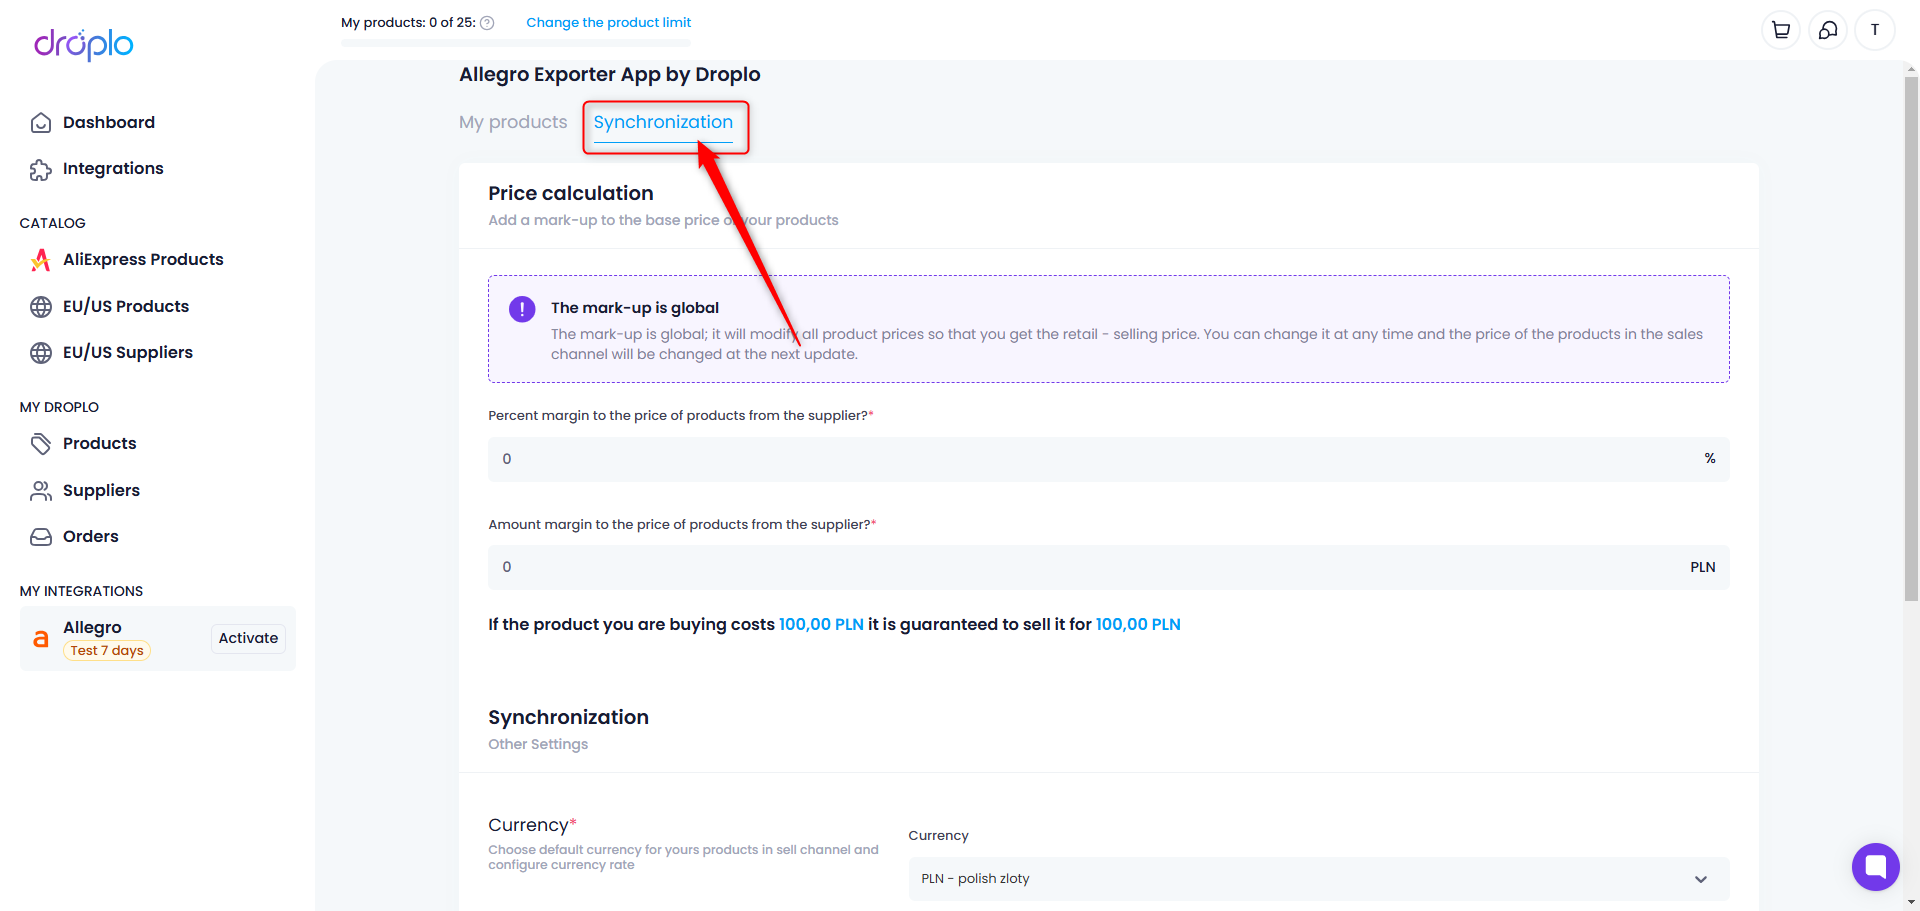
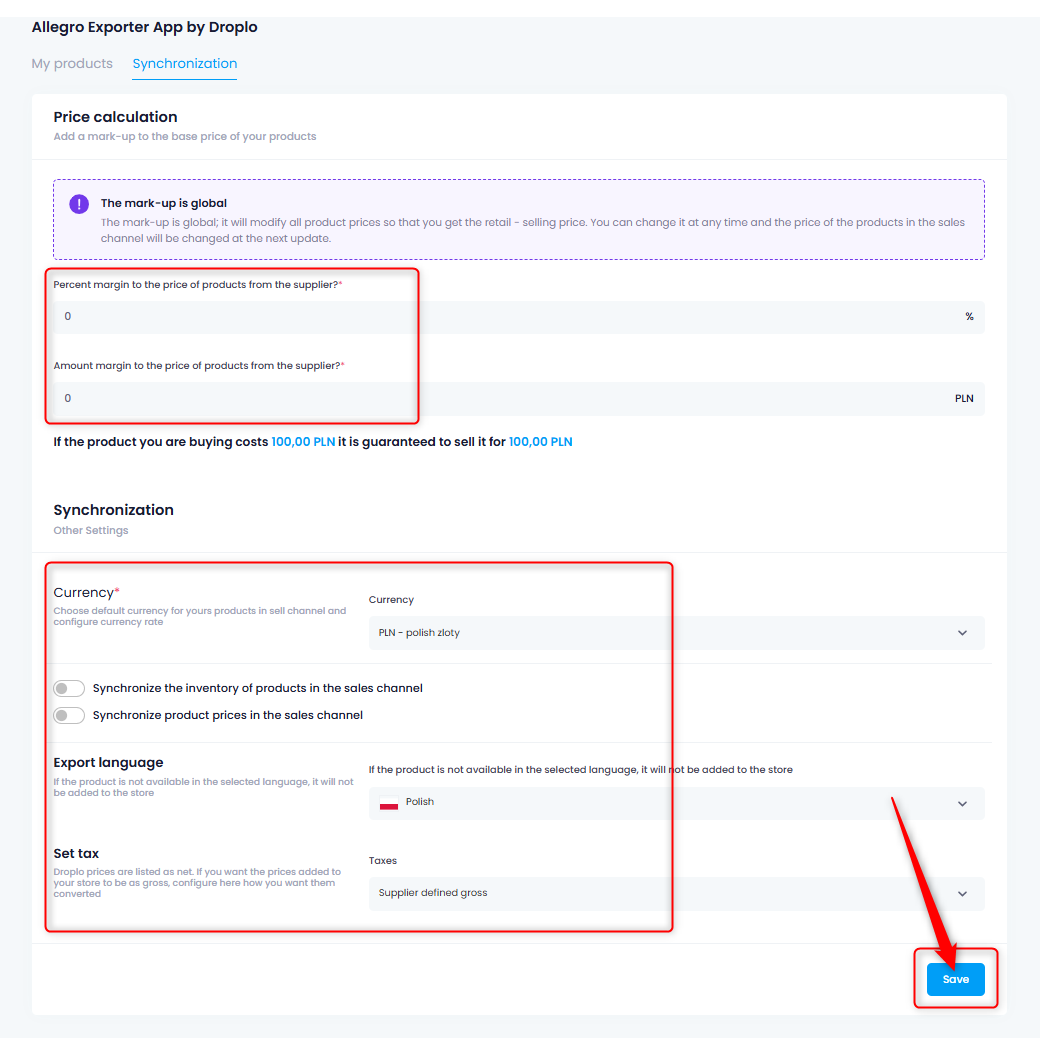
First, set the global price margin (numerical and/or currency-based) and configure other synchronization settings:
Currency of products in Allegro
Automatic synchronization of stock levels and prices
Language of exported products
Tax rate
Then use the Save button.
In addition to the Synchronization settings tab in Allegro Exporter, you can also configure the auction management panel. To do this, go to the panel from your integration.

Next, go to the Settings.

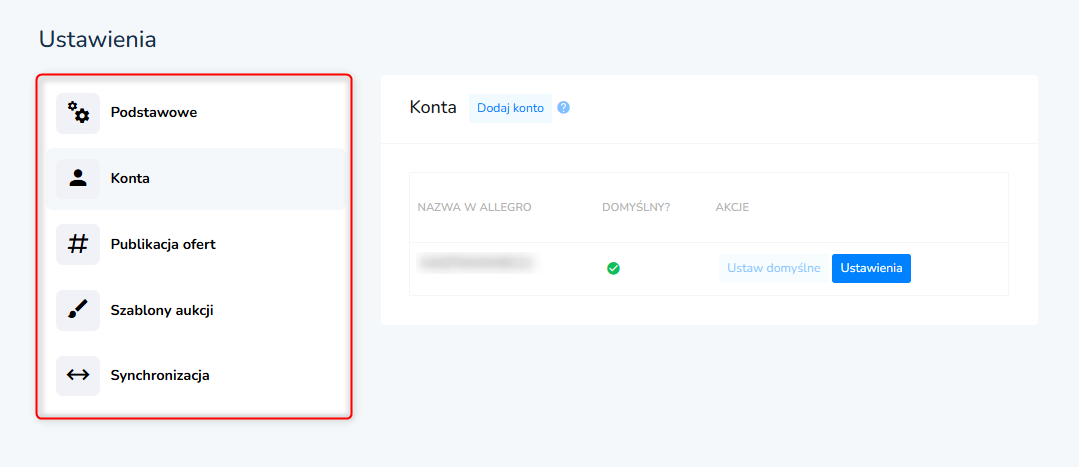
Here, you have 5 tabs available where you can set additional parameters for the listed auctions.
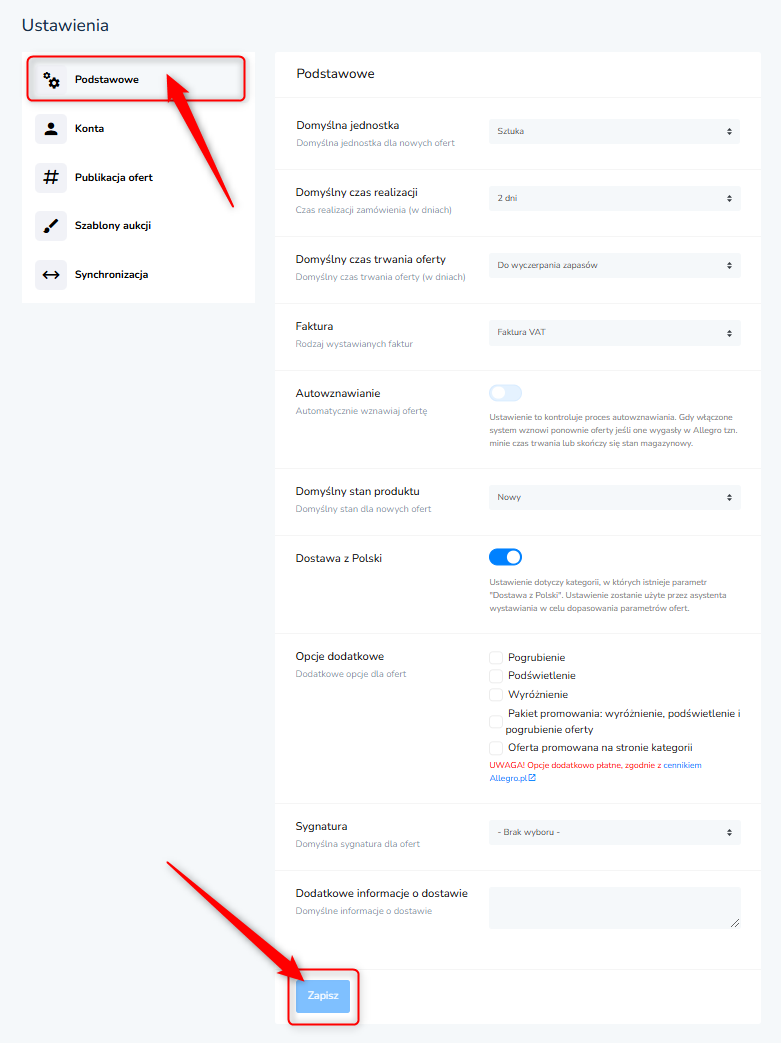
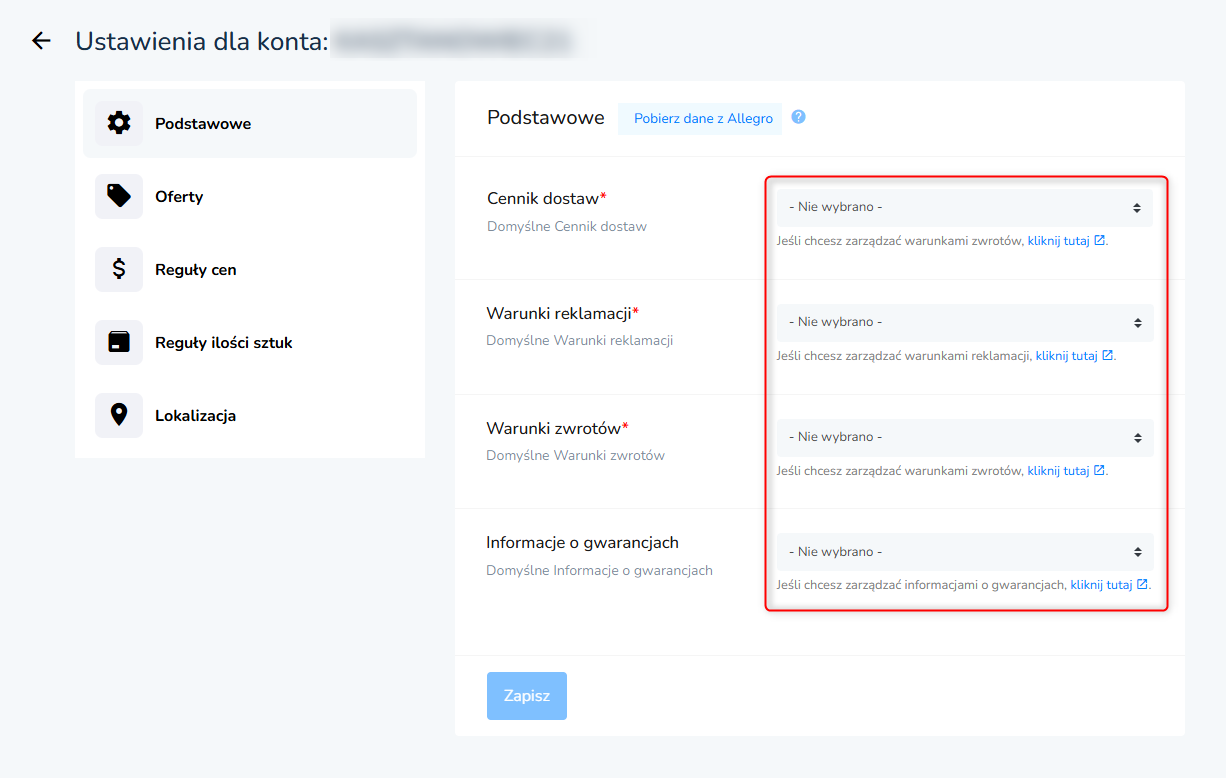
In this tab, you can set default information that will be automatically filled in the offer creator. Remember to save your changes (at the bottom of the page).
Here, you can add additional Allegro accounts to choose where you want to list your auctions. You can also check the default settings for your account.
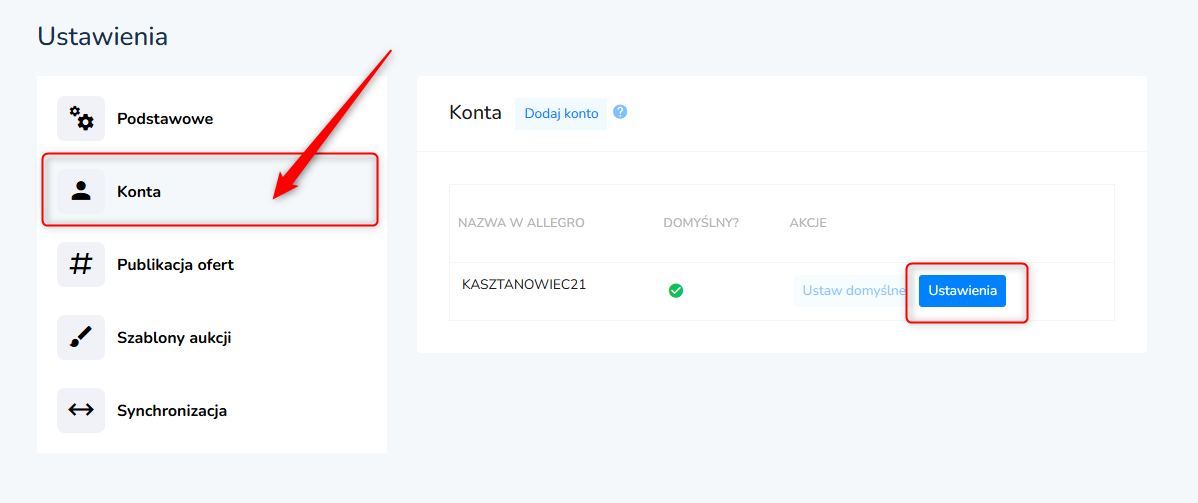
In such a case, you should reconnect your Allegro account with Droplo. To do this, go to the Accounts tab, use the Add account button, and then log in to the same account that was disconnected from Droplo:
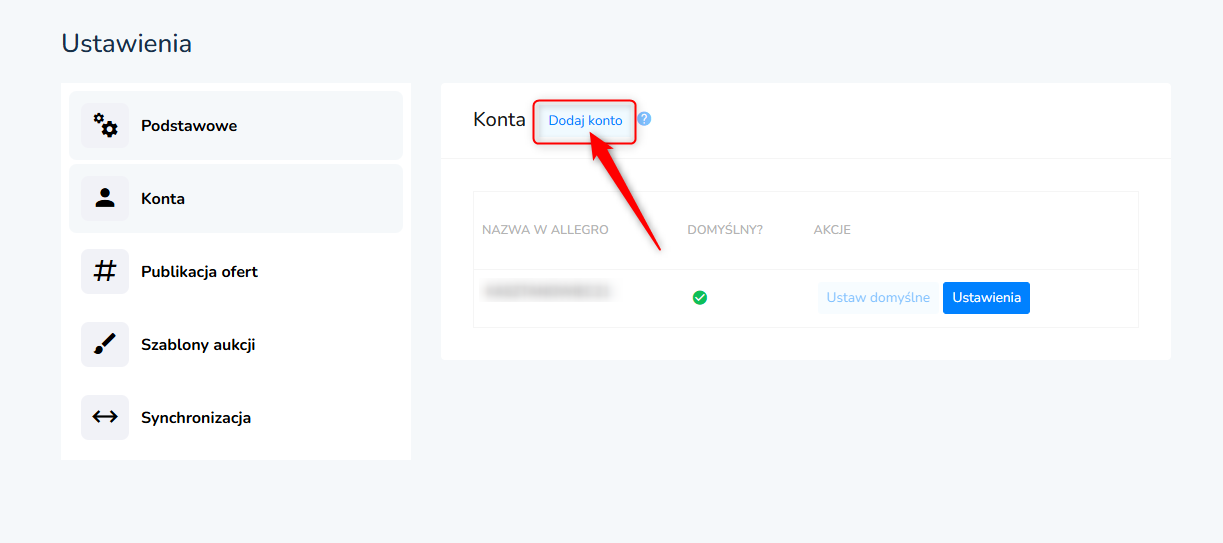
After this operation, the integration will be reconnected to your account on Allegro. The cause of this issue typically originates from changes to settings on the Allegro side (e.g., changes to authorization data).
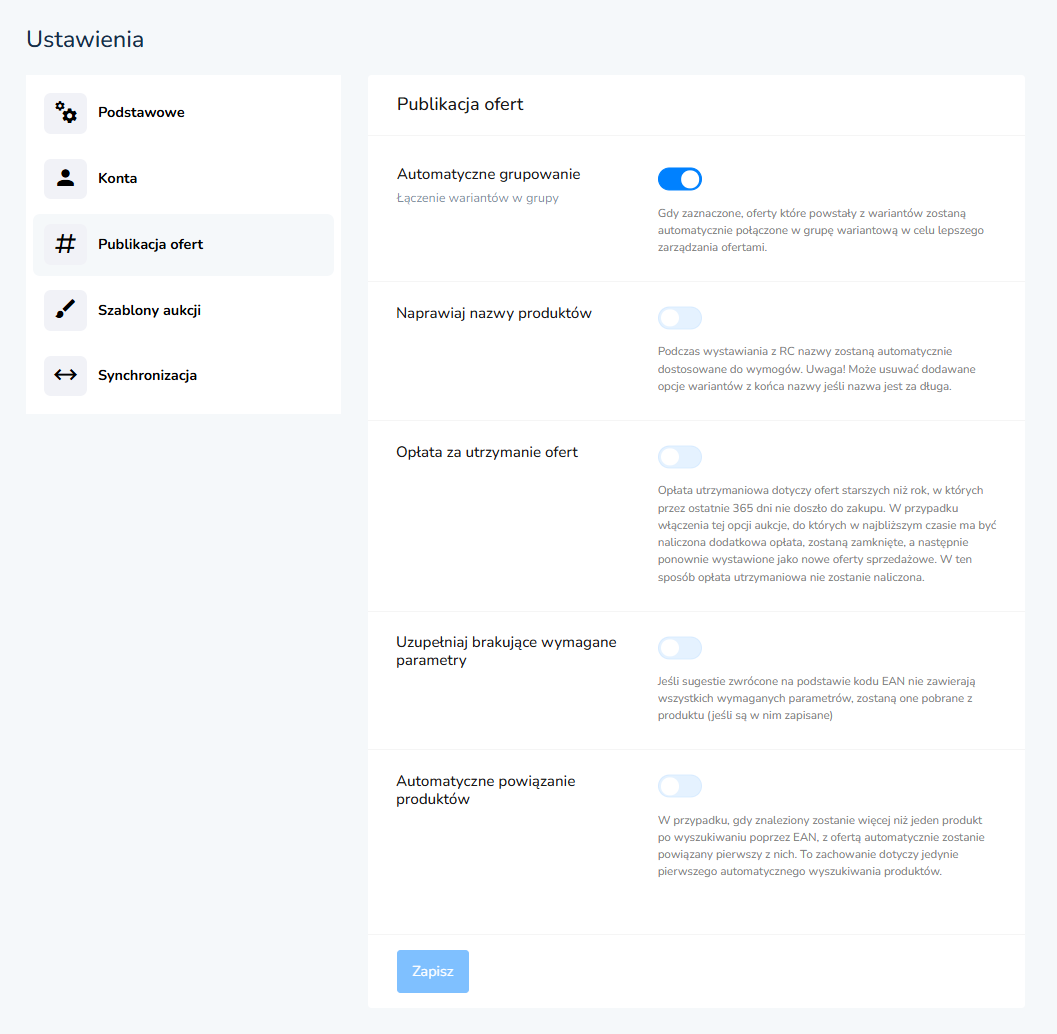
In this tab, you can introduce additional features for offers published through Droplo. For example, shortening product names, to prevent excessively long names from being rejected by Allegro.
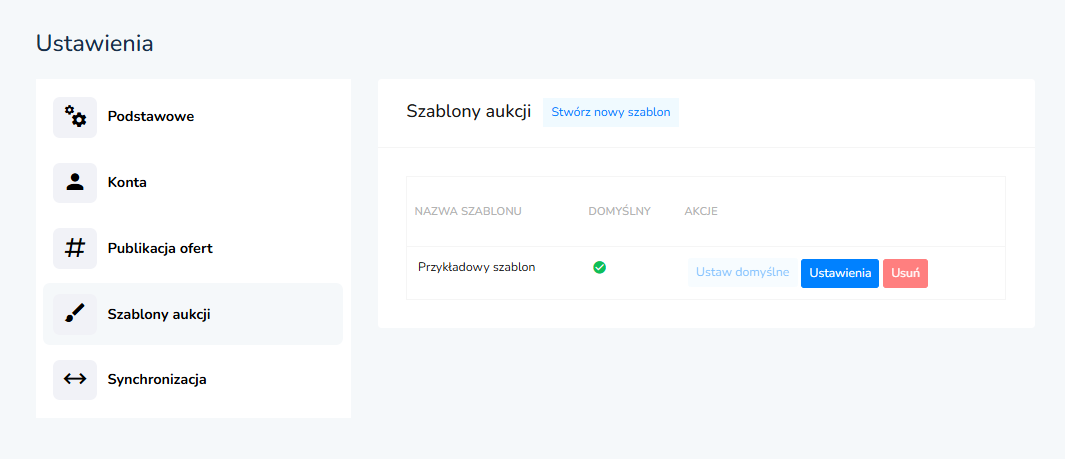
Here, you have the option to edit the current template for your offers on Allegro, or to add new ones.
If you want, you can also manually trigger synchronization of all your listings. The last tab allows you to enable synchronization of prices, stock levels, and product statuses.
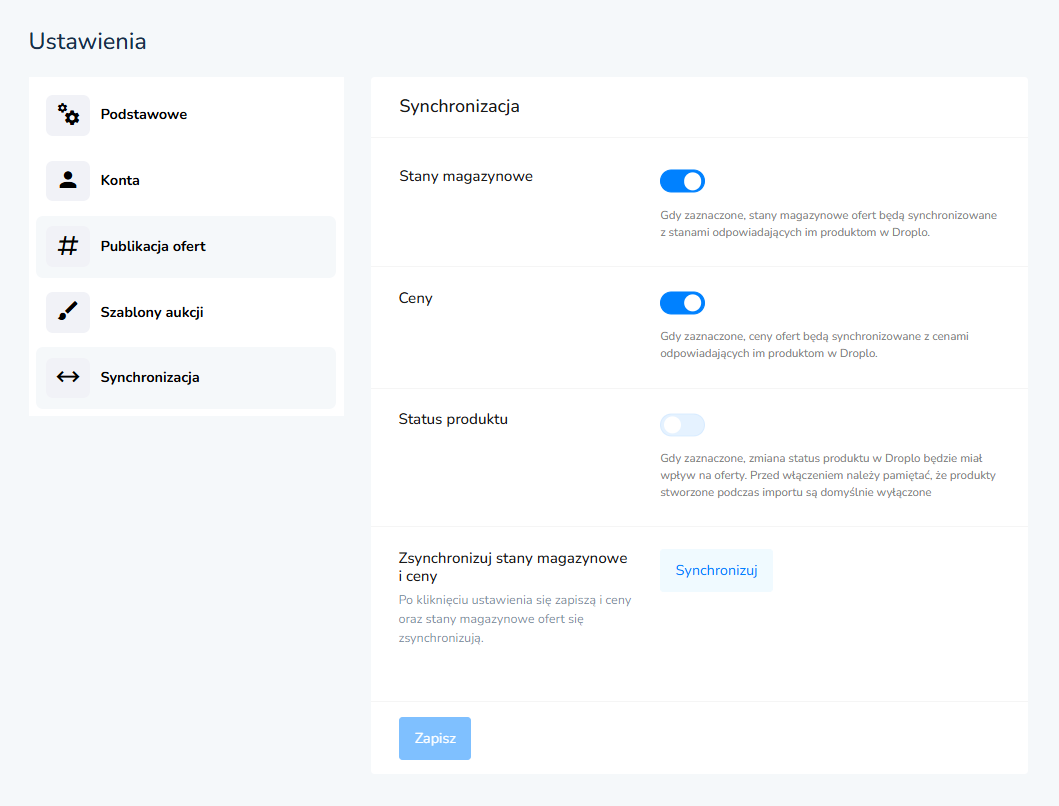
After making changes, click the Synchronize button to update your synchronization settings and refresh your products.
To meet GPSR requirements and list products via Droplo, you need to complete the relevant information in your Allegro account.
Detailed instructions on how to enter GPSR-related data can be found in Allegro's instructions.
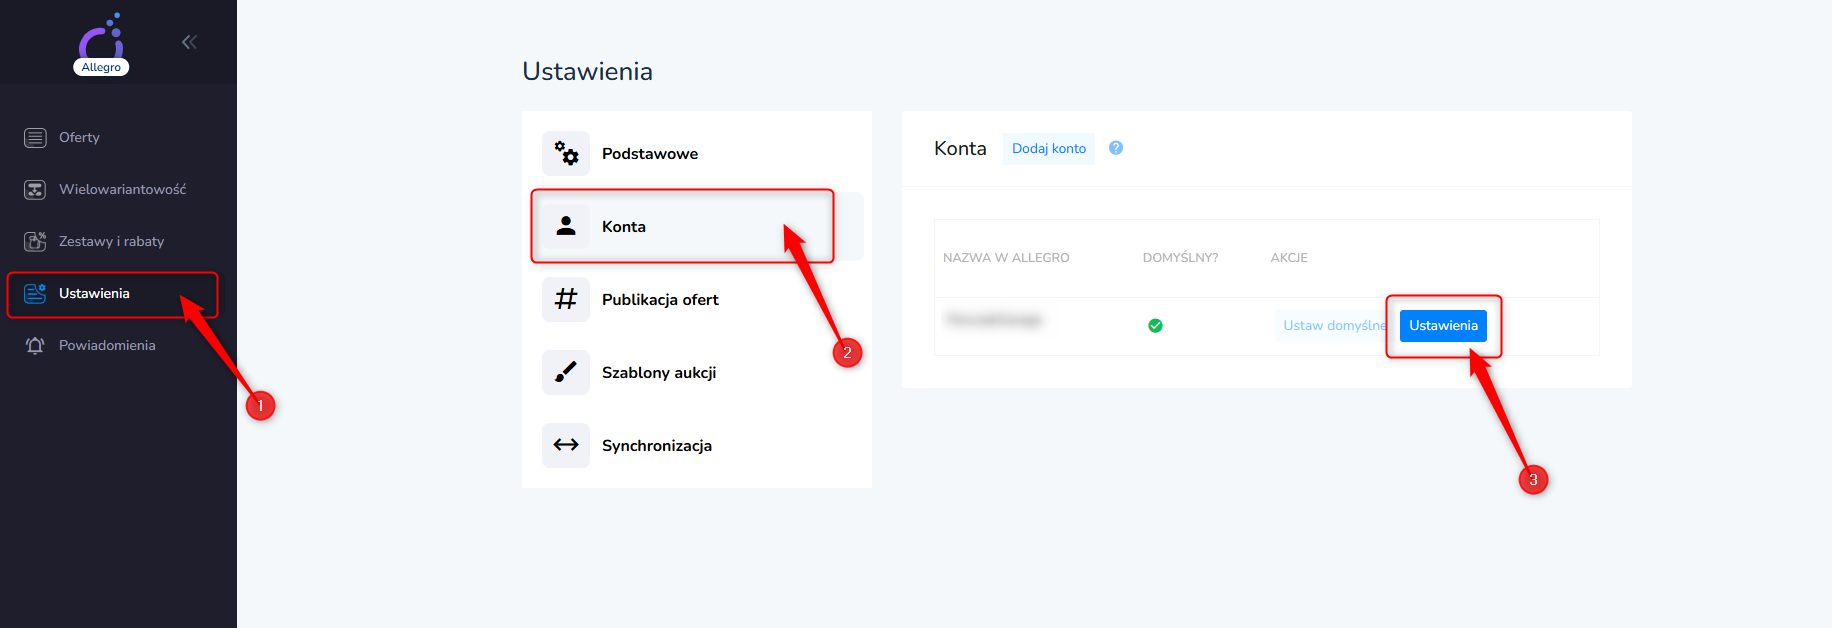
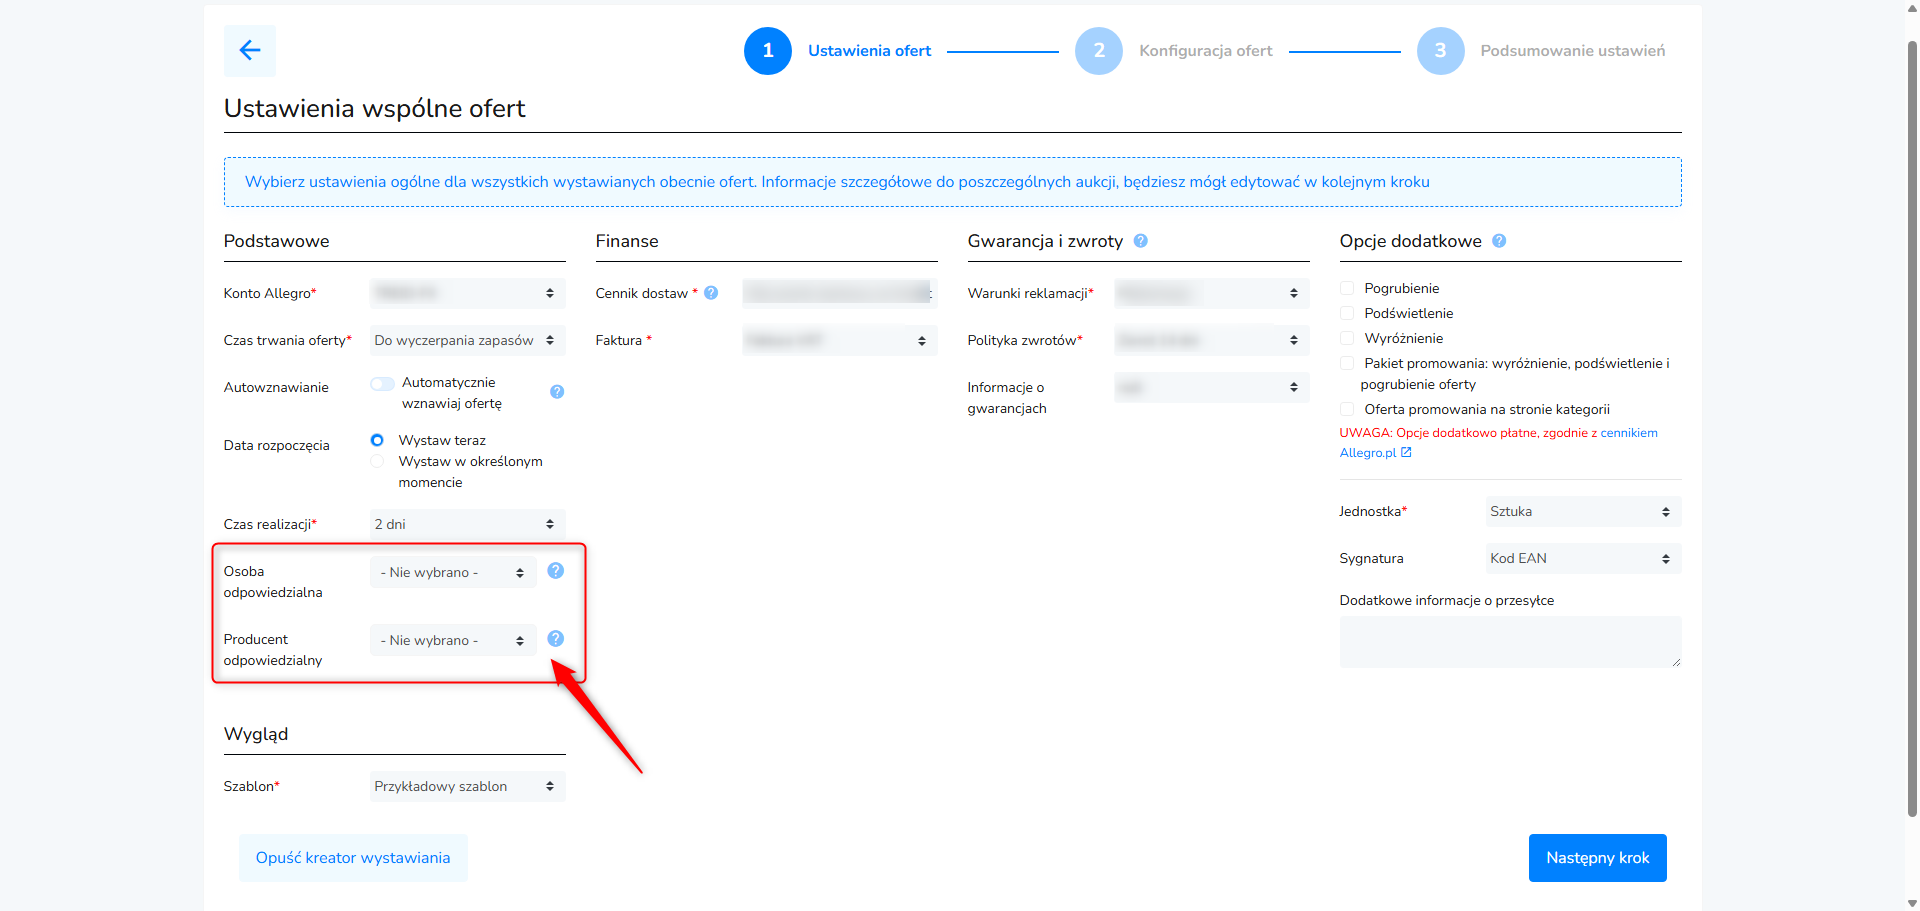
CONFIGURE GPSR IN ALLEGROIn Droplo, you can set a default value for the manufacturer and the responsible person. To do this, go to integration settings (1), then to the Account (Konto) tab (2). In your active account, click the Settings (Ustawienia) button (3).
Next, go to the GPSR Mapping (Mapowanie GPSR) tab. Here you can trigger instant synchronization of your Allegro settings to Droplo:
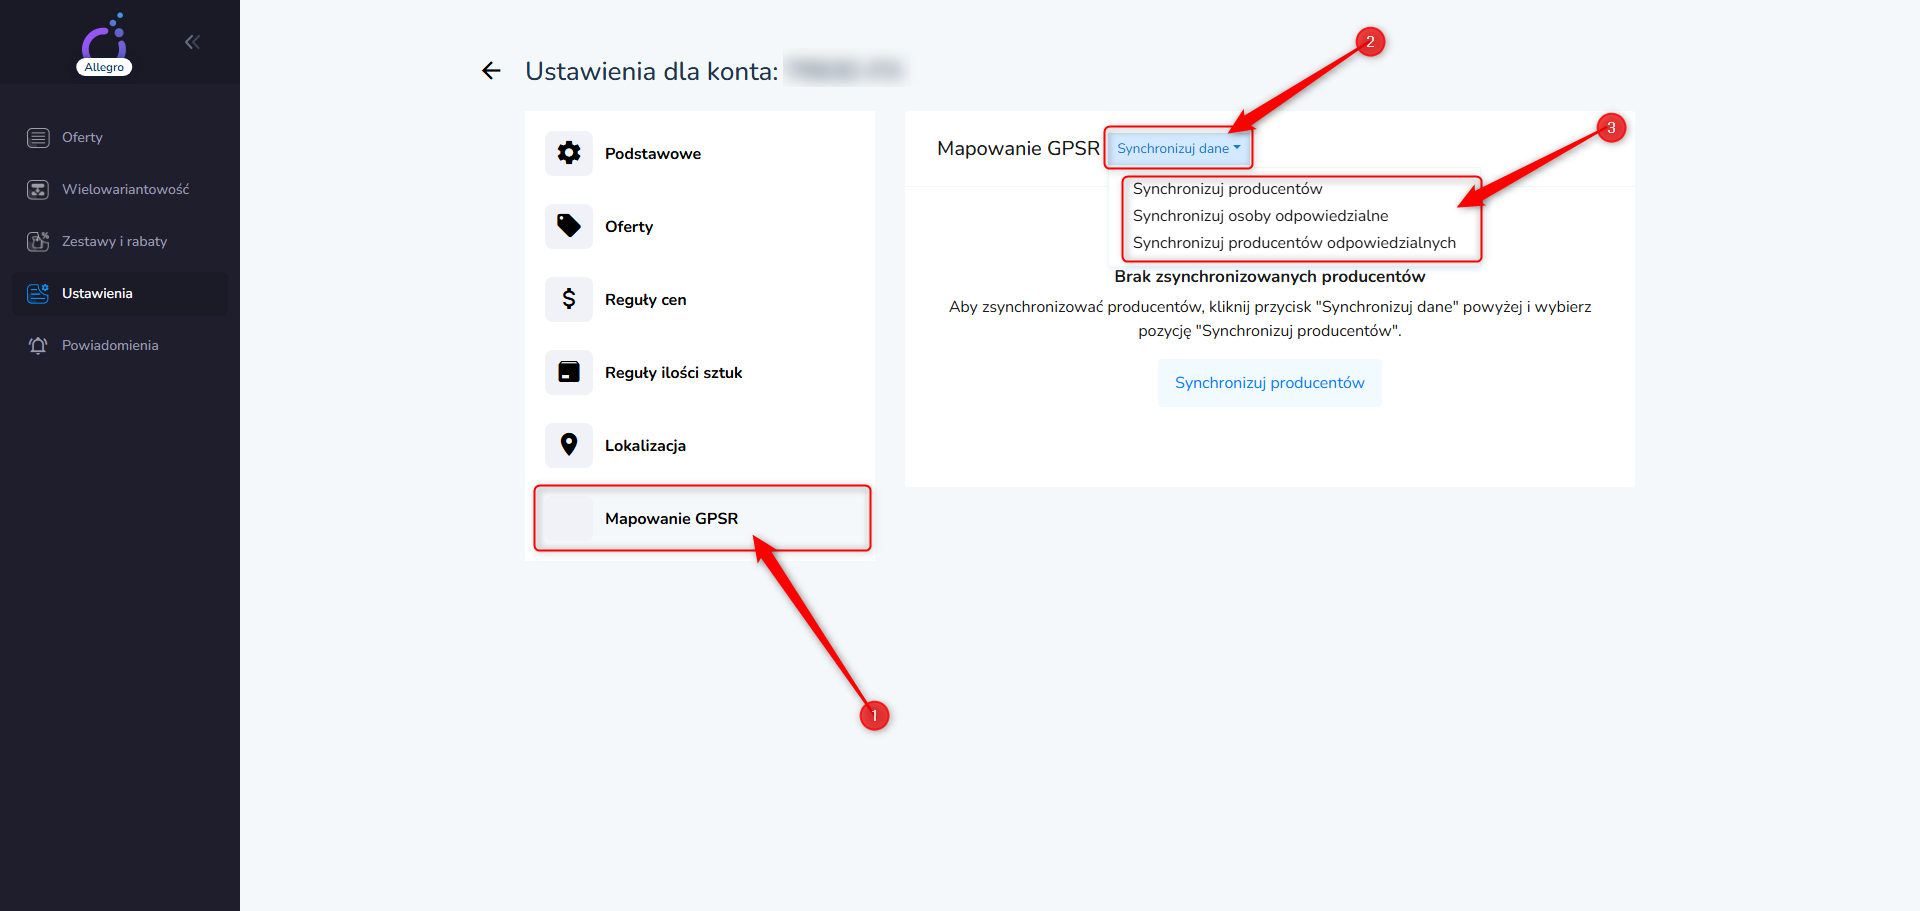
During the listing process, the fields for the manufacturer (producent) and the responsible person (osoba odpowiedzialna) will be filled in automatically. However, you can manually change their values before proceeding to the next step:
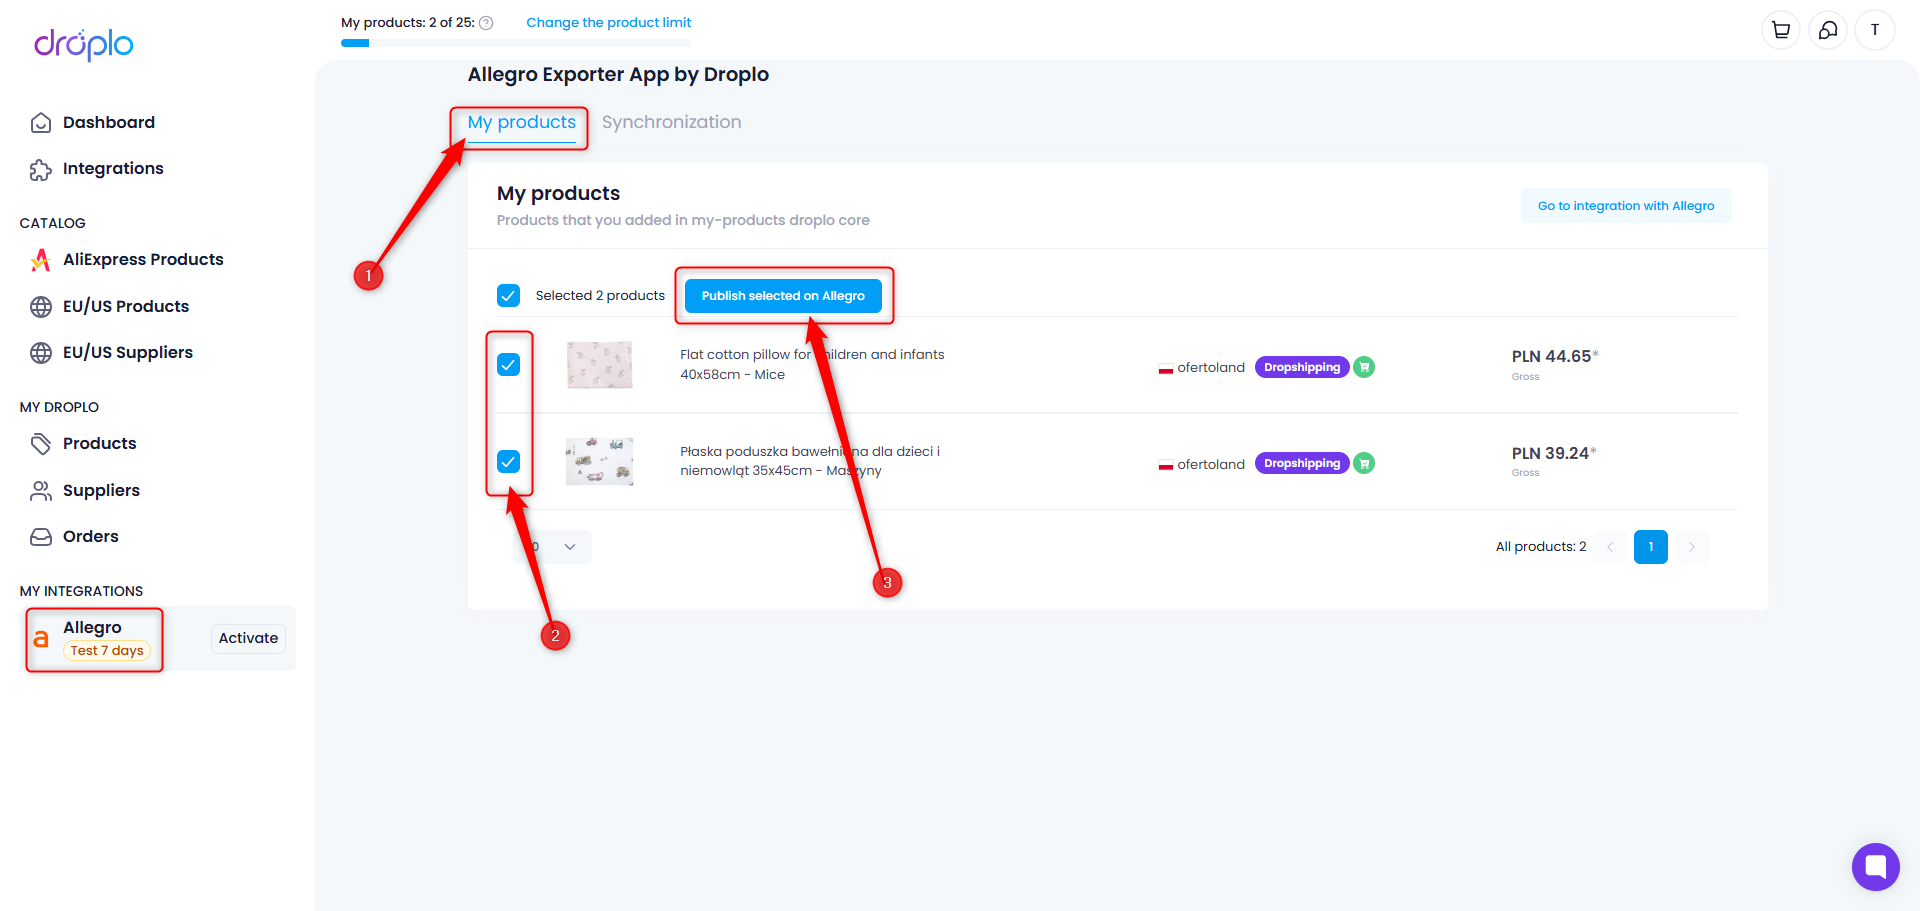
When you add a few products to your list, they will appear in the My Products tab under Allegro Exporter by Droplo.
Select products collectively (2) or individually, and then use the button List selected on Allegro (3).
A new window will open, where you need to complete the settings common to the previously selected offers.
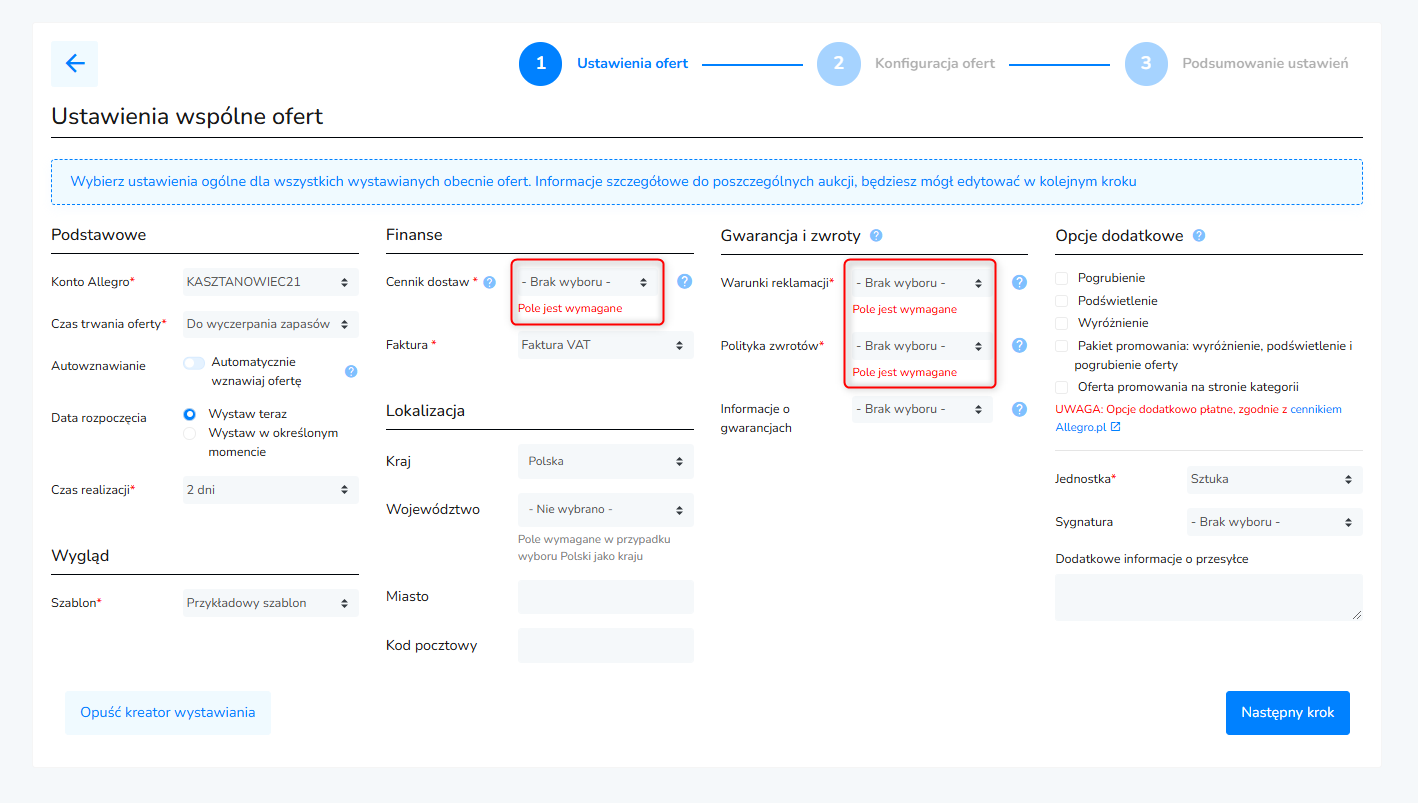
Returning to the offer creator itself, it is divided into several basic sections:
A. The first part of the settings concerns basic information:
Allegro Account – from which account products should be listed
Offer Duration – how long offers should remain active on Allegro
Automatic Offer Relisting – if this setting is enabled, the system will relist offers that expired on Allegro due to the auction duration ending or stock depletion.
Start Date – when the offer should be published on Allegro
Processing Time – the time required to process orders for a product or product group.

B. In the "Appearance" section, select the template you want to use for the listed products.

C. The next step involves financial details: the current delivery price list and options for issuing invoices for customers. You first need to enter the price list in your Allegro account.
Here is the detailed instruction: CLICK

D. The fourth section contains your company's location details. Fill in: country, province, city and postal code.

E. Next, in the “Warranty and Returns” section, select the warranty terms and return policy from the dropdown lists. Information about warranties is optional.
You should also fill this information out on your Allegro account:

F. Finally, in the last section, you can select additional options for listed auctions:
Bold
Highlight
Emphasis
Promotion package (bold, highlight, emphasis)
Promotion offer on the category page
However, these are paid options, and their prices are outlined in the Allegro service price list. (https://allegro.pl/regulamin/pl/zalacznik-4#czesc-iv-oplaty-za-opcje-dodatkowe)
You can also specify the unit of products (piece/set/pair) and their signature (e.g., EAN Code).

When all mandatory fields are filled, use the Next Step button in the bottom right corner of the page to proceed to the second stage.
At this point, a list of products previously selected in the Allegro Exporter product list will be displayed.

Each product should have a green field in the ‘Products’ column, to be correctly listed. A green status indicates that the product has already been preliminarily linked correctly with its counterpart in the Allegro catalog, based on product data in Droplo.
If this field is yellow or red, you can try using an assistant that will match suggestions for parameter values for offers based on the data contained in the related product. The assistant will work only in a portion of possible cases.
Ultimately, you can search for and select a product from the Allegro catalog based on:
GTIN/EAN/ISBN
Manufacturer code
Basic data (name, description)
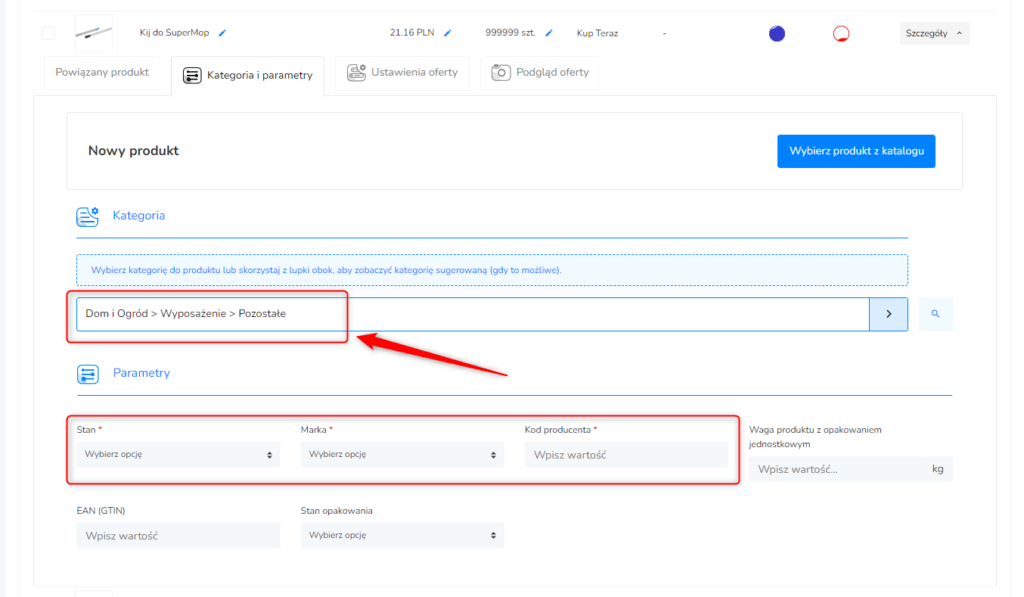
If you don’t find the desired product, you can use the function Continue without selecting a product. With this function, you will be able to manually select a category and parameters for the offer.
Based on this, a new product will be created, which will be automatically linked to your offer.
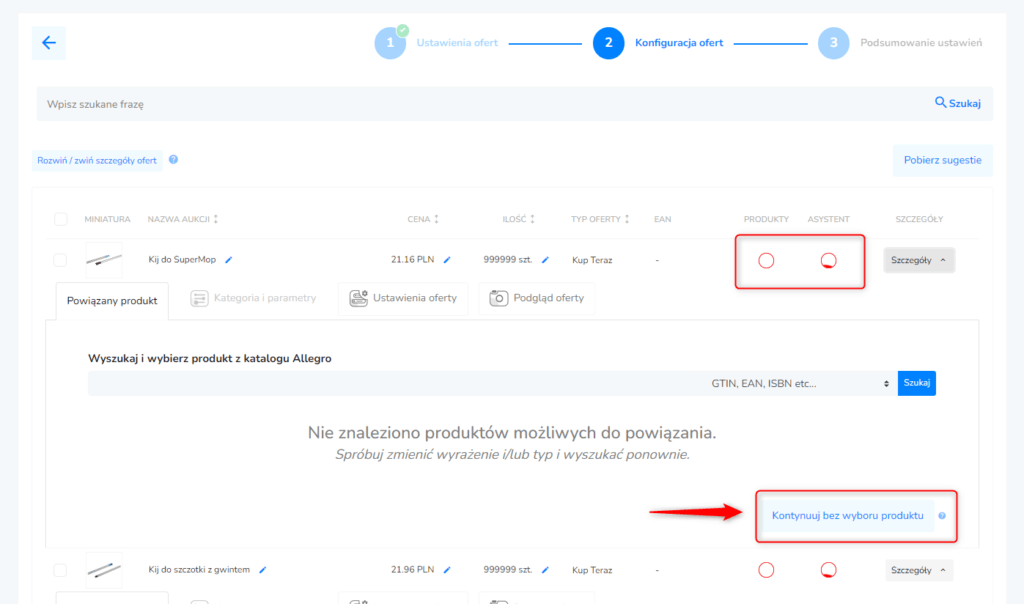
The product window will expand. In the Category section, select the exact category of the listed product. Also, specify other parameters.
You can easily remove products from the list of listed items. To do this, select at least one product. An extra offer management panel will appear. Available actions include:
Find and replace – allows you to locate an offer and change its name or description
Remove – deletes products from the list exported to Allegro

Once you have completed the product information and all products are correctly linked with the Allegro catalog, select all products and click Next Step in the bottom right corner of the screen.

The final stage of offer configuration will appear. Here, you can decide whether the linked products and settings should be saved as draft listings or whether they should immediately be listed on your Allegro store.

When you use the List auction now, a confirmation message will appear to indicate the action has been taken.

In both cases, you will then be redirected to the management panel for previously configured auctions/drafts. This section allows for multi-level filtering and managing the product list within the integration.
Select at least one product, and an additional module will appear with all available functionalities, including e.g., the ability to immediately resume/end auctions. You can also permanently remove a product from the list or edit draft configurations, subsequently listing them on Allegro.

The listed offer will change its status to Active. Closed to Completed.


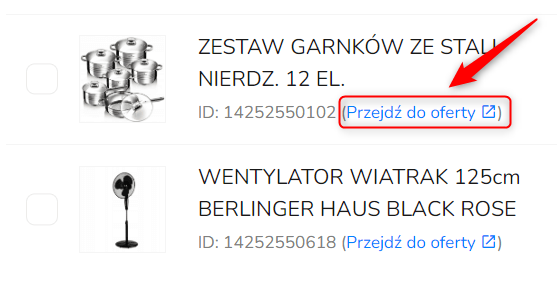
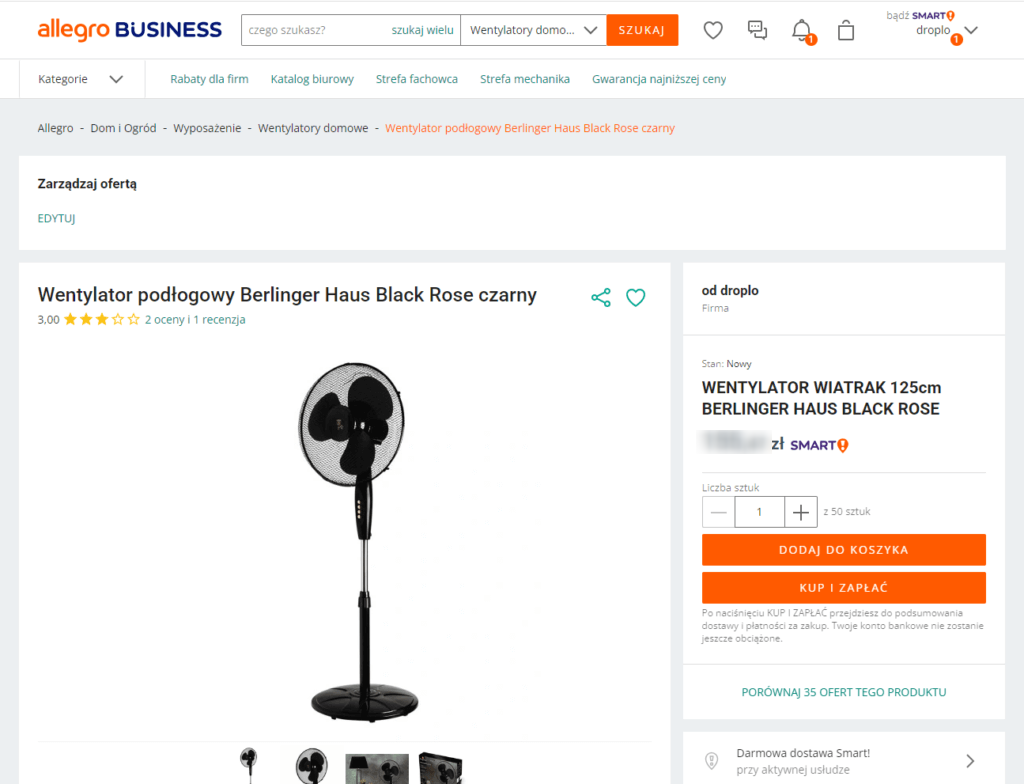
You can also open each auction on the Allegro platform by navigating to the link below the product name.
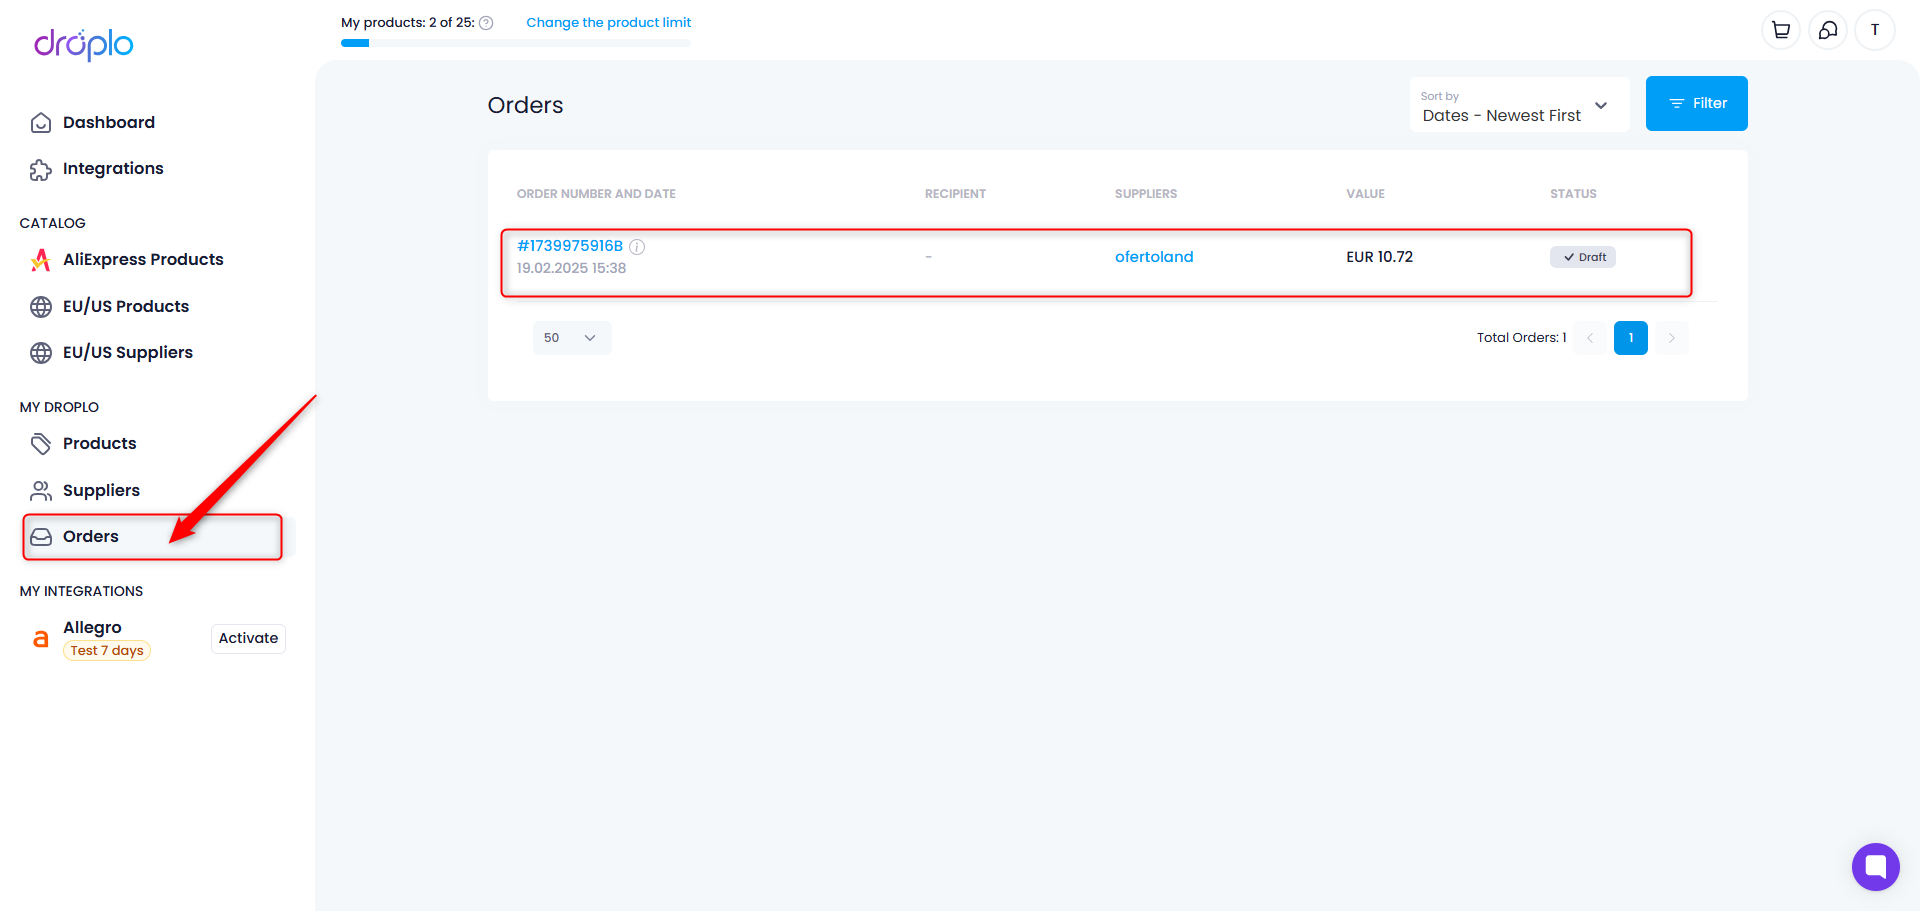
When you receive an order for a product listed on Allegro through Droplo, a draft of a new order will automatically be created in the Orders section of your account. You can fill it out and send it to the supplier.
You can find more information on this topic in a separate manual:
Creating and Sending Orders to Suppliers
In this guide, we will show you how to manually create a new order and send it to a Supplier without leaving Droplo.